Showing posts with label main dish. Show all posts

Friday, January 30, 2015

Homemade Chili

 We have battled the flu and computer problems for the past month and now it's already time for the Super Bowl. How time flies when life gets busy! But I thought I'd share my go to chili. I have to admit that I've never followed a recipe when I make chili, so for all the years of my life I have just winged it. Considering that I turned 62 in December, that's a lot of years. So the past few times I finally began writing it down.We like a thick, meaty chili with beans, that is fragrantly spicy, but not fiery. Some hot cayenne pepper can always be added for more heat, or Ro-tel tomatoes can be used instead of plain tomatoes. I made the last batch of chili this week after my husband finally kicked the flu. He said it really hit the spot! Chili is a perfect Super Bowl food around these parts and is perfect for this cold weather that much of the country is enduring. Here's my recipe.
My Homemade Chili
From Lynda's Recipe Box
I add a little brown sugar to the chili because I think it really compliments the spices nicely.

2 pounds ground beef chuck
1 large onion, diced
1/2 of a poblano pepper or bell pepper, diced
1-2 tablespoon oil
4 cloves of garlic, minced
2 tablespoons of chili powder
2 teaspoons ground cumin
1 - 15 ounce can crushed tomatoes
1 can black beans, drained and rinsed
1 can chili beans in sauce
1 tablespoon light brown sugar, packed
2/12 - 3 cups water
salt and pepper to taste

In a dutch oven over medium-high heat, brown the ground chuck in 1-2 tablespoons of oil. Before the meat is completely browned add the onion, pepper and garlic. When meat is browned and the onion is softened, remove excess grease from the pot if needed. Stir in the chili powder, cumin, about 1 teaspoon salt and pepper to taste. Stir the spices into the meat mixture and let cook just for a minute. Lower the temperature if needed so the spices don't burn.
Add the tomatoes, tomato sauce, brown sugar, drained black beans and chili beans with sauce. Add the water and stir, scraping up any brown bits on the bottom of the pan.
Place lid on the pot and simmer over low heat for about 45 minutes, stirring occasionally, and adding water if needed.
Remove lid. If chili is too thick add extra water to get the consistency that you want. If too runny, cook the chili uncovered, until it thickens to the desired constancy. Stir often to keep the chili from sticking or burning. Taste chili and adjust the seasonings. May need more salt and pepper, and if you want it hotter add 1/4-1/2 teaspoon cayenne pepper. Serve with several choices of toppings, such as onion, sour cream, shredded cheese, cilantro, chips, etc. Enjoy!
Click here for more Super Bowl food ideas.


Sunday, March 24, 2013

Skillet Chicken, Broccoli, and Penne

 I just love a good one pot meal. In this case it is a yummy skillet meal with thin slices of chicken, penne pasta, tender-crisp broccoli with an easy and delicious sauce. This meal is easy to put together and perfect for a weeknight dinner. The only problem with this recipe is that the broccoli tends to fall apart a little as you stir the Parmesan into the dish at the finish. So if that bothers you too, you can cook the broccoli separate from this dish. Either way, this is a real tasty meal that I've made several times. Hubby also gives a thumbs up! Here's the recipe.
Skillet Chicken, Broccoli, and Penne
Adapted from The Best chicken Recipes, by Cook's Illustrated
I replaced the wine in this recipe with more chicken broth, and used Penne instead of the Ziti that was called for.

Ingredients:
4 tablespoons olive oil
1 pound boneless, skinless chicken breasts, sliced thin
1 medium onion, minced
1/4 salt
6 garlic cloves, minced or pressed
pinch of red pepper flakes
2 1/2 cups low-sodium chicken broth
2 cups water
8 ounces penne pasta
8 ounces, about 3 cups, broccoli florets
1 cup freshly grated Parmesan cheese (2 ounces)

Directions:
1. Heat 1 tablespoon oil in a 12 inch skillet(non-stick, if you have one. Mine is stainless steel and it worked ok). Add the sliced chicken and break it up. Don't stir-let the chicken brown for about 1 minute, then stir and break it up. Cook and stir for another 2 minutes until chicken is done. Transfer chicken to a bowl; cover to keep warm.
2. Add 1 more tablespoon oil to the skillet and the onion and about 1/4 teaspoon salt. Cook over medium heat until onion is softened, about 5-7 minutes. Stir in the garlic and pepper flakes and cook about 30 seconds until fragrant. Stir in the broth, water and pasta. Increase the heat to high and cook, uncovered, for 12 minutes, stirring often so pasta doesn't stick to pan. Add the broccoli and simmer for 4-5 minutes, until tender crisp and the liquid has thickened some.
3. Return the chicken to the skillet and heat until it is warmed through. Off heat, stir in the remaining 2 tablespoons olive oil and the 1 cup of Parmesan. Season with salt and pepper to taste. Great with crusty bread and a salad. Enjoy!

Thursday, March 14, 2013

Italian Wedding Soup (from Ina Garten)

I love this soup! It's hearty with the zesty meatballs and all the healthy veggies, and it's so comforting on cool nights. We had another cold snap earlier this week, so I made this delicious soup. I've made it before, but just now have tweaked it to our liking.
The recipe calls for ground chicken for the meatballs, but our stores rarely have it, so I use ground turkey most of the time. Ground beef also makes some tasty meatballs. This recipe makes a bunch of soup, plenty for company. But if you are going to make it for just 2 or 3, I advise you to cook the pasta separately, and add it to the bowls individually when you are ready to serve the soup. The pasta really soaks up the broth if cooked in it and then not eaten right away. This soup is delicious on it's own, but also good with a salad and some crusty bread. The meatballs have tons of flavor and the veggie filled broth is super good. Hope you'll give it a try!
Italian Wedding Soup
Adapted from Ina Garten

Ingredients:
For meatballs:
3/4 pound ground turkey (or ground chicken or beef)
1/2 pound turkey sausage, casings removed ( or again, chicken, beef,)
2/3 cup fresh, white breadcrumbs
2 cloves fresh garlic, minced
3 tablespoons fresh parsley, chopped
1/2 cup freshly grated Parmesan cheese
3 tablespoons milk
1 large egg, beaten
salt and pepper- I only use about 1/8 teaspoon salt because the cheese is salty. But I'm also a low salt cook, so use your judgement.

For the Soup:
2 tablespoons olive oil
1 cup minced yellow onion
1 clove garlic, minced
1 cup diced carrots
3/4 cup diced celery
10 cups homemade chicken stock, (or use canned, low sodium chicken broth or stock)
1 cup small pasta-I used Ditalini
2 teaspoons dried oregano
about 6-8 ounces kale, washed and chopped-about 4 cups or more (may sub spinach if preferred)

Directions:
Preheat oven to 350 degrees F. In a bowl combine the ground turkey, sausage, bread crumbs, garlic, parsley, cheese, milk egg, salt and pepper and mix with a fork. With a spoon drop about 1 inch meatballs onto a parchment or foil lined baking sheet. You'll have around 40 meatballs. Bake for about 30 minutes.

While meatballs are cooking, heat olive oil over medium-low heat in a heavy soup pot. Add the chopped onions, garlic, carrots and celery. Saute until softened, about 5-6 minutes, stirring occasionally. Add the chicken stock or broth and bring to a boil. Add the pasta and cook about 5 to 6 minutes. Stir in the kale, meatballs and the oregano or other herbs of choice, and simmer about 2 minutes. Season with salt and pepper to taste. Ladle into soup bowls and top with Parmesan cheese. Yum! Enjoy with bread and/or salad!

Tuesday, November 13, 2012

Chicken Pot Pie Soup

 It's hard to beat Chicken Pot Pie, but it can be rather time consuming to make depending on your method. My son told me about this Chicken Pot Pie Soup last year, and at first I thought it sounded rather pointless. After all you may just as well make pot pie I reasoned. But I gave the soup a try and it is delicious and rather fun to serve with broken pieces of pie crust tucked into the bowls of soup. Yes, it tastes just like Chicken Pot Pie, but just in a different form. The thick, flavorful broth is full of vegetables, tender chicken and is real old fashioned comfort food. Give it a try this winter; it's a great soup to make during the holidays too. In fact, this soup will taste wonderful using some of your left-over Turkey from thanksgiving dinner.
Chicken Pot Pie Soup
Adapted from Aaron McCargo, Food Network - 6-8 servings approximately
I cut out some of the fat from the original recipe, used cornstarch instead of flour, half and half instead of cream and changed spices.

Ingredients:
4 medium potatoes, peeled and diced
1 1/2 quarts (6 cups), chicken stock or broth
1 1/2 pounds cooked chicken- I use chicken breasts that have been baked, or simmered in water until tender
2 tablespoons oil or butter
1/2 medium yellow onion, diced-about 1 cup
2 stalks celery, diced
4 tablespoons cornstarch, dissolved in a little water to make a slurry
1 1/2 pounds frozen vegetables- I used fresh vegetables this time
3/4 cup half and half
salt and pepper to taste
1/2 teaspoon dried tarragon, or sage, or herb of your choice- thyme is also good
1 store-bought pie crust, baked

Directions:
1. Cook the chicken, or use a rotisserie chicken, or left over baked chicken. Bake 1 pie crust, according to package directions.
2. In a dutch oven, cook the onion and celery in the oil until just softened. Pour in the chicken broth or stock and bring to a simmer.
3. Add the frozen vegetables, and the diced potatoes. Cook until the potatoes are tender, 15-20 minutes.
4. Mix the cornstarch with a little water to make a slurry. Pour half into the soup, stirring constantly. Add the rest if desired, to get the thickeness you want.
5. Stir in the half and half and the chicken. Remove from heat. Season with salt and pepper. Add herbs to taste.
6. Serve in bowls garnished with pieces of pie crust. Enjoy!

Monday, August 13, 2012

Chicken Cacciatore

 This dish is delicious with tender chicken thighs in a healthy marinara style sauce full of sweet peppers and mushrooms. Yumminess on a plate! I've been wanting to make this dish since I first saw it on Pam's blog, but had kept putting it off with our extremely hot weather. But we've been blessed with much cooler weather this past week. Today it was only about 82 degrees, so I was craving some comfort food. After a long hot summer, I'm finding myself getting anxious for cool weather and the foods that go with it. Pam's Chicken Cacciatore is a fantastic dish and really hit the spot. She found this winning recipe at Cooking Light.
 Chicken thighs are browned in oil in an oven-proof skillet or dutch oven. Then onions, peppers and garlic are cooked and the sauce added. Pam's recipe calls for jarred marinara sauce, but I didn't have any, but I so wanted to make this, so I subbed a large can of crushed tomatoes. It worked very well. I added the tomatoes and herbs and popped it in the oven to cook. After it came out, I topped it with basil and some grated cheese. Outstanding meal! This be going on my rotation as it not only tastes delicious, but it is easy to put together, even for a week-night meal. Hope you give it a try!
Chicken Cacciatore
Adapted from Pam at For the Love of Cooking

Ingredients:
about 1 1/2 tablespoons olive oil- I may have used little more
6 boneless skinless chicken thighs, any fat trimmed off (Pam's recipe uses 4 thighs)
salt and pepper
1 1/2 cups of baby bell peppers, sliced - I used red, orange and yellow peppers
1 small sweet yellow onion, diced
1 1/2 teaspoons dried basil, or 1 1/2 tablespoons fresh basil
1/2 teaspoon dried oregano
8 ounces mushrooms, quartered or sliced-I used Baby Bellas
4 cloves of garlic, minced
1 can (28 ounces) of good quality crushed tomatoes
salt and pepper to taste
freshly grated Parmesan cheese

Directions:
1. Preheat oven to 350 degrees F.
2. Heat about 1/2 tablespoon of olive oil in a large oven-proof skillet or dutch oven over medium high heat. Season each side of chicken with salt and pepper and add to the skillet. Brown for about 4 minutes and turn over; brown for another 2-3 minutes. Remove the chicken to a plate.
3. Add more oil to the skillet; add the onions and mushrooms. Cook for a couple of minutes until mushrooms give off most of liquid. Add the peppers to the skillet; cook 1 minute, then add the garlic. Cook until garlic is fragrant, about 1 minute. Add the canned, crushed tomatoes to the skillet. Stir in the dried oregano and basil. Season with salt and pepper. Add the chicken back to the skillet. Bring to a simmer and then place pan into the oven. Bake for 30-35minutes until chicken is done. Larger thighs could take a few minutes more.
4. Remove skillet from oven; top with fresh basil and grated Parmesan cheese. Serve with pasta if desired. Or just sop up the sauces with crusty bread. Thanks Pam for a delicious dinner-Enjoy!


Thursday, August 9, 2012

Slow Cooker Chicken Taco Meat


We've been craving Mexican style food lately, but I wanted to get away from the beef taco meat I use so much and try shredded chicken. Since the weather is still so hot, I decided to cook this Chicken Taco Meat in the slow-cooker, and it turned out really good with just the right amount of spice and heat. This meat can be used in tacos, either soft or hard shell, burritos and was even good in some chicken nachos that I put together quickly.
My crock-pot is large, probably too large for this recipe, but that's what I used. The meat was done in 3 1/2 hours on low, but it will depend on your crock pot as to how quickly the meat cooks. I would definitely try this the first time while you were home for the day, so you'll have an exact idea of how long the chicken needs to cook in your cooker.

I was very happy with the flavor of this meat and will do it the same next time. In fact I thought the meat turned out very well as I don't always like chicken done in a slow cooker. But this was really tasty and easy too. Only thing I didn't have was some avocado as the store was out, except for a couple of very soft ones.
Hope everyone is having a great week. We have finally had some rain and the temps tomorrow may stay around 89 degrees! We are ecstatic to say the least after weeks of drought and triple digit heat. The weeds in our yard are growing again, but I think most of the grass is dead. Sigh........Well, make some tacos, or use this meat in other favorite Mexican style dishes. Here's my recipe.
Slow Cooker Chicken Taco Meat
From Lynda's Recipe Box
Rotel Tomatoes are 10 ounce cans of diced tomatoes and chili peppers that come in several levels of heat. I use Rotel Original, which is spicy but not super hot.

2 pounds boneless, skinless chicken breasts or boneless chicken thighs (I used breasts this time)
1 can Rotel tomatoes
2 1/2 teaspoons chili powder
1 teaspoon ground cumin
1 teaspoon salt
1/2 teaspoon black pepper
2 large cloves garlic, sliced or minced
juice of 1 lime, optional

Lay thawed chicken in the slow cooker. Mix together the Rotel tomatoes with all the spices and the garlic. Pour over the chicken. Cover crock pot and cook on low for 3 1/2 hours, or more until the chicken can easily be shredded. Chicken thighs may take a bit longer to cook. When done, remove chicken to a platter and shred the meat using 2 forks. Squeeze the lime juice over the meat if desired, or just pass lime wedges along with the other garnishes. You may want to use some of the juices in the pot with the chicken to keep it moist. I always strain the juice and add the remaining tomato mixture back in with the chicken. Enjoy!  If making tacos, garnish with your favorite toppings. I love to use Cilantro, shredded cheese, lettuce, green onions, sour cream and avocado. What is your favorite way to garnish a taco?

Tuesday, July 31, 2012

Asian Barbecued Chicken

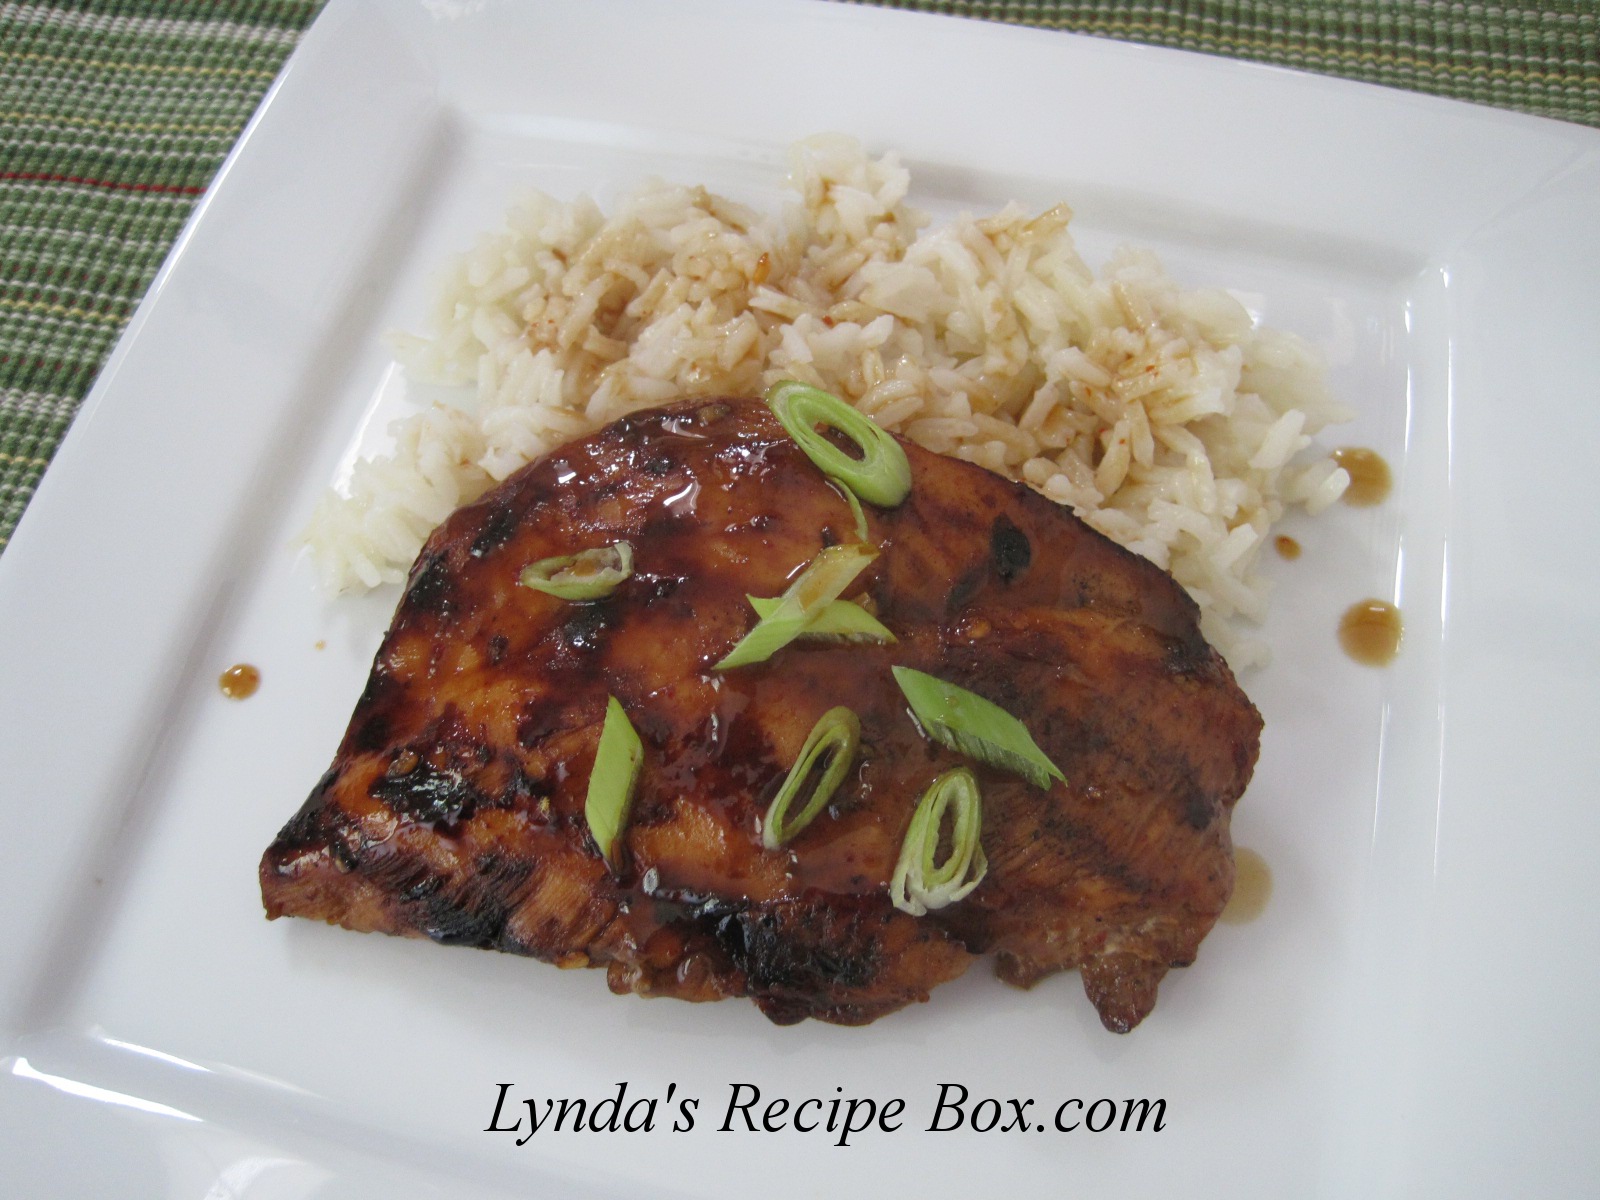
I love Asian flavors but I don't venture into that realm often. This recipe for Asian Barbecue Chicken is wonderful as the ingredients are probably in every ones pantry and there's nothing fancy or hard to find. All you need are some basic ingredients and a grill and you can have some really delicious chicken. I used a charcoal grill for cooking, but an indoor grill would work too. I used boneless chicken breasts, which I pounded slightly to make them an even thickness so they would cook more evenly. And they cooked faster which was nice since it was still 107 degrees outside! I haven't grilled much this summer with the intense heat, and some towns in our area are banning the use of outdoor grills since it is so dry here. So I may have to wait for rain before I grill again. We'll see. But this chicken was so full of flavor and I will make it often. Leftovers were fantastic in salad. There is a little bite from the red pepper, but not drastic. I served it with simple rice with some of the remaining  marinade spooned on. So delicious so I hope you'll give this a try.
Asian Barbecued Chicken
Adapted from Cooking Light
Skinless chicken thighs were used in the original recipe. I subbed boneless breasts, that I pounded slightly to make them a more uniform thickness.

1/4 cup packed brown sugar
1/4 cup low-sodium soy sauce
3 tablespoons fresh lime juice
1/2 teaspoon crushed red pepper flakes
3 cloves minced garlic cloves
4-6 boneless, skinless chicken breasts. The original recipe uses 8 skinless thighs.
Mix together all ingredients, except chicken, in a bowl. Place chicken in a large resealable baggie and pour the marinade in with the chicken. Seal and place in refrigerator to marinate about 1-2 hours for the breasts. Bone-in chicken thighs should marinate longer, (4 hours in the recipe).
Prepare your grill, leaving a cool area to use in case you need to move the chicken to it. My grill had a temp of 350 degrees.
When fire is ready, remove the chicken from the marinade, shaking it off well before placing on the grill. Boil the remaining marinade for about 2 minutes to baste the chicken as it cooks. (The marinade is safe to use as long as it is boiled.) Grill chicken until it turns white around the edges, and then turn over to finish. Chicken is done when the juices run clear. Mine was done in 8-10 minutes, but cooking time will depend on the temp of your grill and the size of the chicken parts. Enjoy!

NOTE: I marinated the chicken breasts for about 1 1/2 hours, but my husband thought the flavors too strong, so next time I'll do an hour or so. But I loved the flavors, so I chalk it up to different palates. If you try this, let me know your thoughts on the flavors.


Friday, June 1, 2012

Quick Chicken Stew (A Pantry Stew)

Some days I just have to have soup. Like yesterday, when a cold front came through with winds and rain and the temperature was about 55 degrees. It was cold compared to the low 90's that had been earlier this week. So I decided to whip up a quick stew, or soup, with just ingredients I had on hand. I found 3 chicken thighs in the freezer, and added some vegetables. I would have liked some mushrooms and celery for this, but didn't want to go to the store. So this was our lunch yesterday, with a little left over for today. Tomorrow the temperature will start climbing back up, and stew won't sound good to us then. This Quick Chicken Stew was delicious and hit the spot. And it is satisfying to make something so tasty with just the ingredients you have on hand.
I didn't measure anything, but here's what I did.

Quick Chicken Stew
From Lynda's recipe Box

3 boneless, skinless chicken thighs, trimmed of any visible fat
1/2 of an onion, diced
1 large clove garlic, minced
1 can low-sodium chicken broth, or equivalent amount of water
2 medium potatoes, peeled and diced
some baby carrots, cut in half
about 3/4 cup of frozen peas
about 1/4 teaspoon dried Tarragon leaves, or dried Thyme
salt and pepper to taste
Sliced mushrooms and celery are good in this also.
Heat a 3 or 4 quart saucepan over medium heat with about 1 tablespoon oil. Season both sides of the chicken with salt and pepper. Brown the chicken in the oil, about 2 minutes per side just until browned. Remove chicken to a plate. Add the onion to pan and cook for about 1 minute, adding oil if needed. Then add the minced garlic. Stir in the chicken broth or water, and add the cooked chicken thighs with any accumulated juices from the plate. Stir in the carrots and potatoes. Add water to the pan to completely cover the stew. Bring to a boil, cover pan and reduce heat. Simmer until the vegetables are tender, about 20-30 minutes. Remove the chicken to a plate. Add the peas and Tarragon (or Thyme), to the stew and cook about 5 minutes more. Cut the thighs into bite size pieces and add back to the saucepan. Add more salt and pepper if needed. Serve and enjoy!

NOTE: Sometimes I thicken the broth when I make stews like this, by making a slurry with cornstarch and water. Then just add a little at a time to the stew, stirring. Just add enough to give the broth a slight thickness.

Friday, May 4, 2012

Chicken Fajita Nachos with Easy White Cheese Dip

 I love the Fajitas at our local Mexican restaurant, and the Nachos too. Our favorite restaurant makes what they call "Fajita Nachos" with your choice of steak or chicken, and instead of using shredded cheese, they smother the nachos in their Queso Blanco Dip. My goodness, talk about deliciousness on a plate! So, I've tried to recreate this fantastic dish at home the last couple of weeks for my husband and I, just in time to celebrate Cinco de Mayo too!
 I took pictures both times trying to get a good one. Seems that the cheese looked better in my first photos, so that is why you'll see two different shaped plates.
 I don't normally order the white cheese dip at the restaurant, because I really prefer their salsa with the chips, but, when that Queso Blanco is covering nachos, I say yes please. Their simple white cheese dip really adds to these nachos and some of the other dishes on their menu. I haven't perfected the Queso Blanco yet, but it turned out pretty good this time. I kept it very simple. Make the cheese dip first, before you start the nachos, so the flavors have time to come together. It is quick to make since it is done in the microwave.
 I have to admit that I wasn't good at measuring; I tend to cook by looks and taste, so hope this doesn't keep you from trying this dish. We definitely enjoyed these nachos, twice so far, and I'll make them again. We tend to crave this type of food quite often.

Chicken Fajita Nachos with Easy White Cheese Dip
From Lynda's Recipe Box- made for 2

Nachos ingredients:
2 boneless, skinless chicken breasts
2 cloves garlic, minced
about 1 tablespoon fresh lime juice
salt and pepper
about 1/4 teaspoon cumin
about 1/2 teaspoon chili powder
1/2 half of a large yellow onion, sliced thin
1 green bell pepper, sliced thin -or a mix of colored peppers- I used red and green this time
white cheese dip
diced tomato for topping
diced avocado for topping, or any other topping you desire
good quality tortilla chips

Directions:
1. Make the cheese dip first; set aside.
2. Cut each chicken breast in half lenght-wise, and then slice each piece into thin slices against the grain. Place chicken in a bowl with the lime juice, salt and pepper, cumin, chili powder and the minced garlic and toss to coat evenly.
3. Heat a skillet over medium high heat. (I used my cast iron skillet.) Add 2 tablespoons of oil and add the sliced chicken to the pan. Let cook for about a minute then begin to stir and turn the chicken pieces as they brown, breaking them apart. When no pink remains and chicken is done, remove the meat to a bowl or plate. You may have to do this in 2 batches, if using more than 2 chicken breasts.
4. Add more oil to the skillet and add the onion and pepper. Stir it around as it cooks for 2-4 minutes, just until it begins to slightly soften. Remove veggies from pan.
5. Plate the nachos. Lay the tortilla chips on a plate, then add the onions and peppers, then the chicken. Smother the nachos with cheese dip, then add the diced tomatoes and avocado and other toppings that you desire. Enjoy!

Easy White Cheese Dip -Queso Blanco

1/2 pound white American cheese*, shredded, or diced small
3 small, yellow pickled chili peppers*, or 1 small pickled jalapeno pepper, minced
1/2 cup milk, more or less, depending on how well the cheese melts

Place cheese and milk in a microwave-safe bowl and microwave on high for 1 minute. Remoe bowl and stir well with a fork, or if it is really soupy a whisk. Stir until the cheese and milk is very well incorporated. It will depend on the cheese brand as to how well it melts and whether you will need more milk. If the dip isn't melted enough, microwave another 30 seconds and continue this until the cheese is melted. Add more milk as needed to get the consistency you want. Stir in the minced pickled peppers.
*Notes: White American Cheese is found at your local deli. I bought the Prima Della brand from Walmart and it melted well with less milk than another brand I bought earlier. Land of Lakes is supposed to be a good brand of cheese for dip making.
* Pickled yellow chili peppers, or pickled jalapenos are found on the pickle isle at your grocers. Trappy's  or Mezzetta are 2 brands I can buy here. They work really well in this dip.
NOTE: I found that many Mexican restaurants use white American cheese for the Queso Blanco that they serve.


Monday, April 30, 2012

Chicken Pasta Salad with Green Beans

This salad is so easy to make I almost didn't post it, but decided somebody reading this post might need a really tasty, easy idea for dinner tonight. This salad comes together quickly if you have some leftover chicken to use up, or if you purchase a rotisserie chicken from the deli. I baked a couple of chicken breasts that I had in the fridge. I just salted and peppered them and baked them at 425 degrees for 20 minutes. After they cooled I added them to the salad that I found at Cooking Light. My only changes were to use Farfalle, instead of Penne, tomatoes instead of jarred roasted peppers, and a bit more dressing. This was a great salad on a warm spring evening and I thought it tasted better after it had chilled for an hour. Give it a try if you need a quick meal idea. Enjoy!

Chicken Pasta Salad with Green Beans
Adapted from Cooking Light   (3-4 Servings)

2 cups uncooked pasta-recipe calls for penne, but I used farfalle
2 cups, inch cut fresh green beans-about 1/2 pound
2 cups shredded or cubed cooked chicken
1/4 cup fresh basil, cut in strips-don't leave this out
2 teaspoons chopped, fresh parsley
1 cup grape tomatoes, cut in half
3 tablespoons olive oil
3 tablespoons red wine vinegar
1 1/2 tablespoon cold water
1/2 teaspoon salt-I used less, about 1/4 teas.
1/4 teaspoon black pepper
1 small garlic clove, minced

Cook past according to package directions. The last 4 minutes of cooking, add the sliced green beans, so they will cook with the pasta. After 4 minutes, drain the pasta and beans in a colander.Rinse with cold water to make the beans quit cooking and drain well.  combine the olive oil, vinegar, salt, pepper and garlic in a small bowl. In a large bowl, add the rest of the salad ingredients along with the chicken and the pasta and beans. Pour the dressing over the salad and mix. Can be served immediately, or later after it has chilled. We really enjoyed it cold after a hot day of working outdoors.

Tuesday, April 24, 2012

Oven-Baked Barbecued Baby Back Ribs

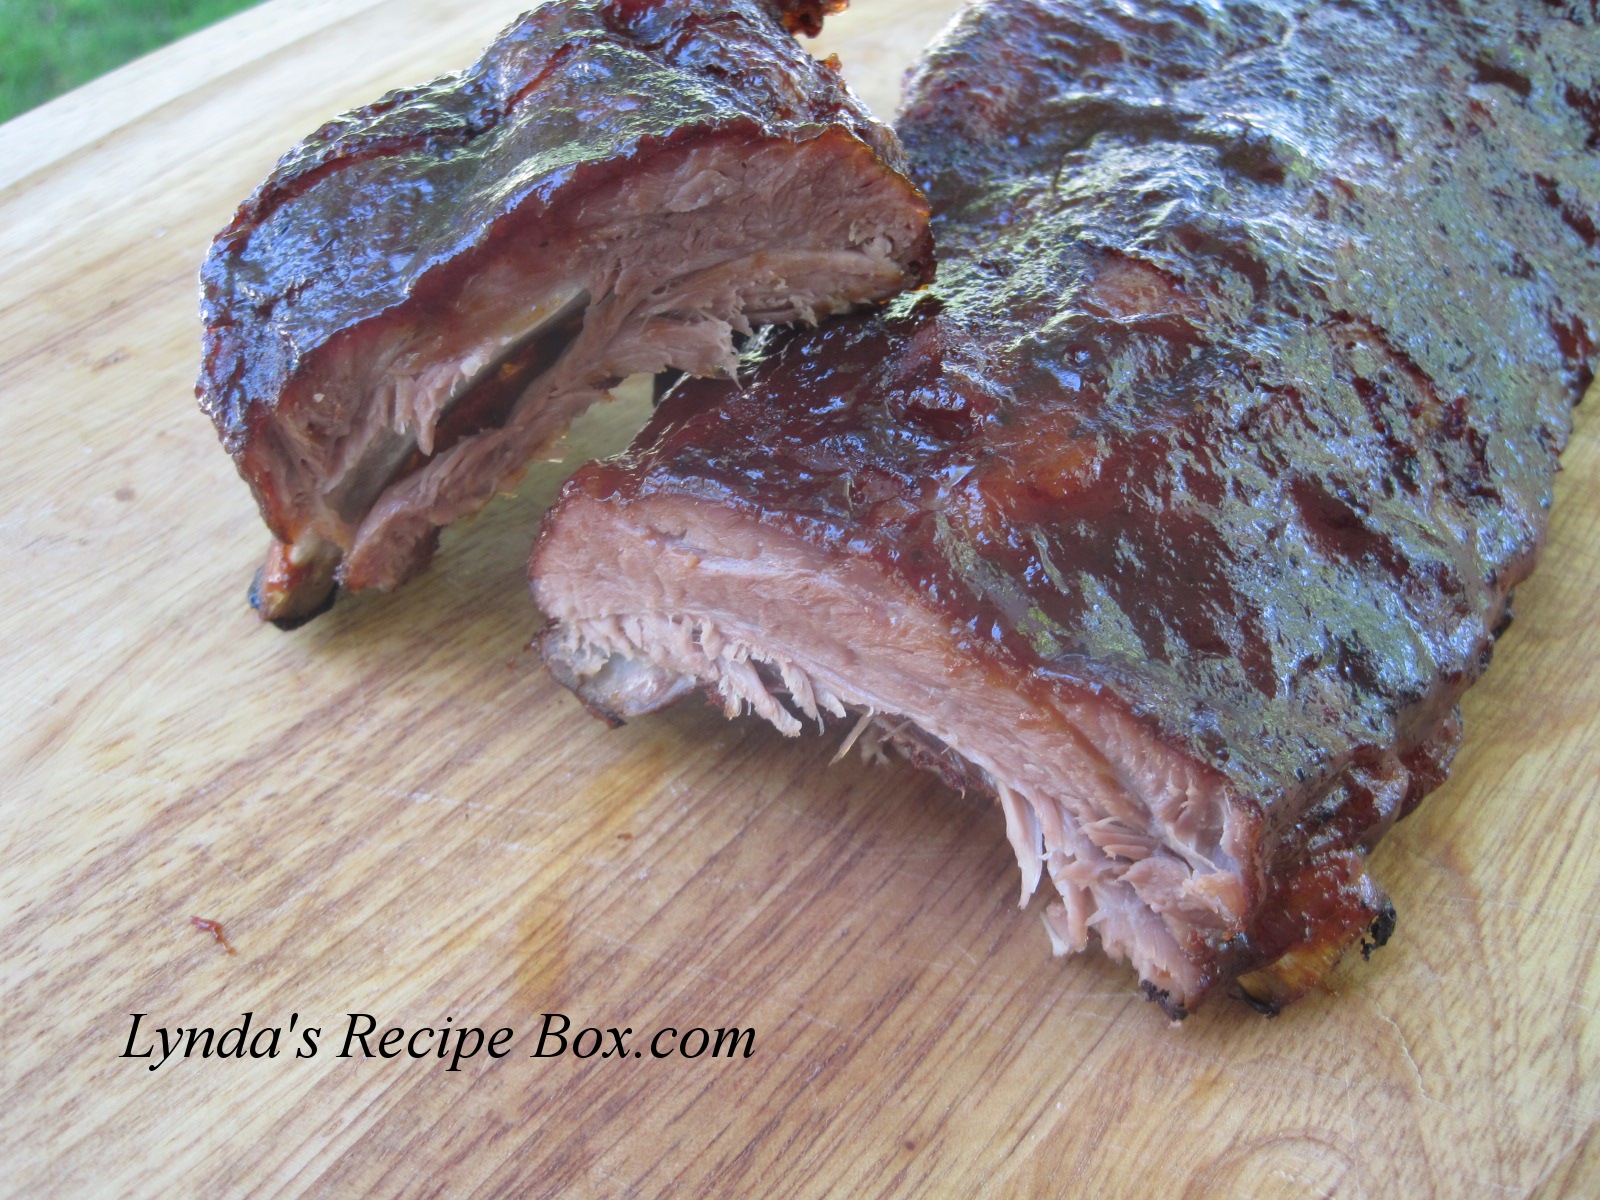
 Fall-off-the-bone tender ribs, slathered with a spicy homemade barbecue sauce, are irresistible. I wanted to cook these babies on the grill last week, but a thunderstorm forced me to cook them indoors in my oven. Sigh~
I had 2 racks of ribs I wanted to cook, but when it started raining, I put 1 rack in the freezer to save for another time. I don't have a dry place to grill when it is stormy. But ribs cooked in the oven are certainly very tasty too. The color is off in my photos, as the sun came out again when it was time to take pictures, so I took them out on my front porch. For some reason, the ribs look almost black, but they were not.
 I use a rub and sprinkle it all over the ribs, cover with plastic wrap, and keep in the refrigerator for a few hours. This time I prepared them in the morning, and cooked them later in the afternoon, for about 3 hours total. Barbecue sauce is applied the last 30-45 minutes of cooking to ensure a spicy, sticky glaze. Baby back ribs are delicious prepared this way, they just won't have the fresh smoked flavor of the outdoor grill. We still love them though. Easy to prepare, you will need about 2 1/2 - 3 hours cooking time. 
Oven-Baked Baby Back Ribs
From Lynda's Recipe Box

1 or 2 racks of Baby Back ribs
about 1 tablespoon rub, either your own mix, or a purchased rub-recipe below)
liquid smoke-about 2 teaspoons
Barbecue sauce- I used this homemade version

Directions:
1. Rinse the ribs with cold water. Dry them well with paper towels.

2. Remove the membrane from the underside of the ribs. To do that, loosen the membrane at one corner with a paring knife. Using a paper towel, or a kitchen towel, take hold of the membrane and slowly pull it off. For a picture, go here. Rub a little liquid smoke over the ribs. Sprinkle the ribs with the rub. Place on a baking pan and cover with plastic wrap. Place in fridge for 8 to 24 hours. ( I have skipped this step before, and cooked the ribs right away, and you will still have really tender ribs. But waiting longer gives the rub flavors longer to penetrate the meat.)

3. Preheat the oven to 275 degrees F. Remove the plastic wrap from the ribs, and allow them to sit at room temperature for 30 minutes. Place ribs fat side up on baking pan. Cover pan well with aluminum foil, or wrap the ribs in foil, either way. Place baking pan with ribs into the oven and bake for
 2-2 1/2 hours.

4. Remove the ribs from the oven. Pull back the foil and insert a paring knife between the bones into the thickest piece of meat. If the knife goes in easily and the meat feels tender, then the ribs are ready for the BBQ sauce. If the ribs need more cooking time, cover with the foil and cook for 30 more minutes.

5. When done, remove the ribs from the oven. Pour off any accumulated juices. Brush BBQ sauce liberally all over the ribs. Increase oven temperature to 350 degrees. Place ribs back in oven, uncovered. Bake for 20-30 minutes, turning the ribs over once, until the sauce is sticky. Baste again if desired and remove from oven. Let ribs rest about 10 minutes before serving. Enjoy!

For an easy rub, I mixed together 2 teaspoons sweet paprika, 1 teaspoon black pepper, 2 teaspoons coarse salt, 1/2 teaspoon garlic powder, 1/4 teaspoon onion powder, and 1/4 teaspoon cayenne pepper. Or use a purchased rub, if desired.

Monday, April 16, 2012

Homemade Margherita Pizza and an Almost Disaster!


 I have posted this pizza recipe before, but wanted to again so I could make a beautiful Margherita Pizza. But I almost had a calamity instead. I like to bake pizza on my pizza stone because it really makes the crust crisp and delicious, but I was in a hurry the other evening and almost lost my pizza on the oven floor! I use a method of placing the pizza dough on parchment paper and then laying it on the backside of a large baking sheet, where I top the pizza. Then I carefully grab hold of the parchment and guide the pizza onto the pizza stone. Yes, I saw this done on Cook's Country one time, and it really does work, but I was too hurried I guess. Actually my daughter made pizza at her home a couple of weeks ago, and she did drop part of hers down in the ovens elements! So, anyway, my pizza looks a bit messy on the crust for good reason. The next time I make this delicious pizza I'll update the photo with a less messy pizza. Messy or not, it was fantastic tasting though.
I've posted this recipe before; it is from Bobby Flay and I love it still. The dough is so easy to mix up and it is a breeze to work with. Not to mention we love the flavor too. It will make 2 pizzas, so besides my yummy Marherita Pizza, I made a more traditional pizza for my husband. That pizza was made with pepperoni, turkey Italian sausage, green bell pepper, and red onion. It was fantastic as well. Hope you'll give it a try.

Homemade Margherita Pizza
from Bobby Flay in Parade Magazine
Bread flour will give you a crisper crust, but all purpose flour can be used, resulting in a chewier crust.
Makes 2 crusts!

Directions for dough:
3 1/2 - 4 cups of bread flour, or all purpose flour
1 teaspoon sugar
2 teaspoons salt
1 envelope yeast- I use the quick rise
1 1/2 cups warm water (about 110 degrees F.)
2 tablespoons olive oil

In a bowl add 3 1/2 cups of the flour, salt, sugar, and yeast and whisk together. Stir in the water and the olive oil and stir until the dough forms a ball. If too sticky, add 1 tablespoon of flour at a time. If dough is too dry add 1 tablespoon water. Turn dough onto a floured surface and knead until dough forms a smooth ball. Grease a large bowl with olive oil and place dough in bowl, turning to coat with oil. Cover bowl with a clean kitchen towel and let rise until doubled, about 1 hour. After it has risen, turn dough out and cut in half. Cover and let rest 10minutes.

Pizza Sauce Directions:
2 tablespoons olive oil
1/2 of an onion
2 cloves garlic,minced or pressed
pinch of red chili flakes
28 ounce can of good quality whole, canned tomatoes
1/4- 1/2 teaspoon dried oregano
2 teaspoons dried basil, or 2 tablespoons fresh basil
1 teaspoon sugar
salt and pepper to taste

In a large saucepan, saute the onion in the olive oil over medium heat for about 5 minutes until it is soft; add the garlic and red pepper flakes and stir until fragrant, about 30 seconds. Add the whole tomatoes, but crush them, and stir in the herbs and sugar. Cook about 20 minutes until thickened; remove from heat. This sauce can be made a day ahead of when you need it. It's great time saver to have the sauce done when you are ready to make the pizza.

To make a Margherita Pizza, you'll also need an 8 ounce ball of fresh mozzarella cheese and fresh basil leaves.
Preheat the oven to 500 degrees. (If using a pizza stone, place it in the oven on the middle rack and then turn oven on. Preheat the stone for 25-30 minutes).
Take 1/2 half of the pizza dough and roll it out with a rolling pin into about a 12-14 inch crust. I've also tried making a pizza that was almost too large for my stone, which caused a mess, so go smaller than you pizza pan or stone. A 12-13 inch crust is perfect for my 15 inch stone. If you are using a pizza pan, just roll the dough to fit your pan. Smooth some sauce over the dough. Cut the ball of fresh mozzarella into thin slices and place around the pizza. Place pizza in oven and bake for about 10 minutes, until cheese it bubbly. Remove from oven,  and add some leaves of fresh basil to the top of the pizza. You can use whole leaves, or a chiffonade of basil leaves.
Bake remaining pizza. Enjoy!

Friday, April 13, 2012

Chicken with Orzo, Asparagus, and Parmesan

 This tasty meal is a quick cooking dish that will be ready to be put on the table in very short time, as long as you have everything prepped. You have well seasoned chicken breasts, with tender orzo and asparagus that has been flavored with thyme, lemon and Parmesan cheese. It really is a very good weeknight meal for two people. I've made this Chicken with Orzo a couple of times now, so my husband and I both enjoy it The recipe is one of  Cook's Illustrated, and has it's share of touches that are to make this dish more flavorful. After it cooks, you are supposed to mix more oil, lemon zest and garlic and drizzle over the finished dish. I have omitted that step, because fresh garlic doesn't agree with me. I added the extra garlic instead earlier in the cooking. The chicken breasts are dredged in flour and sauteed in the skillet just until brown, and then it is transferred to the oven to finish cooking. This time I omitted coating the chicken with flour, but the chicken didn't have as much flavor, so back to the flour next time.
Chicken with Orzo, Asparagus, and Parmesan
Adapted from Cook's Illustrated  - Serves 2
(Israeli Couscous can be substituted for the orzo, if desired)

1/4 cup flour
2 boneless, skinless chicken breasts-about 5 to 6 ounces each
2-3 tablespoons olive oil
salt and black pepper
3/4 cup orzo
3 tablespoons finely diced red onion -Cook's used a diced shallot
3 medium garlic cloves, minced or pressed
1 teaspoon minced fresh thyme leaves, or 1/2 teaspoon dried thyme
1/2 teaspoon lemon zest
2 tablespoons fresh lemon juice
1 1/2 cup low sodium chicken broth
8 ounces asparagus, tough ends trimmed, and cut into 1 inch lengths
1/2 cup freshly grated Parmesan cheese

Directions:
1. Preheat oven to 325 degrees F.
2. Place flour in a dish. Pat the chicken breast dry with a paper towel. Season well with salt and black pepper. Dredge the chicken in flour and shake off excess.
3. Heat 1 tablespoon oil in a non stick 10 inch skillet, over medium heat. Add the chicken and cook until browned on both sides, about 5 minutes. Transfer the chicken to a baking pan and place in the oven to finish cooking, about 5-10 minutes.
4. As chicken bakes, add 1 more tablespoon of oil to the skillet along with the orzo.  Toast the orzo until golden about 2 minutes. Add the onion, garlic, thyme, and lemon zest to the skillet and stir about 30seconds until fragrant.
5. Pour the chicken broth in pan and scape up any brown bits. Stir over low heat for about 4 minutes. Add the asparagus, stir and cover the skillet with a lid. Cook until asparagus is crisp tender and orzo is al dente, 4-6 minutes longer. Season with salt and pepper.
6. Remove pan from heat. Stir the lemon juice and the Parmesan cheese into the orzo. Divide between 2 plates and top with the chicken. Garnish with fresh thyme and lemon zest if desired. Enjoy!

Monday, April 9, 2012

Scalloped Potatoes and Ham

I've always loved using leftover ham in scalloped potatoes for a delicious, hearty casserole. I had 2 cups of ham pieces leftover from my Easter ham, so this casserole was born today. It was creamy and cheesy and had chunks of ham scattered throughout it. Potatoes are either sliced with a mandolin, or very thinly sliced by hand with a sharp knife. The only change I will make next time is too add more milk for just a bit more sauce, a change I added to the recipe. Other than that, this was a very tasty dish. Got Leftover ham? Give this a try.

Scalloped Potatoes and Ham
From Lynda's Recipe Box
I used unpeeled Yukon Gold potatoes. When I use russets, I always peel them because they have a thicker peel.

2 pounds Yukon Gold potatoes, or russet potatoes
2 cups diced ham
1 cup heavy cream
1 1/2 cups milk-I used 2%
2 tablespoons butter
2 tablespoon flour
1/2 onion, diced
1 1/2 cups shredded cheese- I used Colby/Jack
salt to taste
pepper, to taste

Preheat the oven to 350 degrees F. Since I used Yukon Gold potatoes, I left the peels on. If using russets, they need to be peeled. So, slice all the potatoes, using a mandolin or a knife. In a 12 inch skillet, melt the butter and add in the diced onion. Saute the onion for about 2 minutes, then sprinkle in the flour. Stir and cook for about 1 minute. Pour the milk into the skillet and stir until the mixture begins to thicken. Add in the ham, and heat one minute. Add the cream, and also the potatoes. Taste and adjust the salt and pepper if needed. Butter a 9x13 inch baking dish. Pour half of the potato mixture into the baking dish. Sprinkle with half the cheese. Top with remainder of the potato and cream mixture. Top with the remaining cheese. Cover dish well with aluminum foil. Bake for 50 minutes covered. Then, uncover the pan and bake for another 10-15 minutes until cheese is bubbly and potatoes are done. Remove from oven and enjoy!


Wednesday, March 28, 2012

Ina's Herb-Roasted Turkey Breast

Turkey isn't just for Thanksgiving. A whole turkey breast cooks in less time than a whole bird does and you can do quite a bit with the left-overs. This recipe from Ina Garten is full of fantastic flavor which comes from the herb and garlic rub that is put under the skin as well as rubbed over it. A mixture of garlic, rosemary, sage and thyme as well as a few other ingredients gives this turkey breast personality! I've made this recipe several times and my husband and I always enjoy it. It is my favorite way to prepare turkey now. This Herb-Roasted Turkey Breast is wonderful for leftovers too.

Leftovers are delicious used in sandwiches, or can be used in any recipe where cooked chicken is used. This is just your average supermarket whole turkey breast, that when prepared this way, will give you a fantastic dish for your family or guests. I wanted to make this last week before the weather got too much warmer. I hate heating up the kitchen after it turns warm outside. I hope you will give this recipe a try.

Herb-Roasted Turkey Breast
slightly adapted from Ina Garten
Hint: Use fresh herbs for maximum flavor! I have used dried thyme, but the rosemary and sage are best fresh, in my opinion.

Ingredients:
1 whole bone-in turkey breast 6-7 pounds
1 tablespoon fresh minced garlic
2 teaspoons dry mustard
1 tablespoon chopped fresh rosemary
1 tablespoon fresh sage, chopped
1 teaspoon fresh thyme leaves
2 teaspoons kosher salt
1 teaspoon ground black pepper
2 tablespoons olive oil
2 tablespoons freshly squeezed lemon juice
1 cup chicken broth (recipe calls for wine)

Directions:
Preheat oven to 325 degrees F. Place turkey breast skin side up on a rack in your roasting pan.

In a small bowl, mix together the mustard, garlic, herbs, salt, pepper, lemon juice and olive oil. Loosen the skin carefully from the meat of the turkey. ( Take your fingers and just carefully push underneath the skin to loosen all the way to the back.) With your fingers, gently smear half of the herb mixture underneath the skin. Pat skin back in place and then rub remaining herb mixture over the skin. Pour the chicken broth into the bottom of the roasting pan.

Roast the turkey breast, uncovered for 1 3/4 to 2 hours, or until an instant read thermometer inserted at the thickest part of the meat reads 165 degrees F., and the skin is golden. If the skin is getting too brown, cover loosely with foil. When turkey is done, remove from oven, and let meat rest for 15-20 minutes. Slice and serve with the pan juices spooned over the meat.
NOTE: I let the meat rest about 30  minutes this time, so that I could remove one half of the breast from the bone. To do that, take a boning knife and cut done the middle of the breast next to the bone. Cut down as far as you can. With fingers of the other hand, pull the meat back from the bone and cut down the rib cage. You will be able to remove the side in one large piece. Then, slice the meat as shown in my picture and place on a platter. Enjoy!


Thursday, March 15, 2012

Crock Pot Teriyaki Chicken

If you are looking for a really delicious slow cooker recipe, this is the one for you. This Crock Pot Chicken Teriyaki uses boneless chicken thighs and is so easy to throw together. It doesn't take long to cook though, so this is not a recipe that you can leave cooking all day long. Your kitchen will smell amzing. I have made this twice so far and my husband and I have savored every bite. My thanks to Penny at Lake Lure Cottage Kitchen for this tasty recipe. I hope you'll stop by to see her fantastic blog and also give this recipe a try. It is the best crock pot chicken recipe I've ever had. With an Asian flavor, it's not too sweet or too salty. It's just right.

Crock Pot Teriyaki Chicken
From Lake Lure Cottage Kitchen
My only change was to add more garlic and I used low sodium soy sauce.

12 boneless, skinless chicken thighs
3/4 cup sugar
3/4 cup low sodium soy sauce
6 tablespoons cider vinegar
3/4 teaspoon ground ginger
3 cloves minced garlic
1/4 teaspoon pepper
5 teaspoons cornstarch
5 teaspoons cold water
Hot cooked rice
Sliced green onions or chives for garnish

Place chicken in slow cooker. Combine sugar, soy sauce, vinegar, garlic and pepper in a bowl and pour over the chicken. Cook on low 4-5 hours. Remove chicken from crock pot. Pour the hot liquid into a sauce pan. Skim off any fat. Bring juices to a boil. Combine the water and cornatarch and whisk into the simmering liquid. Cook a couple minutes until slightly thickened. Serve over chicken and rice. Adding sliced green onions as a garnish really adds to the dish. Enjoy!

NOTE: I made this with only 8 thighs and it worked just fine. It did take less time to cook though; about 3 1/2 hours. It will depend on your crock pot.

Friday, March 9, 2012

Tangy Glazed Pork Loin

 I love a good pork loin roast. If done properly, it will be very moist and tender, and with this wonderful glaze it will become heaven on a plate!  My husband and I practically licked our plates clean with this roast. The glaze is made with vinegar, soy sauce and sugar, so it's rich, sweet and tangy. The sage and garlic from the rub add wonderful flavor also.
My pictures don't do it justice, as the day was so dark and stormy, so there was not good light anywhere. But the taste was fantastic and that's what matters. This Tangy Glazed Pork Loin is a company worthy roast dinner.
 I found the recipe from Kay at the Church Cook. I don't know if you have visited her blog, but she cooks huge quantities of food for her church family, but usually gives the recipe for family size meals too. Her pictures and recipes are drool-worthy. I hope you'll give this recipe a try. I think you'll really like it!
Tangy Glazed Pork Loin
From Kay @ The Church Cook
Recipe from Ann Voskamp's book, The Spirit of Food
(I have not read this book)
NOTE: The recipe was for a 5 pound roast, but I used a small 2 1/4 pound roast for just my husband and I. Therefore I halved the recipe.

Ingredients:
For roast and rub-
1 teaspoon rubbed sage
1/2 teaspoon salt
1/4 teaspoon black pepper
1 clove garlic, minced
about a 2 1/2 pound pork loin roast, trimmed of any silver skin or tough membrane

Glaze ingredients:
1/2 cup sugar
1 tablespoon cornstarch
1/4 cup vinegar - I used white vinegar
1/4 cup water
2 tablespoons soy sauce

Let roast come almost to room temperature before roasting. Preheat oven to 325 degrees F. Place roast in a roasting pan. Mix rub ingredients together and sprinkle or rub all over the roast. Place pork loin in the oven and roast uncovered. About 30 minutes before the roast is done, you will baste it with the glaze several times. My small roast was done in about 1 hour and 20 minutes. Use a meat thermometer to make sure the roast cooks to  at least 145 degrees F. Mine went to 150, or a tad more, which was perfect for us.

To make glaze:
Stir together glaze ingredients in a sauce pan. Cook over low heat stirring until it thickens, remove from heat. Baste roast with glaze several times during the last 30 minutes of baking.
When done, remove pork loin from oven and tent loosely with foil. Let the meat rest about 15-30 minutes, before cutting into it. If using a much larger roast, let it rest longer.  Add some more glaze before carving. Enjoy!

Try my other pork roasts!
Orange-Glazed Pork Loin Roast
Adobo-Marinated Pork Tenderloin with Grilled Pineapple Salsa

Monday, February 27, 2012

Chicken and Broccoli Stir-Fry

 I seem to be craving spicy foods right now, so this Chicken and Broccoli Stir-Fry is perfect. The addition of dried red pepper flakes will deffinatly wake up your taste buds! Wonderful flavor also comes from fresh ginger, garlic and hoisin sauce. There's not too much chopping involved as there's just a few vegetables. Actually, I added the carrots to this dish the last time I made it to add some extra color, but they are not needed if you don't want them. This is a fairly simple and tasty meal, so I hope you'l give it a try.
Chicken and Broccoli Stir-Fry
adapted from Food Network
Hint: Have all the ingredients chopped, minced and with in reach and this dish will come together quickly.

Chicken and Marinade:
1 pound chicken breasts, cubed
1 or 2 large cloves garlic, minced or pressed
1/2 inch of fresh ginger, minced or finely grated
1 tablespoon soy sauce - I used low sodium
2 tablespoons sugar
1 tablespoon sesame oil
1 tablespoon rice vinegar

Other ingredients:
3 tablespoons oil
about 5 cups broccoli florets and trimmed stalk pieces
1 small onion, sliced from end to end, or some sliced green onions
1 carrot, cut into match stick pieces, optional
3/4 to 1 teaspoon dried red chili flakes- I used 1 teas.
1 large clove garlic, minced
another 1/2 inch of fresh ginger, minced or grated
2/3 cup water
1 tablespoon cornstarch
2 tablespoons hoisin sauce
2 tablespoons soy sauce

1. In a bowl, add the chicken and the other ingredients and stir. Marinate at room temperature for 15 minutes.
2. Heat a large skillet over medium heat with 2 tablespoons of oil to the skillet. Add the broccoli stems, florets, onions and carrot, if using, to the pan and stir fry about 2 minutes, until broccoli is bright green. Add the garlic and ginger to the pan the last 30 seconds and stir fry together with the vegetables. Remove the veggies to a plate or bowl. Mix the 2/3 cup water with the cornstarch.
3. Add another tablespoon of oil to the pan and add the chicken and dried red pepper flakes to it. Stir fry chicken about 3 minutes, until it loses it's raw color.
4. Add the hoisin sauce to the chicken and stir. Return the broccoli and other veggies, if any, to the skillet and stir. Add the cornstarch/water mixture to the pan along with the soy sauce. Stir until thickened. Add more water if sauce is too thick. Taste and season with salt and pepper if needed.
Serve over rice and garnish with toasted sesame seeds if desired. Enjoy!

Monday, February 6, 2012

Tex - Mex Beef Enchiladas - ground beef filling with a chipotle sauce

 I have a serious love affair with Tex - Mex food and I especially love enchiladas. I rarely order them in restaurants, but love making them at home instead. I found these wonderful ground beef enchiladas at Everyday Food and couldn't wait to try them. My husband and I loved the smoky,spicy flavor the chipotle chili gave the sauce. It is spicy hot, but not a fire alarm hot, so it does cool down. And considering that we both don't do well with real spicy food, we had no trouble with these enchiladas. Loved them, will make again next week, in fact. Hope you'll give them a try!
Tex - Mex Beef Enchiladas
adapted from Everyday Food

Sauce:
2 tablespoons olive oil
1/4 cup flour
1 can (15 ounces) of low sodium chicken broth
1 cup of water
1/2 of a medium onion, minced, my addition
1 1/2 tablespoons chili powder
1 teaspoon dried cumin - my addition
1 small, canned, chipotle chili pepper in adobo sauce, minced- my chili was about 3-4 inches long
1 tablespoon adobo sauce
Beef Filling:
1 pound lean ground beef
1/2 of medium onion
2 cloves minced garlic, my addition
1 teaspoon chili powder, my addition
1 teaspoon cumin
salt and pepper to taste
8 ounces freshly grated cheese, I used a Cheddar Jack cheese
1/2 cup cilantro
about 10 corn tortillas

1. In a saucepan over medium heat, cook the onion in the 2 tablespoons of oil until softened. Stir in the flour and the chili powder, and whisk for about 1 minute while the flour cooks. Slowly pour in the broth and water, whisking as you pour. Add adobo sauce and minced chipotle pepper, the broth and water. Mix well; bring to a boil, reduce heat and simmer about 10 minutes. Remove from heat until needed.

2. In a skillet, brown the ground beef and minced onion together. When meat is no longer pink, stir in the garlic and stir about 1 minute. Drain off any fat. Season the meat with the chili powder, cumin and salt and pepper.

3. To assemble the enchiladas:
Preheat the oven to 350 degrees F. Pour about 1/4 cup of enchilada sauce in the bottom of a 9x13 inch baking dish. Warm the tortillas. I stacked the tortillas on foil, wrapped them up and placed in oven for about 10 minutes. They were ready to use then. Stir about 1/3 cup of sauce into the beef mixture. Place a rounded 1/4 cup of meat on each tortilla. Add about 1 tablespoon of shredded cheese, and roll up. Lay seam side down in the baking pan. Spread the remaing sauce over the enchiladas. Cover with the cheese. Turn oven up to 400 degrees F. and place enchiladas into the oven. Bake for about 20 minutes until cheese is melted and enchiladas are bubbly. Remove from oven and garnish with cilantro. I also added some diced green onion. So good -  enjoy!

Also check out my Chicken Enchiladas with Sour Cream Sauce
and my Shredded Beef Enchiladas.

Tuesday, January 3, 2012

How to Cook a Tender, Oven Braised, Beef Pot Roast


My first cooked meal of the New Year was a very tender and delicious beef Pot Roast, braised in the oven. A cold front that blew in left me wanting something warming and comforting for dinner. And I had a chuck roast in the freezer that was calling my name, and bringing back memories of my Mother. My mom made the most tender, melt in your mouth roasts I've ever tasted, so I think of her every time I make pot roast. Sometimes I make mashed potatoes with pot roast, but most of the time I bake potatoes with the roast as my Mother did. You can just break up the potatoes on your plate and cover with gravy. This is comfort food at it's best.
I always add onions to the pot and I brown them slightly the first thing. Then I brown the roast on all sides, even the ends for just a few minutes. Add carrots and potatoes to the pot and you have a true one pot meal to look forward too. I even make the gravy in the same pot. I'm lazy when it comes to clean up.
If you cook chuck roast long enough, it will be very tender and delicious. Many folks tend to take it out of the oven too soon, resulting in a tough piece of meat. You really need about 1 hour of cooking per pound of chuck roast. Use the fork test to see if it's tender. Stick a fork in the meat and pull. If done, it should begin to pull apart very easily, like you are going to shred it.This is right where you want it. Here's my method.
Classic Oven Braised Pot Roast
my Mothers

1 chuck roast- mine was only 2 1/2 pounds
1 onion, sliced
1 pound carrots, peeled and cut into about 1 inch slices
5 or 6 potatoes,(I used Yukon Golds) peeled and cut in half or fourths, depending on the size
1 dried bay leaf
beef broth, water or chicken broth

In a dutch oven over medium high heat, in about 1 tablespoon of oil, cook the sliced onion for just a couple of minutes, until it softens and begins to turn golden. Remove the onion to a bowl. Season the roast liberally with salt and pepper, and garlic powder if desired. Add more oil to the dutch oven if needed. Add the chuck roast to the pan and brown it on all sides. Place half the onions on top of the roast and half scattered around the roast in the pan.  Add enough liquid to come up most of the way next to the roast. I used 1 can low-sodium beef broth and 1/2 cups water in my pan. You could need more or less, depending on the size of your pan and how full it is. Toss the bay leaf in the liquid and cover pot with lid. Place dutch oven in a preheated 300 degree oven and cook for about 60 minutes per pound of beef. My 2 1/2 pound roast took about 2 3/4 hours to become tender and delicious. Add the potatoes to the pan about halfway through cooking. Cover the pan and continue baking until roast is tender. When done, you can serve the pan juices as is, spooned over the meat and potatoes, or you can do as I do and thicken the juices some for a really tasty gravy.
To Make a Quick Gravy: After you remove the roast and veggies from the pan, skim any fat from the juices,or use a fat separator to make the job easier. Then make a slurry of about 1/4 cup flour and some water. Mix until there are no lumps. While meat juices are simmering, whisk in flour and water mixture a little at a time, only using enough flour mixture to thicken the gravy as much as you want it. Simmer gravy a couple of minutes. Season to taste with salt and pepper. Pour gravy over potatoes and meat. Enjoy!