Showing posts with label Thanksgiving/Christmas. Show all posts

Saturday, December 6, 2014

Potato-Fennel Gratin(from Ina Garten)

Mmmm, I have to tell you that Ina's Potato-Fennel Gratin is amazing! My husband and I would order this from a restaurant if it was on the menu, that's how much we love it! This side dish has so much flavor from the addition of fennel, onion and cheese to the potatoes, that it is positively addictive. I don't know about you but I just can't resist creamy, cheesy potato dishes! This is a wonderful dish anytime and perfect for any holiday dinner or buffet.
Only the bulb of the fennel is used. I saved the stalks and added to some soup later on. The fennel bulb is cut in half and the core then removed.
Then it is sliced very thin, and the potatoes also. Ina's recipe calls for Gruyere cheese, but I subbed sharp white cheddar cheese and it is delicious. I hope you'll give Potato-Fennel Gratin a try. Here's the recipe.
Potato-Fennel Gratin
Adapted from Ina Garten
(I made half a recipe when I took these pictures, but I'm providing the whole recipe. Leftovers reheat very well.)

Ingredients:

2 small fennel bulbs ( I use 1 large bulb for the whole recipe)
1 medium yellow onion, thinly sliced
2 tablespoons olive oil
1 tablespoon butter
2 pounds (about 4 large potatoes) I used Yukon gold
2 cups plus 2 tablespoons heavy cream
2 1/2 cups sharp white cheddar cheese (Ina uses Gruyere)
1 teaspoon sea salt
1/2 teaspoon black pepper

Directions:
Preheat oven to 350 degrees F.
Grease the inside of a 10 cup baking dish. I used a 9x13 inch.

Remove the stalks from the fennel and cut the bulbs in half lengthwise. Remove the cores and then slice them thinly, making about 4 cups. Sauté the fennel and sliced onions in the olive oil and butter over medium-low heat for about 15 minutes until tender. Remove from heat.

Peel the potatoes, then slice thinly with a mandolin or by hand. In a large bowl, mix the potatoes with 2 cups of cream, 2 cups of cheese, and the salt and pepper. Add the cooked fennel and onion and mix well.

Pour the potato mixture into the prepared baking dish. Press the mixture down and smooth the potato mixture evenly in the pan. Combine remaining 2 tablespoons of cream and 1/2 cup cheese and sprinkle on top. Bake for 1 1/2 hours, until the potatoes are very tender and the top is browned  and bubbly. Remove from oven and let set 10 minutes before serving. Enjoy!

Thursday, November 20, 2014

Quick Potato Rolls

Thanksgiving is almost here, and in my opinion you have to have homemade rolls for the feast. At least in our family you do that is. I've got several delicious roll recipes, but I thought I'd share this Easy Potato Roll recipe today. I love Potato Rolls because of their tender, soft interiors, which come from the addition of mashed potatoes to the dough. This recipe is so easy because it uses the convenience of instant mashed potatoes! Plus, this recipe is a quick rise roll, in which you set the pan of rolls over hot water and they are then ready to bake in just 15 minutes! And they smell heavenly, and fill your home with the aroma of fresh baked bread. Mmmm, Thanksgiving isn't the same without this fragrance.
This quick roll is stirred together, lightly kneaded, then formed into 12 rolls and placed in a greased pan. After they are covered, the pan is placed over a pan of very hot water. The rolls rise for about 15 minutes.
When the rise is over, just pop them into the oven and bake Voila! You have tender, melt in your mouth homemade Potato Rolls. I like to brush them with melted butter right out of the oven, then I just can't wait to eat one. Hope you'll give them a try.
Quick Potato Rolls
Adapted from Taste of Home

Ingredients:
3 1/2 - 4 cups of all-purpose unbleached flour, divided
1 tablespoon sugar
1 package (1/4 ounce), quick-rise yeast
1 teaspoon fine sea salt
3/4 cup warm water (about 120 degrees F.)
1/2 cup warm whole milk (about 120 degrees)
1/4 cup melted butter
1/4 cup dry instant mashed potatoes
1 egg
melted butter to brush over the rolls,(about 1 tablespoon)

Directions:
In a large bowl, combine 1 cup of flour, sugar, yeast, sugar and salt. In another bowl, mix the water milk, and the 1/4 cup melted butter. Stir in the potato flakes and let stand 1 minute. Add the egg and beat until smooth. Add the wet mixture to the dry mixture and mix well. Add enough of the remaining flour to make a soft dough. Turn dough onto a floured surface and knead for 4-6 minutes until smooth and elastic. Cover dough and let rise 10 minutes. Uncover dough and cut into 12 equal pieces. Shape each piece into a ball and place in a greased 9x13 inch baking pan. Place a large baking pan on the counter and fill half full with boiling water. Place the baking pan of rolls over the hot water. Cover the rolls and let rise for 15 minutes. ( I place a baking rack or cookie sheet over the boiling water if needed to hold the pan. Then I cover the rolls with plastic wrap to rise). Preheat the oven to 375 degrees F. while the rolls are rising. After 15 minutes of rising, place the rolls in the oven and bake for20-25 minutes until golden. Remove to a wire rack to cool. Brush with melted butter and enjoy!!

Wednesday, November 5, 2014

Pumkin Bundt Cake with Cream Cheese Frosting

 I just had to start off my fall baking with something pumpkin since it is one of my favorite fall and winter flavors! Apple is right up there too, so there will be an apple recipe coming real soon also. I have tried a couple of different Pumpkin Bundt Cake recipes and this is the best one so far so I'm sharing it with you.
 This Pumpkin Bundt Cake with Cream Cheese Frosting is dense and moist, much like pumpkin bread or pound cake. I topped this luscious cake with cream cheese frosting that contains some brown sugar, which gives the frosting a hint of caramel flavor! This is a perfect fall dessert which would be a delicious addition even your Thanksgiving table. And I confess that it was so good with my morning coffee also! Try taking it to any family gathering or even to work and I think people will be singing your praises. Here's the recipe.

Pumpkin Bundt Cake with Cream Cheese Frosting
Adapted from My Baking Addition

Ingredients:
Bundt Cake
If you don't have all the spices, you can sub pumpkin pie spice if desired.
2 1/4 cups granulated sugar
1 cup canola oil, or vegetable oil
3 large eggs
3 cups un-bleached flour
2 teaspoons baking soda
2 teaspoons ground cinnamon
1/2 teaspoon ground cloves
1/4 ground ginger
1/4 teaspoon ground nutmeg
1/2 teaspoon salt
1 can (15 ounces) pure pumpkin puree

Cream Cheese Frosting
4 ounces cream cheese, softened
4 tablespoons softened, unsalted butter
2 tablespoons light brown sugar
1 14 cup confectioners sugar (powdered sugar)
1/2 teaspoon vanilla extract
1-3 tablespoons milk, half and half or cream, if needed to thin the frosting
3/4 cup toasted, chopped pecans, if desired

Directions:
1. Preheat the oven to 350 F. Spray a 10 inch Bundt cake pan with nonstick cooking spray.

2. In a large bowl combine the oil and sugar and mix thoroughly with an electric mixer. Beat in eggs 1 at a time, then beat in the pumpkin. In a medium bowl mix together the flour, baking soda, spices and salt. Add flour mixture to the pumpkin mixture a little at a time, and mix until batter is just blended well.

3. Pour batter into the prepared Bundt pan and smooth the batter evenly around the pan. Bake in the preheated oven for 60-65 minutes until a toothpick inserted in the center if cake comes out clean. Cool the cake for 10-15 minutes. Then invert cake onto a wire rack to finish cooling. Place cake onto a cake plate to frost.

4. To make the frosting: In a large bowl add the softened cream cheese, butter and the brown sugar and beat until creamy and smooth, about 2 minutes. Then gradually add in the powdered sugar and beat well. Stir in the vanilla and milk if needed. If frosting is too thick add a bit more milk if needed to get the desired consistency. Spoon frosting over the cooled cake. Using a spoon or rubber spatula, push the frosting where you want it. (This is not a glaze that will pour). Top with the toasted pecans , if desired. Now enjoy!


Wednesday, November 27, 2013

Homemade Cranberry Sauce

Well, it's just a few hours until Thanksgiving officially is here. Are you ready? I thought I'd share a very quick recipe for Homemade Cranberry Sauce that is delicious. I grew up eating the cranberry sauce from the can. That's all my mother ever bought. I didn't have the homemade stuff until I was married and had my first holiday at my mother-in-laws house. I fell in love with the tart, fresh flavor of the cranberries. I've made several different recipes through the years, like Cranberry Apple Relish which I have also posted. This is the quickest recipe and will only take you about 15 minutes! There's definitely time for you to make this before dinner!

Homemade Cranberry Sauce
From Lynda's Recipe Box
I used the juice from an orange plus enough water to make 1 cup of liquid. There is just a hint of orange in the taste. You could use all water, or another juice like apple or pomegranate if desired. You can also stir in chopped nuts after cooking.

Ingredients:
12 ounce bag of fresh cranberries
zest from 1 orange
juice from 1 orange, plus enough added water to make 1 cup of liquid
1 cup of granulated sugar

Directions:
In a 3 quart sauce pan bring the water mixture and the sugar to a simmer; add the cranberries and bring to a rolling boil. Turn heat down to medium low, still boiling, and cook for 10 minutes. Stir frequently. Stir in the orange zest and remove pan from heat. The cranberry sauce will be foaming, but as it begins to cool, it will disappear when you give it a stir. Or you may skim the foam off if preferred. Pour sauce into a serving dish and chill until time to serve. I hope you enjoy your deliciously sweet, but tart Cranberry Sauce
Happy Thanksgiving!

Tuesday, November 26, 2013

Sage Stuffing (or Dressing-whatever you want to call it!)

Here it is, 2 days before Thanksgiving. Time really flies by fast this time of year doesn't it? If you are hosting the meal on the big day I hope that you already have some of the preparations out of the way so that you can enjoy your time with family and friends. Our family had our big dinner this past Sunday. Now that our kids are all married, it seemed like a good idea to celebrate on a different day than Thanksgiving. That frees up the kids to go to the other side of the family on the big day. I mean, it's not really fun if you have to make it to 3 dinners in one day. So this worked well for us.
I thought I'd share my stuffing recipe with you today. Dressing or stuffing, I've called it both names. For years I've tried to make my stuffing like my mother-in-law used to. But she didn't follow a recipe, she had a method that she followed every year that produced a moist and spicy bread dressing that we loved. I'm getting closer. I think I would have nailed it this year, but I needed more sage. But this was still a yummy dressing full of fresh herbs that made tasty leftovers too. My photo was taken quickly, before we sat down to devour our food. Here is my method.
Sage Stuffing
From Lynda's Recipe Box
(Hint) You may use all bread if desired, instead of adding cornbread. To save time on the big day, prepare the corn bread 2 days ahead of your dinner. Also cube the bread at this time. Use a hearty white bread. It will then be dried out enough to stir up the day before your dinner. Just mix up the stuffing and place in a greased baking dish; cover and refrigerate. Take out of fridge about 30 minutes before placing in the oven, Bake and serve.

Ingredients:
about 8 cups of white bread cubes- trim crusts from bread and cut into small cubes
about 4 cups of cornbread, cubed or crumbled- from this recipe, or your own recipe
1/4 cup chopped fresh parsley
3 tablespoons fresh sage, finely chopped- or about 1 tablespoons dried sage
1 teaspoon fresh thyme or rosemary, finely chopped
1 teaspoon salt
about 1/2 teaspoon pepper
1 stick (1/2 cup), unsalted butter, melted
1 large sweet onion, finely diced
2 stalks celery, finely diced
2 large eggs, beaten
1 cup of unsalted chicken stock or broth, or more
1/3 cup half and half or heavy cream

Preparation:
If you need to dry the bread and cornbread more, place the cubes on 2 baking sheets and place in a 300 degree oven for 15-20 minutes until dry. Cool in pans, then transfer to a large bowl. When ready to stir up the dressing, stir in the herbs and the salt and pepper.

Melt butter in a heavy skillet over medium low heat. Add the onions and celery and cook until tender, about 5minutes. Pour into the bowl with the bead. Mix the eggs and half and half together. Pour over the bread. Add the chicken broth and toss all the ingredients together. if you need more broth stir it in. I used about 1 1/3 cup.

Transfer stuffing to a greased 2 1/2 quart to 3 quart baking dish. Cover with foil. (At this point you can refrigerate the stuffing for 1 day.) If ready to bake, place it covered, in the middle of the oven at 350 degrees for 25minnutes. Uncover and bake another 25 - 30minutes until golden. Remove from oven and enjoy.
Also check out my recipe for Sausage and Cornbread Dressing.

My daughter Hailey has started a food blog also. She'd be so happy if you stopped by to "hi" at Tasteful Cuisine.

Tuesday, March 26, 2013

The Best Cheesy Broccoli and Rice Casserole (No canned Soup!)

 If you would like a really creamy, really cheesy Broccoli and Rice recipe, look no further. This awesome recipe is the best I've ever had, and there is absolutely no canned soup involved. I made it this week and my husband and I both loved it's creaminess, with lots of broccoli goodness and great cheese flavor too. I won't make any other, ever. In my early married years I made the old canned soup version, but it doesn't hold a candle to the real thing. I used to always serve Broccoli and Rice Casserole at Easter dinner, and sometimes for other holidays too. Broccoli is a great spring vegetable, even though it is readily available all year long now. I love it raw, in salads and in casseroles. It is my all time favorite veggie. Anyway, I hope you'll give this recipe a try; it's really delicious and addictive.
Cheesy Broccoli and Rice Casserole
Adapted from Mel's Kitchen Cafe (which she adapted from Cook's Country)

Ingredients:
For topping;
2/3 cup Panko bread crumbs
3 tablespoons melted butter
1/4 cup freshly shredded Parmesan cheese
1 clove garlic, minced
For casserole;
2 pounds broccoli- (about 3-4 heads), florets cut into 1 inch pieces and stems chopped
2 tablespoons butter
1 medium onion, finely diced
1 1/4 cups long grain white rice
4 cups low-sodium chicken broth
1 1/4 cups half and half
3/4 teaspoon salt
about 1/4 teaspoon black pepper (subbed for 1/8 tea. cayenne pepper)
2 cups shredded extra sharp cheddar cheese
1/2 cup shredded Parmesan cheese

Directions:
1. Place oven rack in center position and preheat oven to 400 degrees. Grease a 9x13 inch baking dish. In a small bowl combine the panko crumbs, melted butter, 1/2 cup grated Parmesan and garlic. Set aside.
2. Microwave broccoli florets (save stems for later), covered in a large bowl until bright green and tender, 2-3 minutes. Be careful to not overcook. Melt the 2 tablespoons butter in a large pot over medium heat. Cook onion and broccoli stems until softened and tender, about 8-10 minutes. Add rice and cook stirring, about 1 minute. Stir in broth and half and half and bring to a boil. Reduce heat to medium-low and cook until rice is tender. Be sure to stir rice often. Cook for 20-25 minutes. Off heat, stir in the salt, pepper, cheddar and Parmesan cheeses, and the broccoli florets. Pour the mixture into the prepared baking pan. Top with the reserved panko crumb mixture and bake until the sauce is bubbly and the top is golden, about 15 minutes. Cool 5 minutes. Serve and enjoy!

Note: This dish can be prepared ahead of time. Follow recipe instructions. After pouring the mixture into the baking dish, cover it with plastic wrap and refrigerate up to 8 hours. Store the crumb mixture in a separate container in fridge. Before baking, sprinkle the crumbs on top of casserole. Bake at 375 degrees for 25-30 minutes until hot and bubbly.

Tuesday, December 18, 2012

Tiger Butter - A Yummy Peanut Butter and Chocolate Candy

Need some homemade goodies for gifts still? This Tiger Butter candy is easy and quick to make, plus it tastes amazing too. If you've ever used Almond Bark, you can guess how easy this candy is. Almond Bark is found on your grocers baking isle, close to where the baking chips are.
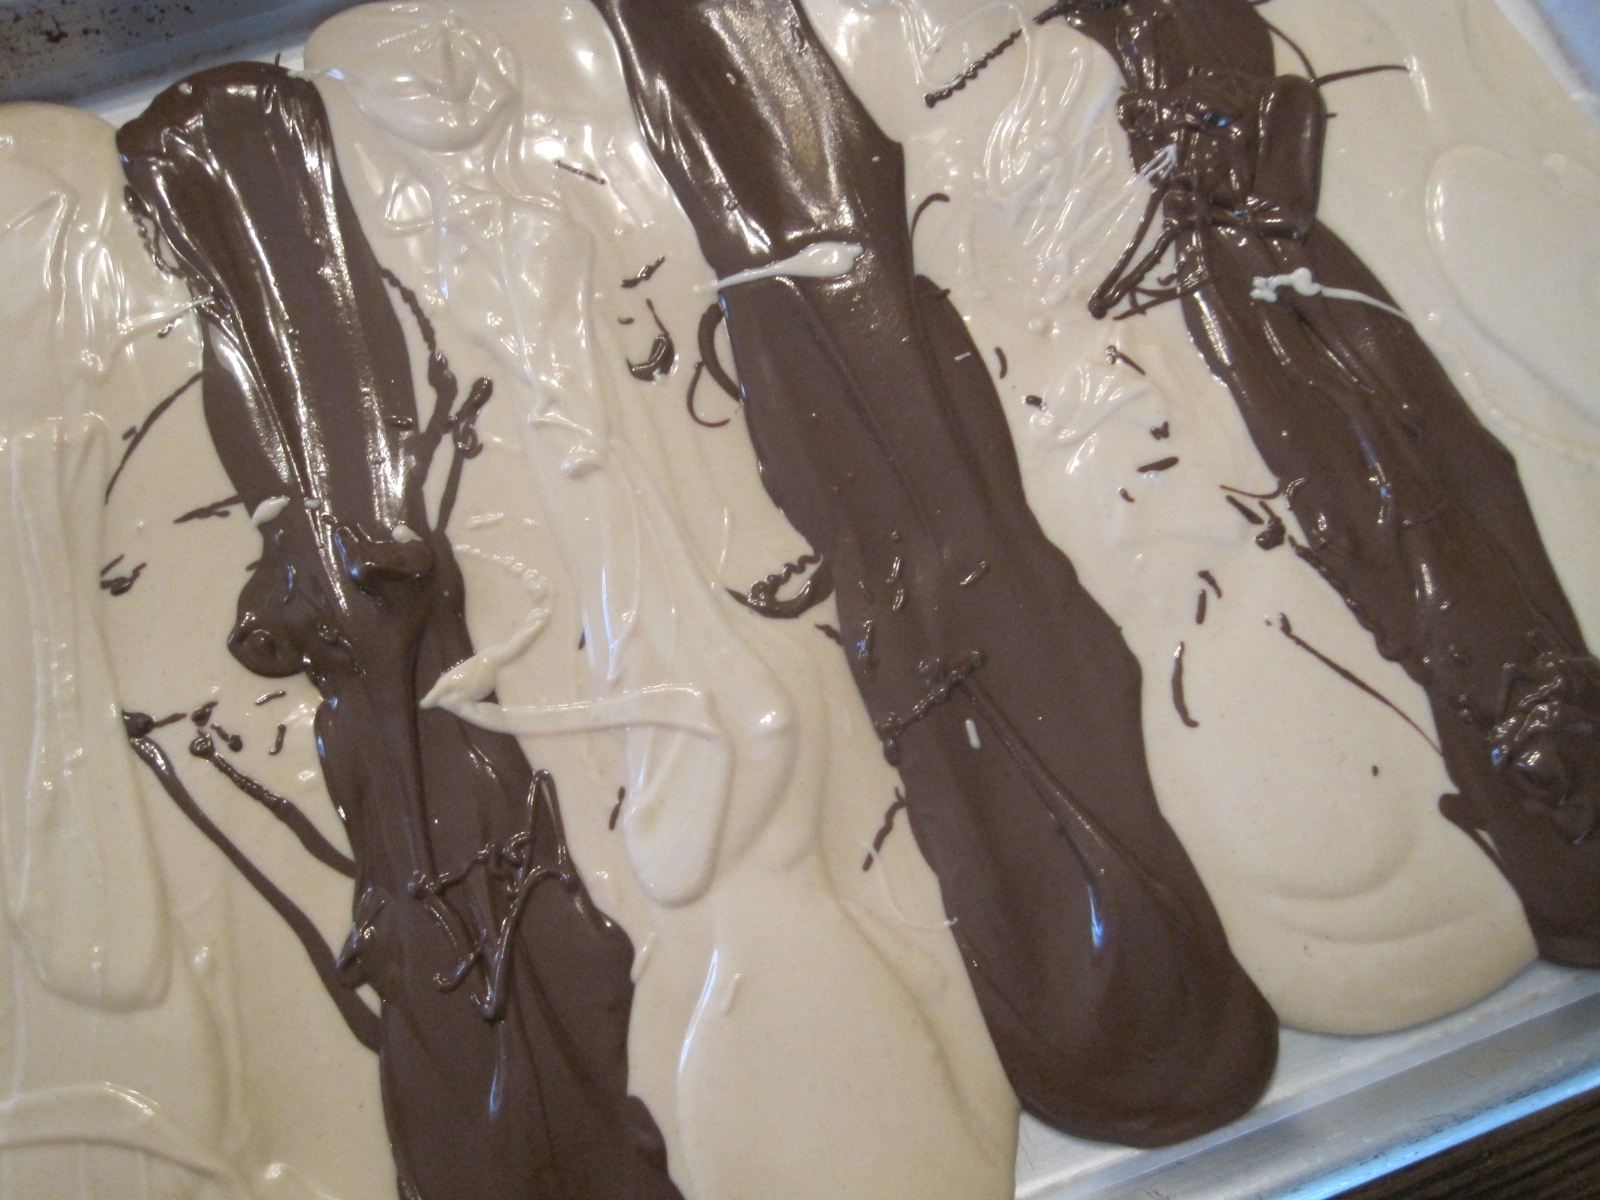
In this recipe, both vanilla and chocolate Almond Barks are melted. Peanut butter is stirred into the vanilla. The peanut butter flavored Almond bark is poured into a prepared pan.
Then the melted chocolate is spooned in stips over the peanut butter mixture.
I drag a knife through the candy to cause a marbleized effect, then run the knife through again in the opposite direction. You also could just drizzle the chocolate all over the peanut mixture if desired.
Now it needs to set and harden. My kitchen was rather warm because of baking, so I placed the candy in the refrigerator to harden. Then brake it into pieces and devour.Yum! This is a perfect gift for friends, family, teachers, mail carriers, whomever. My husband loves this stuff, so I may have to make another batch for gift giving.
Tiger Butter Candy
Recipe from a friend of my husbands

24 ounces Vanilla Almond Bark
12 ounces Chocolate Almond Bark
1/2 cup peanut butter, creamy or chunky

1. Melt the Vanilla Almond Bark in a large microwave safe bowl. Do it in 1 minute increments, so that you don't cook the candy and cause it to seize. Or melt candy in a double boiler if desired.
2. When completely melted stir in the peanut butter until smooth.
3. Melt the chocolate in a large bowl. It took about 1 1/2 minutes in my microwave.
4. Line a large baking sheet, ( 12x17 inches) with wax paper or parchment paper. Pour the Vanilla Bark mixture into the pan and spread it out evenly.
5. Spoon strips of chocolate over the melted Vanilla Bark mixture.
6. Drag a knife across the width of the pan to swirl the cany mixture. Then drag the knife across the length of the pan. Or, drizzle the chocolate over the vanilla,if desired.
&. Let the candy cool and harden. Keep away from the heat. Enjoy!

Monday, December 10, 2012

Cinnamon Apple Pie with Crumb Topping

Cinnamon, how I love thee, especially in a homemade Cinnamon Apple Pie with a Crumb topping! My house smelled so delicious with the fragrance of apples and cinnamon while this yummy pie baked. I made this pie for Thanksgiving and then made it again last week because it is just so good, and because I forgot to take pictures of it earlier. The things we do for pictures! I've made variations of this Cinnamon Apple Pie with Crumb Topping for several years, but this last time I decided to use some oatmeal in the crumb topping. It was delicious, but not much more than just using flour. I love making a pie like this because I only need to make a bottom crust. I'm not a perfect pie crust maker, but the crust did turn out nice and flaky this time. You could use refrigerated pie crust, if desired, or a frozen deep-dish crust from your supermarket.
Peeling and slicing the apples consumes most of the time it takes to get this pie ready to bake. After you toss all the apples and filling ingredients together, you place the filling in the pie crust. While you don't have to arrange the apples, you do need to make sure there are no air pockets or gaps among the apples. Press them down slightly to fit, but heaping them up higher in the middle of the pie.
Then after mixing the topping together, it is just sprinkled over the apples. It may seem like there is too much topping, but use it all. It cooks down into a thin, buttery, crisp layer on top.
Let the pie cool, if you can, and then enjoy the fruits of your labor. Serve with a scoop of ice cream or some whipped cream if desired. I hope you enjoy.
Cinnamon Apple Pie with Crumb Topping
Adapted from here
I used a 10 inch pie plate for this pie with apples piled high. I like to mix tart and sweet apples in my pie, so I used about half Granny Smiths(tart), and half Galas(sweet). Golden delicious or other baking apples of your choice are fine. If you use all tart apples, you may need more sugar in the filling.
Purchased pie crust can be used if preferred. If using a frozen crust, buy deep-dish.

Crust: (my recipe)
1 1/4 cups all-purpose flour
1/4 teaspoon salt
1/4 cup (4 tablespoons) chilled, unsalted butter
1/4 cup (4 tablespoons) chilled shortening
3-4 tablespoons ice water

Filling:
7-71/2 cups of sliced apples. I used half Granny Smiths, and half Galas.
1/2 cup, plus 2 tablespoons brown sugar, packed
2 1/2 tablespoons flour
2 tablespoons melted butter
1 1/2 teaspoons cinnamon-I used Saigon cinnamon, but regular will work fine
a squeeze of fresh lemon juice

Topping:
1 cup all purpose flour- (or use 1/2 c. flour and 1/2 cup oatmeal)
1/2 cup granulated sugar
1/4 cup brown sugar, packed
1/2 teaspoon cinnamon
1/4 teaspoon salt
6 tablespoons unsalted butter, chilled and cut into cubes

Preparation:
For crust:
In a large bowl, mix the flour and salt. Add butter and shortening and use a pastry blender to cut them into the flour. Mix until it looks like a coarse meal, with butter being no larger than small peas. Drizzle ice water over the mixture; stir with a fork until moist clups form. Add more water if dough is too dry. Gather dough into a ball and flatten into a disk.Wrap in plastic wrap and refrigerate for about 30 minutes.
Place rack in center of oven. Preheat oven to 400 degrees F. Roll dough on lightly floured surface to about a 12 inch round. Transfer to a pie plate. Press dough into pan; trim overhang to 1/2 inch.. Turn edge under and crimp. Place crust in the fridge while preparing the filling.

For Filling:
Peel and core apples.Slice thin, about 1/4 inch. Sprinkle with a squeeze or two of fresh lemon juice. Drizzle with butter. Mix the flour, sugar and cinnamon in the apples. Set aside and mix the topping.

For Topping:
Mix flour, salt, sugars and cinnamon in a food processor. Pulse a couple of times. Add chilled, cubed butter and pulse until mixture looks like sand.

To assemble  and bake the pie:
Toss the filling to redistribute the juices. Transfer the filling to the crust, mounding higher in the center of pie. Sprinkle the topping evenly over the pie. Bake pie at 400 degrees for 30 minutes, then REDUCE the temperature to 350. If pie browns too much, lay a piece of foil over the pie. Bake for another 40 minutes or more, until the top is golden, the filling is bubbling thickly at the edges, and a paring knife inserted in the center of the pie goes easily through the apples. It could take as long as 1 hour and 20 minutes to fully bake. When done, remove from oven and cool. Enjoy!


Tuesday, November 20, 2012

Corn Casserole for Thanksgiving

 I can't believe that Thanksgiving is only 2 days away! But I'm busy like many of you, cooking and cleaning for the big day. Thought I'd share an easy and delicious Corn Casserole recipe with you, just in case you are looking for one more side for the big meal. I got this recipe years ago from a friend, but I have adapted it somewhat. This dish is very good and is easy to double if needed. If you still need some more ideas for side dishes, click here. If you need a dessert, click here.
I wish all of you a wonderful Thanksgiving. Be thankful for the blessings you've been given and enjoy your family and friends. Now here's the recipe.
 
Corn Casserole
From Lynda's Recipe Box
 
1 can cream-style corn
1 can whole kernal corn, drained - or 1 1/2 cups frozen corn that is thawed
2 tablespoons butter
1/2 of a large bell pepper, diced -(sometimes I add both green and red pepper so it will look festive.)
2 tablespoons flour
1/4 pound, (4 ounces), shredded cheddar cheese
2 large eggs, beaten
salt and pepper to taste
 
Preheat the oven to 350 degrees F. In a small skillet over medium heat, melt the butter and sautee the bell pepper until softened, about 4-5 minutes. Stir in the flour until combined and stir about 1 minute. Remove from heat and set aside.
In a bowl add the creamed corn, the drained corn, cheddar cheese and eggs. Stir in the saaauted bell pepper mixture. Seqason with salt and pepper. Pour into a greased 1 1/2 to 2 quart casserole dish. Bake 50-60 minutes until firm and golden. My dish in the photo was a bit larger, so it baked quicker. Enjoy!


Thursday, November 15, 2012

Mediterranean Braised Green Beans

Mediterranean Green Beans braised in the oven with onion, garlic in a rich tomato sauce. Pure deliciousness on a fork!
I have eaten green beans and tomatoes before, but have not made them myself. According to Cook's Illustrated, where this recipe comes from, green beans cooked this way can take awhile to get tender, because tomatoes will slow down the cooking time because of their acidity. I have learned something new! I also learned that baking soda added to this dish causes an alkaline environment where the fibers of the beans will soften and become tender. That is your science lesson for today folks. And yes, the beans are delicious, very tender but they still hold their shape since they were slow braised in the oven. I did have quite a bit of sauce in the beans, so next time I may cook more beans than called for. These green beans are pretty enough for any ones table, (and they smell fantastic while cooking too).  I'm not sure yet if I'm adding to my Thanksgiving table, but my husband gave them two thumbs up. Our kids look forward to my Green Beans Almondine every Thanksgiving, so we'll see. However, this dish is very company worthy, if you would like to try them.
Mediterranean Braised Green Beans
Adapted from Cooks Illustrated - serves 4-6
(I cut down the amount of olive oil from 5T. to 2T. And I totally forgot about stirring in chopped parsley before serving.

Ingredients:
2 tablespoons olive oil
1 onion, diced
4 cloves garlic, minced
pinch of cayenne pepper
1 1/2 cups water
1/2 teaspoon baking soda
1 1/2 pounds fresh green beans, trimmed and cut into 2-3 pieces
1 tablespoon tomato paste
1 14.5 ounce can small dice tomatoes with juice
1 teaspoon salt
1/4 teaspoon pepper
red wine vinegar to taste

Directions:
1. Adjust oven rack to lower-middle position and heat oven to 275 degrees F.
2. Heat 2 tablespoons olive oil in a dutch oven 0ver medium heat. Add onions and cook for 3-5 minutes until softened. Add garlic and cayenne and cook until fragrant, about 30 seconds.
3. Add water, baking soda, and green beans and bring to a simmer. Reduce heat to medium-low and cook for 10minutes, stirring occasionally.
4. Stir in tomato paste, tomatoes and their juice, salt, and pepper.
5. Cover the pot and place in the preheated oven. Cook until sauce is slightly thickened and green beans can be cut with the side of a fork, 40-50 minutes.
6. Add a splash of red wine vinegar, to taste, if desired. It does brighten the flavors some. Enjoy hot or at room temperature.
What's your favorite way to cook green beans?

Sunday, October 21, 2012

Broccoli and Orange Salad

 Crisp broccoli, toasted almonds, tangy oranges  with a yummy dressing make up this delicious version of Broccoli Salad.
I posted this recipe over 3 years ago not long after I started this blog and I decided it needed an update, especially the photo. This is one of my husbands favorites. We both love the citrus twist on this salad with the mandarin oranges, but if that doesn't appeal to you, they can be left out. Other nuts like pecans, walnuts, or sunflower kernels can be used instead of almonds. The dressing makes quite a bit, so sometimes I don't need all of it. It will depend on personal preferences, and how much broccoli you use. I purchase broccoli very often and love it in this salad, so hope you'll give it a try. It makes a pretty dish to add to any holiday table.
Broccoli and Orange Salad
From Lynda's Recipe Box-inspired by several recipes that I combined

6-8 sliced of bacon, cooked crisp and crumbled
1 pound or more of broccoli -I used about 5 cups of florets and diced small stems. Could use a bit more to use all the dressing.
1/2 of a small red onion, diced
1/2 cup dried cranberries- Craisens
1/2 cup sliced almonds, lightly toasted
11 ounce can of manadin oranges, well drained - I often use fresh mandarins, or another variety of small orange
1 cup mayonnaise
1/4 cup sugar
3 tablespoons red wine vinegar

1. In a small bowl mix the mayonnaise, sugar and red wine vinegar to make the dressing. Set aside.
2. Cut up the broccoli, separating the florets into bite sized pieces, and slice the tender stalks also. Place into a large bowl.
3. Add the diced red onion, dried cranberries, almonds, mandarin oranges, and bacon. Add half of the dressing and mix well. Add as much of the remaining dressing as you want. Stir, cover and refrigerate at least an hour until chilled. Garnish with bacon or additional nuts if desired. Serve and enjoy!

Thursday, October 18, 2012

Pecan Pie Bars

 Pecan Pie Bars with a shortbread style crust, a sweet, creamy filling and crisp, toasted pecans on top; they're like pecan pie only without all the work!
My husband and I love pecan pie. His mother always made the best the best pies and her pecan was super delicious. But sometimes I don't don't like fussing with a pie. With bars you can just have a bite or two, or maybe more if you want.
 Pecan Pie Bars are a perfect take along dessert for Thanksgiving, or any others gatherings. Take them to a potluck, or to work as a treat for your co-workers. Make them for neighbors, or just make them for yourself - you deserve a treat too!
I made the crust in my food processor, but you can make it in a bowl using a pastry blender or fork also. Just cut the butter well into the flour ingredients. So addictive and so much easier than making pie. Hope you'll give these a try.
Pecan Pie Bars
Slightly adapted from The Girl Who Ate Everything

Crust Ingredients:
2 cups all purpose flour
1/4 cup granulated sugar
1/2 teaspoon salt
3/4 cup cold, unsalted butter - 12 tablespoons

Filling:
3 large eggs
1/2 cup packed brown sugar
1/2 cup granulated sugar
1 cup light corn syrup
2 tablespoons melted butter
1 teaspoon vanilla extract
1 3/4 cups chopped pecans

1. Preheat the oven to 350 degrees F. Grease or spray a 9x13 inch baking pan with cooking spray. 
2. In a bowl mix the flour, sugar, and salt. Cut in the cold butter until the mixture is fine particles. Or you can mix this in a food processor and pulse until you have fine crumbs. Pour crust mixture into the prepared baking pan. Spread out evenly and press crust down firmly all over.
3. Place crust in oven and bake for about 20 minutes until just lightly golden around edges.
4.While crust is baking prepare the topping. Mix eggs, sugars, corn syrup, melted butter and vanilla together in a bowl until smooth. Stir in the chopped pecans. Spread the topping over the crust as soon as it comes out of oven.
5. Place bars in the oven and bake for 25-30 minutes until the topping is set. If the topping jiggles, it is not done. If the topping begins to brown to much, loosely place a sheet of foil over the pan.
6. Allow Pecan Pie Bars to cool completely before cutting. Enjoy!

Sunday, September 9, 2012

Pumpkin Cake Bars

 Technically it is late summer, but fall weather blew in with the storm we had a couple of days ago. I absolutely love fall and fall foods, so I couldn't wait to make something pumpkin. I can't even remember where I got this recipe years ago, but the first time I made it I thought the name was deceiving. It was called Pumpkin Bars, and somehow I assumed that it would turn out somewhat like a brownie. I was wrong. These bars are cake-like and moist, almost as dense as pumpkin bread really, but delicious. This recipe has become a staple at my house because I always have canned pumpkin in my pantry, so I can whip it up at a last minutes notice. I've made these Pumpkin Cake Bars so many times through the years. They are always well received at our church's pot luck dinners, family get togethers and they have been devoured at many funeral dinners that I've helped with. Oh, and my husband loves them too. These Pumpkin Cake Bars are made in a jelly roll pan and topped with Cream Cheese Frosting, which is always a favorite. So if you need an easy, yummy dessert to make, give this a try.
Pumpkin Cake Bars
Origin of recipe forgotten-sorry!
(Update! It was pointed out to me that I had a couple of mistakes in my recipe. So sorry for any problems this may have caused. It has been corrected-thanks! 10-29-14)

Ingredients:
2 cups all purpose flour
2 cups sugar
2 teaspoons baking powder
1 teaspoon baking soda
1/2 teaspoon salt
1 teaspoon cinnamon
1 teaspoon pumpkin spice (or use another teas. cinnamon if desired)
1 cup oil
4 eggs, beaten
1 can of pumpkin

Preheat the oven to 350 degrees. Grease a jelly roll pan. I used a 17 1/2 x 12 1/2 inch jelly roll pan with 1 inch sides, also called a Baker's Half Sheet. (It will also fit in a 10 1/2 x 15 1/2 inch pan with 1 inch sides, but may need to bake a few minutes longer.) In a large bowl, mix the dry ingredients together with a whisk. In another bowl, mix the oil, eggs, and pumpkin. Add the wet ingredients to the dry and stir until just mixed. Pour batter into prepared pan and bake in oven for about 20-25 minutes, or until a toothpick inserted in middle comes out clean. Cool on a wire rack. Frost with Cream Cheese Icing. Enjoy!

Cream Cheese Frosting:
4 ounces cream cheese, softened
1/4 cup unsalted butter, softened
1 3/4 cups powdered sugar
1 teaspoon vanilla extract
In a large bowl, cream the butter and cream cheese together with a mixer. Mix in the powdered sugar and vanilla. Spread over cake. Enjoy!

NOTE: This makes a fairly thin layer of frosting, You may increase the amount of frosting if desired. I always top the frosting with about 1/2 cup of chopped pecans.
If you want a thicker frosting, use 8 ounces  cream cheese, 1/2 cup butter, 3 1/2 cups powdered sugar, and 1 1/2 teaspoon vanilla.

Wednesday, March 28, 2012

Ina's Herb-Roasted Turkey Breast

Turkey isn't just for Thanksgiving. A whole turkey breast cooks in less time than a whole bird does and you can do quite a bit with the left-overs. This recipe from Ina Garten is full of fantastic flavor which comes from the herb and garlic rub that is put under the skin as well as rubbed over it. A mixture of garlic, rosemary, sage and thyme as well as a few other ingredients gives this turkey breast personality! I've made this recipe several times and my husband and I always enjoy it. It is my favorite way to prepare turkey now. This Herb-Roasted Turkey Breast is wonderful for leftovers too.

Leftovers are delicious used in sandwiches, or can be used in any recipe where cooked chicken is used. This is just your average supermarket whole turkey breast, that when prepared this way, will give you a fantastic dish for your family or guests. I wanted to make this last week before the weather got too much warmer. I hate heating up the kitchen after it turns warm outside. I hope you will give this recipe a try.

Herb-Roasted Turkey Breast
slightly adapted from Ina Garten
Hint: Use fresh herbs for maximum flavor! I have used dried thyme, but the rosemary and sage are best fresh, in my opinion.

Ingredients:
1 whole bone-in turkey breast 6-7 pounds
1 tablespoon fresh minced garlic
2 teaspoons dry mustard
1 tablespoon chopped fresh rosemary
1 tablespoon fresh sage, chopped
1 teaspoon fresh thyme leaves
2 teaspoons kosher salt
1 teaspoon ground black pepper
2 tablespoons olive oil
2 tablespoons freshly squeezed lemon juice
1 cup chicken broth (recipe calls for wine)

Directions:
Preheat oven to 325 degrees F. Place turkey breast skin side up on a rack in your roasting pan.

In a small bowl, mix together the mustard, garlic, herbs, salt, pepper, lemon juice and olive oil. Loosen the skin carefully from the meat of the turkey. ( Take your fingers and just carefully push underneath the skin to loosen all the way to the back.) With your fingers, gently smear half of the herb mixture underneath the skin. Pat skin back in place and then rub remaining herb mixture over the skin. Pour the chicken broth into the bottom of the roasting pan.

Roast the turkey breast, uncovered for 1 3/4 to 2 hours, or until an instant read thermometer inserted at the thickest part of the meat reads 165 degrees F., and the skin is golden. If the skin is getting too brown, cover loosely with foil. When turkey is done, remove from oven, and let meat rest for 15-20 minutes. Slice and serve with the pan juices spooned over the meat.
NOTE: I let the meat rest about 30  minutes this time, so that I could remove one half of the breast from the bone. To do that, take a boning knife and cut done the middle of the breast next to the bone. Cut down as far as you can. With fingers of the other hand, pull the meat back from the bone and cut down the rib cage. You will be able to remove the side in one large piece. Then, slice the meat as shown in my picture and place on a platter. Enjoy!


Monday, January 30, 2012

Brown Butter Pumpkin Layer Cake

 I know, many of you will think that pumpkin is so Fall like, but my husbands birthday was last week and he really wanted a pumpkin cake. I've had this cake bookmarked for quite a while, so decided to try it now. I wanted to make a special cake for my sweetie, who's getting older and wiser, and who does not always share my chocoholic tendencies. This cake did not disappoint. In fact we both thought it was one of, if not the best cake we've ever tasted! Being a pumpkin cake, it is dense and moist and the browned butter in the cake, AND in the Cream Cheese Frosting, makes this a "To Die For", dessert! The frosting also has brown sugar in it and it's delicious.We couldn't quit groaning as we shoveled it in. You've got this cinnamony, gingery, spice flavored cake with the browned butter, cream cheese combination that's just amazing. In short, this is a keeper. Can't wait to try making cupcakes.
 I changed the recipe some. I increased the cinnamon in the cake batter, and decreased the ginger. I decreased the brown sugar just a bit, but now I don't think I needed to. I thought the cake might be too sweet because I planned on increasing the frosting, but it was just fine. I knew that the amount of frosting wouldn't be enough, so I increased that. I also did not do the nut topping like the recipe. I just used some roasted pecans that I tossed with butter, sugar and a little salt and then decorated the cake rim. The next time I make this cake, I'm going to add some chopped pecans between the cake layer, like the recipe suggests. While this cake and the frosting use brown butter, this is not a hard cake to make. It does require a bit more time, so it would be best to make it early in the day, or make the cake layers the day before and then wrap them in plastic wrap. Then assemble the next day. Either way, this Browned Butter Pumpkin Layer Cake is worth the trouble.  Delicious, decadent, addictive and so much more; it's a cake to dream about. I hope you'll give it a try.

Brown Butter Pumpkin Layer Cake

For the cake:
3/4 cup, (12 tablespoons),  unsalted butter
2 cups unbleached, all purpose flour
1 1/2 teaspoons baking soda
2 teaspoons ground cinnamon
1/2 teaspoon ground ginger
1/4 teaspoon ground cloves
3/4 teaspoon table salt
1 1/2 cup granulated sugar
1/2 cup light brown sugar - originally calls for  2/3 cup
2 large eggs
1/3 cup buttermilk
1 can of pumpkin puree, or homemade puree

1. Preheat the oven to 350 degrees F. Move the oven rack to center of the oven.
2. Grease and flour 2 round cake pans that are 9x2 inches. Use parchment if desired. My cake did fine without it.
3. In a heavy bottomed saucepan, heat the butter over medium heat. Every minute or so, stir or roll the butter around. The butter will foam and begin to turn a nutty shade with bits of brown . This will take about 4 minutes. Pour into a bowl and cool.
4. In a large bowl, combine the flour, baking soda, cinnamon, ginger and cloves.  In another bowl, combine the granulated sugar, brown sugar, eggs, buttermilk, sugar, pumpkin and mix well.
5. Mix the wet ingredients into the dry ingredients together in intervals. Mix in the brown butter. Do not over mix this batter. You will not need and electric mixer for this cake.
6. Divide the batter evenly into the 2 cake pans and smooth the top. Bake for 25 - 30 minutes until done. Toothpick inserted into cake should come out clean. Cool the cake in pans for 10 minutes. Run knife around the cake and invert onto cooling racks. Cool completely.

Browned Butter Cream Cheese Frosting:
10 tablespoons unsalted butter
8 ounces cream cheese, room temperature
1/3 cup light brown sugar
3 cups powdered sugar

1. In a heavy pan, brown the butter just as you did for the cake. Pour into a small bowl, and set it in the freezer for 12-15 minutes. Don't let it get hard on the top. Butter needs to be cool to add to the frosting, but don't let it get too hard. Or, you could pour the butter through a small mesh sieve to catch the small browned bits. You won't pour the brown bits into the frosting. Take a spoon and spoon out the cooled butter, taking care to not scrape up the browned bits.
2. In a large bowl, cream the cream cheese well; mix in the brown sugar and beat until fluffy. Mix in the cooled brown butter, and the powdered sugar in with the cream cheese. Beat until creamy. If the frosting is too stiff, add about a tablespoon of cream, or milk.

Assemble and frost the cake:
Place one cake on your cake plate. Add about 1 cup frosting, or your desired amount, and spread evenly to the edge of cake. Place remaining cake on top of frosting. Frost sides and top of cake. Decorate with pecans.

For Pecans: Mix 1 cup pecans, tablespoon melted butter, 1 tablespoon sugar and 1/8 teaspoon salt. Toast in a skillet for a few minutes, or in the oven. Cool nuts completely on a paper towel lined plate. The original recipe calls for more nuts, and uses them between the layers of the cake, and then piling the rest on top of cake. It also calls for candied ginger, which I did not use.


Monday, January 16, 2012

Pumpkin Bread

 Moist, fragrant pumpkin bread is one of my favorite quick breads. It's right up there with Banana Bread for me. This is my Mother's recipe that she made for many years. I  cut my teeth on this delicious bread when I was a kid, so this recipe has been around for awhile. I made this during Christmas and for got to post it. So here's my recipe. I hope you'll give it a try.
Pumpkin Bread
from my Mother
This recipe makes 2 large loaves.

Grease and flour 2- 9x5 inch loaf pans. Preheat oven to 350 degrees F.
Dry ingredients:
2 1/2 cups all purpose flour
3 cups sugar
2 teaspoons baking soda
1 teaspoon salt
1 teaspoon cinnamon
1 teaspoon pumpkin spice
Sift all these ingredients together in a large bowl.

Wet ingredients:
1 cup vegetable oil- I use canola
2/3 cup water
4 eggs, beaten
1 can of pumpkin puree
1 cup chopped nuts - I used pecans this time
Mix wet ingredients together; stir into the dry ingredients, and then fold in nuts.
Divide the batter evenly between the 2 loaf pans. Bake for about 1 hour, or until a toothpick inserted in the middle comes out clean. Cool bread in the pans for 10 minutes. Then run a knife around the edges of the pumpkin bread and invert the loaves onto cooling racks. When completely cool, wrap in foil. Enjoy!

Monday, December 12, 2011

Molasses Sugar Cookies

I'm a bit late starting with my Christmas baking, but had to make these wonderful cookies. You will have the spicy aroma of cinnamon, ginger and cloves, with a touch of molasses wafting through your home if you make these Molasses Sugar Cookies. This was my dear Mother-in-Law's recipe and I loved it when she would bring us some of these tasty, spice laden cookies. These delicious cookies will be an addition to my cookie gifts this year, if my husband and I can stay out of them, that is!
My Mother-in-Law passed away about a month ago, but making her cookies made her seem very near and dear yesterday. I put on some Christmas music, turned on the lights on the tree and got busy with cookie making. If you haven't made Molasses Sugar Cookies yet, give them a try. I think you'll like them. Here's the recipe.

Molasses Sugar Cookies
a family recipe

3/4 cup shortening
1 cup granulated sugar
1/4 cup molasses
1 large egg
2 teaspoons baking soda
2 cups flour
1/4 teaspoon ground cloves- my MIL used 1/2 teaspoon
1/2 teaspoon ground ginger
1 teaspoon ground cinnamon
1/2 teaspoon salt

Melt the shortening in a sauce pan over low heat. Remove from heat and let cool some. Add the sugar, molasses and the egg to the melted shortening and beat well.
In a large bowl, combine the flour, baking soda, salt and the spices. Mix well. Add the shortening mixture to the flour mixture and mix until all incorporated. Chill, covered, in the refrigerator for at least one hour, or overnight.
To bake: Preheat oven to 375 degrees F. Roll dough into 1 inch balls and then roll each ball into granulated sugar. Place on cookie sheet lined with parchment paper. Bake 8-10 minutes. Cookies will look crackled. Cool on baking racks. I hope you enjoy our Molasses Sugar Cookies!

For more cookie recipes for your Christmas baking, click here.
NOTE: I have substituted butter for the shortening before, which does work, although the cookies were flatter. But of course the butter tasted good. :)

Wednesday, November 16, 2011

Sausage and Cornbread Dressing


 I love dressing. It is one of my favorite components of Thanksgiving dinner. I like it better than turkey. I'll even take it over mashed potatoes. For me, dressing is on the same level as homemade cranberry sauce, sweet potatoes and apple pie.
I've always made an all bread stuffing, but I have memories of eating a super delicious cornbread stuffing years ago at a church dinner. This Cook's Country recipe is wonderful, perfect in almost every way, and reminded me of that long ago dressing. You need to make the corn bread a couple of days ahead, to cut down on food preparations on the big day. I made only half the recipe, because a 9x13 pan is way too much for just my hubby and me. He stills prefers a bread stuffing, but I have been in heaven with this stuff. Even though this recipe contains sausage, the dressing would be equally delicious without the meat. I did double the sage and  I added alittle bit of sugar (gasp!) to the cornbread recipe. I'm one of those people that like some sweetness to the cornbread. Here's the full recipe, for the cornbread, and then the dressing, with my changes added.

Sausage and Cornbread Stuffing
Slightly adapted from America's Test Kitchen and Cook's Country.
Cornbread can be made up to 2 days ahead to have time to stale.

Cornbread Recipe:
2 2/3 cup milk
1/2 cup oil
4 large eggs
2 cups cornmeal
2 cups all-purpose flour
4 teaspoons baking powder
1 teaspoon salt
4 tablespoons sugar- my addition

1. Preheat the oven to 375 degrees. Grease and flour a 9x13 inch baking pan. In a bowl, whisk together the milk, eggs, and oil. In another bowl combine, flour, cornmeal, salt and sugar. Add the milk mixture to the flour mixture, whisking until smooth.
2. Pour batter into prepared pan and bake until golden and toothpick inserted in the middle comes out clean, about 30 minutes. Cool in pan.
3. If the cornbread is made 2 days in advance, you may not need to oven-dry the cornbread. If using freshly baked cornbread, cut cooled bread into 1 inch cubes and place on 2 baking sheets. Place pans in a250 degree oven for about 50-60 minutes. Cool.

DRESSING:
1 1/2 pounds bulk pork sausage- I used Jimmy Dean
2 onions, finely chopped
4 ribs celery, finely chopped-- the recipe calls for 3 ribs
6 tablespoons unsalted butter
2 cloves minced garlic- recipe calls for 4 cloves
2 teaspoons dried sage- Recipe calls for 1 teaspoon dried sage
1/2 teaspoon dried thyme- recipe calls for 1 teaspoon thyme
3 1/2 cups low-sodium chicken broth- I needed a little more
1 cup half and half
4 large eggs
1/2 teaspoon salt
pinch of cayenne pepper- recipe calls for 1/8 teaspoon

1. Cook sausage in a skillet over medium high heat, but turn heat down if it begins to burn. Transfer sausage to a paper towel lined plate, reserving 2 tablespoons of grease in the skillet and adding 2 tablespoons of butter also. I did not have hardly any grease, so I added 4 of the tablespoons of butter to the skillet. Add the onion and celery and cook until softened, about 5 minutes. Add sage, thyme and garlic to the pan and saute about 30 seconds. Stir in the broth, and remove the pan from the heat. Cool about 5 minutes.
2. In a large bowl, whisk together eggs, half and half, salt and cayenne. Slowly stir in the warm broth mixture. Fold  in the cubed cornbread and the cooked sausage. Let the mixture sit, tossing occasionally, until all the liquid is absorbed, about 20 minutes.
3. Heat oven to 375 degrees. Grease a 9x13 inch baking pan. Pour the dressing mixture into the pan and drizzle with the leftover melted butter. I forgot to do that and didn't really miss it, but more butter is great in stuffing. The dressing still came out golden and delicious. Bake for 30-40 minutes until golden and crisp. Serve and enjoy.

Are you a fan of cornbread dressing, or do you prefer a bread dressing?


Monday, November 14, 2011

Easy Cranberry and Apple Cake from Ina Garten

 This is an awesome tasting cake. One reason I wanted to try this cake was because it is small. Since my husband and I are now empty nesters, I don't want lots of dessert sitting around. Another reason for this cake is because I love cranberries and apples together. The cranberries and apple are mixed with brown sugar, cinnamon, orange juice and zest, and placed in baking dish. Then batter is spread over the berry mixture and it bakes and is ready to eat as soon as it comes out of the oven, if you wish! And boy does it smell good while baking! It is better served warm, so there's no torture waiting for it to cool down. Add whipped cream or ice cream if you wish. I like it best without adornment, so I can taste the lovely tart fruit that is infused with cinnamon and orange. I'm addicted. The only changes I made were minor; I used low fat sour cream because that's what I had. I only used the zest from 1 orange, instead of 2. This Cranberry and Apple Cake would be delicious anytime, even for Thanksgiving dinner. I even had it for breakfast this morning (hehe). I hope you'll give it a try.
Easy Cranberry and Apple Cake
adapted slightly from Ina Garten
NOTE: There is no baking powder or soda in this recipe.
12 ounces fresh cranberries
1 Granny Smith apple, peeled, cored and diced
1/2 cup light brown sugar
zest of 1 orange- Ina says 2 oranges zested
1/4 cup fresh orange juice
1 1/8 teaspoon ground cinnamon, divided ( 1/8 teas. for topping)
2 large eggs- Ina uses extra large eggs
1 cup granulated sugar, plus 1 tablespoon for topping
1 stick unsalted butter - 1/4 pound
1 teaspoon vanilla
1/4 cup sour cream - I used lowfat because that's what I had
1 cup all purpose flour
1/4 teaspoon salt

Preheat oven to 325 degrees F.
Combine cranberries, diced apple, brown sugar, orange juice and zest, and 1 teaspoon cinnamon in a bowl. Set aside.
In a large bowl, beat the eggs on medium high speed for 2 minutes. Add the 1 cup sugar, melted butter, vanilla and sour cream and beat until just combined. Slowly add the flour and salt at low speed.
Pour the fruit mixture into a 10 inch pie plate. Pour or spoon the batter over the fruit, covering completely. Sprinkle top with mixture of 1/8 teaspoon cinnamon and 1 tablespoon sugar. Bake for 55-60 minutes. Serve warm or at room temperature. Try not to eat the whole thing!