Wednesday, March 28, 2012

Ina's Herb-Roasted Turkey Breast

Turkey isn't just for Thanksgiving. A whole turkey breast cooks in less time than a whole bird does and you can do quite a bit with the left-overs. This recipe from Ina Garten is full of fantastic flavor which comes from the herb and garlic rub that is put under the skin as well as rubbed over it. A mixture of garlic, rosemary, sage and thyme as well as a few other ingredients gives this turkey breast personality! I've made this recipe several times and my husband and I always enjoy it. It is my favorite way to prepare turkey now. This Herb-Roasted Turkey Breast is wonderful for leftovers too.

Leftovers are delicious used in sandwiches, or can be used in any recipe where cooked chicken is used. This is just your average supermarket whole turkey breast, that when prepared this way, will give you a fantastic dish for your family or guests. I wanted to make this last week before the weather got too much warmer. I hate heating up the kitchen after it turns warm outside. I hope you will give this recipe a try.

Herb-Roasted Turkey Breast
slightly adapted from Ina Garten
Hint: Use fresh herbs for maximum flavor! I have used dried thyme, but the rosemary and sage are best fresh, in my opinion.

Ingredients:
1 whole bone-in turkey breast 6-7 pounds
1 tablespoon fresh minced garlic
2 teaspoons dry mustard
1 tablespoon chopped fresh rosemary
1 tablespoon fresh sage, chopped
1 teaspoon fresh thyme leaves
2 teaspoons kosher salt
1 teaspoon ground black pepper
2 tablespoons olive oil
2 tablespoons freshly squeezed lemon juice
1 cup chicken broth (recipe calls for wine)

Directions:
Preheat oven to 325 degrees F. Place turkey breast skin side up on a rack in your roasting pan.

In a small bowl, mix together the mustard, garlic, herbs, salt, pepper, lemon juice and olive oil. Loosen the skin carefully from the meat of the turkey. ( Take your fingers and just carefully push underneath the skin to loosen all the way to the back.) With your fingers, gently smear half of the herb mixture underneath the skin. Pat skin back in place and then rub remaining herb mixture over the skin. Pour the chicken broth into the bottom of the roasting pan.

Roast the turkey breast, uncovered for 1 3/4 to 2 hours, or until an instant read thermometer inserted at the thickest part of the meat reads 165 degrees F., and the skin is golden. If the skin is getting too brown, cover loosely with foil. When turkey is done, remove from oven, and let meat rest for 15-20 minutes. Slice and serve with the pan juices spooned over the meat.
NOTE: I let the meat rest about 30  minutes this time, so that I could remove one half of the breast from the bone. To do that, take a boning knife and cut done the middle of the breast next to the bone. Cut down as far as you can. With fingers of the other hand, pull the meat back from the bone and cut down the rib cage. You will be able to remove the side in one large piece. Then, slice the meat as shown in my picture and place on a platter. Enjoy!


Monday, March 26, 2012

Bacon-Cheddar-Chive Scones

When I saw this recipe for Bacon-Cheddar-Chive Scones, I knew they were in my near future. I had never had a savory scone before, but with bacon and cheese as ingredients, I knew these just had to be tasty. And are they ever good! These savory scones would be a delicious addition to Easter brunch and they are also really good served with soup or salad. The first time I halved the recipe and used half and half instead of cream, because that's what I had on hand. But the scones are more tender when made with heavy cream like the recipe calls for. I also added some coarse ground pepper, but I didn't think it added anything to the taste. If you are worried about calories, make mini scones. With smokey bacon, oozing cheese and the oniony chives, these scones are irresistable.

Scones are easy to make, just don't overwork the dough. Stir up the ingredients, then pat the dough into an even circle, and cut into wedges. If you want to make mini scones, divide the dough in half and then cut into wedges.

These scones bake quickly! I almost left mine in the oven too long and you can see how golden they got. They were done in less time than the recipe stated. These Bacon-Cheddar-Chive Scones taste amazing, so I hope you'll give them a try!
BACON-CHEDDAR-CHIVE SCONES
Adapted from King Arthur Flour

2 cups all purpose flour
1/2 teaspoon salt- recipe calls for 1 teaspoon
1 tablespoon baking powder
2 teaspoons sugar
4 tablespoons cold butter
1 cup coarsely grated  or diced cheddar cheese
1/3 cup snipped fresh chives -can use diced scallion tops
1/2 pound cooked bacon, crumbled - about 1 cup
3/4 cups heavy cream, plus 2 tablespoons more if needed
about 1/8 teaspoon coarse ground pepper- not really needed

Preheat oven to 425 degrees. Line a baking sheet with parchment, or grease it.
1. Whisk together flour,salt, baking powder, and sugar.
2. Use a pastry cutter, work the butter into the dry ingredients until unevenly crumbly
3. Mix the bacon, cheese and chives in with the flour mixture.
4. Add 3/4 cup of the heavy cream, stirring to combine. Try squeezing the dough together; if it is too crumbly and there are many crumbs in the bottom of the bowl, add the extra 1 or 2 tablespoons of cream until the dough comes together. Transfer the sticky dough to a floured work surface.
5. Pat the dough into about a 7 inch disk about 3/4 inch thick. Place dough on prepared baking sheet.
6. Use a knife to cut the disk of dough into 8 wedges. Spread the wedges apart on the pan.
7. Brush each scone with some cream. This will help them to brown.
8. Bake the scones for 22-24 minutes until golden brown. Mine were done in 19 minutes, so watch carefully! Mini scones will bake in 15-20 minutes. Remove scones from oven. Serve them warm, if possible, but room temperature is fine also.
TIPS:
These scones can be made several hours ahead of time, or even the night before, and then baked right before serving. To do this, get them ready for baking, and cover loosely with plastic wrap. Place baking pan with scones in the refrigerator for several hours, or overnight. The next morning, remove plastic wrap and place scones in preheated oven and bake per directions. Enjoy!
Unbaked scones can also be frozen. Place scones on baking sheet, and freeze them. Remove frozen scones and wrap artight in freezer bags and place in freezer. When ready to bake, place scones on a baking sheet, brush with cream and bake in preheated 425 degree oven for 35-40 minute. Watch carefully.


Wednesday, March 21, 2012

Homemade Sandwich Buns

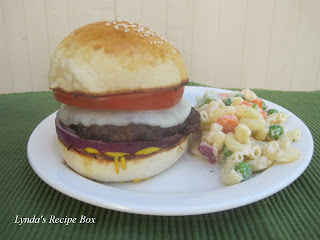
 I finally made these fantastic Homemade Sandwich Buns last week. I've had them bookmarked forever from Cathy at Wives With Knives. If you haven't sen her blog, you need to pay her a visit. With gorgeous pictures and mouthwatering recipes, I can always find something to try there. These sandwich rolls are wonderful for any type of sandwich and they are ready  in about 60 minutes, start to finish! I used them for ham and cheese sandwiches and hamburgers and loved them. I made larger buns than Cathy does, which my husband loved, but they were too large for me. I made 10 buns, but next time will try 12. My husband ate the first one while it was still hot, you know, just to make sure they were OK. HaHa! Even a plain skillet fried hamburger tasted wonderful in these buns. They freeze wonderfully, so I'll be keeping these on hand. Hope you'll give them a try!
Homemade Sandwich Buns
Slightly adapted from Wives With Knives

1 cup milk - I used 2%
1/2 cup water
1 tablespoon honey
1/4 cup butter- I used unsalted butter
1 large egg, room temperature
4 1/2 cups flour- I used unbleached
1 package instant yeast (2 1/4 teaspoon)
1 1/2 teaspoon salt-I only used 1 teaspoon
1 beaten egg yolk, for brushing on the rolls before they bake
Sesame or poppy seeds for sprinkling on tops before baking

1. Heat the milk, honey, water and butter until the butter is melted. Cool to 120F. Beat in the egg.
2. Mix 2 cups of the flour, salt and yeast together. Stir into the milk mixture. Stir in the rest of the flour, 1/2 cup at a time and beat well after each addition.
3. When the dough pulls together and forms a soft ball, turn it out onto a floured surface and knead it until smooth, about 5 minutes. If dough is sticky, add a little more flour as you knead.
4. Divide dough into equal parts. I made 10 rolls, which turned out to be just right for my husband, but too much for me. Next time I'll make 12 rolls, like Cathy does.
5. Shape the dough into smooth balls and place on a baking sheet lined with parchment paper. Flatten the rolls slightly with your hand.
6. Cover loosely with plastic wrap and let rise 30-40 minutes. When rolls are almost double in size, brush with beaten egg yolk, if desired. Sprinkle with poppy seeds or sesame seeds. Bake in a preheated oven for 10-12 minutes. Since my rolls were a bit larger, I baked them about 14 minutes.
7. Enjoy!


Sunday, March 18, 2012

Brown Sugar Cookies

 Chewy, crisp, rich, sweet and addictive. That's how I describe these wonderful cookies from Cook's Illustrated. These humongous cookies really are crisp on the outside, but chewy in the middle. Made with dark brown sugar and BROWNED butter, they have an almost butterscotch flavor. The recipe makes 24 very large cookies, so next time I may make them a bit smaller as they are so rich. The recipe may be more detailed than some cookie recipes, but Cook's always strives for the best! I was concerned whether my husband would like them, but, "Wow these are good!", were the first words out of his mouth after his first bite. I tried making this recipe my own, but really could not improve on it at all. I tried adding caramel chips, but too sweet. The only adaption I ended up liking was adding cinnamon to the sugar that the cookies are rolled in. After all, cinnamon and brown sugar are made for each other, in my opinion. Even so, the cookies are perfect without it. Hope you'll give these a try!
Brown Sugar Cookies
Only slightly adapted from Cook's Illustrated
NOTES: The recipe says to place 12 cookies on cookie sheet and bake, but they really spread out. Nine worked best for me, even though I used large pans.
Do not use nonstick skillet for the browned butter. You won't be able to judge the color of the butter.
Use only soft, fresh dark brown sugar. Dry sugar will give you dry cookies.


14 tablespoons unsalted butter, divided
1/4 cup granulated sugar
2 cups packed, dark brown sugar, divided
2 cups unbleached, all purpose flour
1/2 teaspoon baking soda
1/4 teaspoon baking powder
1/2 teaspoon table salt
1 large egg
1 egg yolk
1 tablespoon vanilla -yes, that's right
1/2 teaspoon cinnamon, optional- my addition

1. Melt 10 tablespoons of the butter in a skillet over medium heat. When melted, swirl the butter around until it is golden, with brown bits in it, about 1-3 minutes. Pour the melted butter into a heat proof container. Add the remaining 4 tablespoon of butter to the melted butter to melt. Let cool about 15 minutes.
2. Place your oven rack in the middle position in oven. Preheat oven to 350 degrees F. Line baking sheets with parchment paper. Mix the granulated sugar and 1/4 cup of the dark brown sugar in a bowl. Add the cinnamon, if using.
Whisk together the flour, baking soda and baking powder in a bowl.
3. Add the remaining 1 3/4 cup dark brown sugar and the salt, to the melted browned butter and mix well until there are no lumps. Add the egg, egg yolk and vanilla and stir. Add the flour mixture and mix until just combined. Divide the dough into 24 even portions (about 2 tablespoons). Roll into even sized balls. Roll each ball in the reserved sugar mixture. Place 2 inches apart on baking sheets.
Bake each pan for 12-14 minutes until the edges of the cookies begin to look set. Rotate the pan halfway through baking. The middle should still look undercooked. Remove from the oven and let the cookies cool on the baking sheet for about4- 5 minutes. Then remove the cookies to cooking racks. Don't over bake if you want chewy cookies. Enjoy!

Thursday, March 15, 2012

Crock Pot Teriyaki Chicken

If you are looking for a really delicious slow cooker recipe, this is the one for you. This Crock Pot Chicken Teriyaki uses boneless chicken thighs and is so easy to throw together. It doesn't take long to cook though, so this is not a recipe that you can leave cooking all day long. Your kitchen will smell amzing. I have made this twice so far and my husband and I have savored every bite. My thanks to Penny at Lake Lure Cottage Kitchen for this tasty recipe. I hope you'll stop by to see her fantastic blog and also give this recipe a try. It is the best crock pot chicken recipe I've ever had. With an Asian flavor, it's not too sweet or too salty. It's just right.

Crock Pot Teriyaki Chicken
From Lake Lure Cottage Kitchen
My only change was to add more garlic and I used low sodium soy sauce.

12 boneless, skinless chicken thighs
3/4 cup sugar
3/4 cup low sodium soy sauce
6 tablespoons cider vinegar
3/4 teaspoon ground ginger
3 cloves minced garlic
1/4 teaspoon pepper
5 teaspoons cornstarch
5 teaspoons cold water
Hot cooked rice
Sliced green onions or chives for garnish

Place chicken in slow cooker. Combine sugar, soy sauce, vinegar, garlic and pepper in a bowl and pour over the chicken. Cook on low 4-5 hours. Remove chicken from crock pot. Pour the hot liquid into a sauce pan. Skim off any fat. Bring juices to a boil. Combine the water and cornatarch and whisk into the simmering liquid. Cook a couple minutes until slightly thickened. Serve over chicken and rice. Adding sliced green onions as a garnish really adds to the dish. Enjoy!

NOTE: I made this with only 8 thighs and it worked just fine. It did take less time to cook though; about 3 1/2 hours. It will depend on your crock pot.

Monday, March 12, 2012

Peach Pudding Dessert

 I almost decided not to share this recipe because I've had it since my first year of marriage. I don't remember where the recipe came from, but I began making it in 1978, and husband loved it then as well as now. I use more peaches than what the original recipe calls for, and I added vanilla to the topping. Peach Pudding Dessert is almost like a cobbler. It's definitely not a gourmet dessert, but it is one of those gooey types that tastes best with a big scoop of vanilla ice cream next to it. I guess you could call this a pantry dessert. It is made with ingredients you already have on hand. Canned peaches are used in this recipe. I know some of you all may not approve of using canned peaches, but you may substitute frozen ones that have been thawed, if desired. The batter goes into the baking dish first. Then you place the peaches over the batter. Weird, right?
 Next, you mix brown sugar and cinnamon together and sprinkle it over the peaches. Then, you pour a cup of boiling water over the whole thing and put it in the oven! Crazy yes? But just let it bake away about an hour in the oven, and see. The cake like topping will be on top, and then the peaches and the sweet brown sugar, cinnamony pudding on the bottom. That is the star of this dessert. The topping is just a dense, cake like batter, but the real treat is the peaches and that brown sugar 'pudding'.
 So you see why I'm still making this dessert after all these years. My husband requires it. Yes, there are prettier desserts, and yes there are more delicious desserts. But this is good too, so every once in a while my husband will  ask for this Peach Pudding Dessert, and I'm happy to oblige. A big scoop of this dessert, nestled in a bowl with some vanilla ice cream, or frozen yogurt, makes us very happy. Let me know if you give it a try!
Peach Pudding Dessert
origin unknown to me

1 cup all purpose flour
3/4 cup sugar
2 teaspoons baking powder
1/4 teaspoon salt
1/2 cup milk
1/2 teaspoon vanilla
3 tablespoons vegetable oil
1 can (29 ounces) drained -you may not need all of them (or use frozen peaches that are thawed)
1 cup brown sugar, packed
1 teaspoon ground cinnamon
1 cup boiling water
1/4 cup chopped pecans - optional , I've never used them

Preheat the oven to 350 degrees F. In a bowl mix the flour, sugar, baking powder and salt. Stir in the milk, oil and vanilla. Pour batter into an 8x8x2 inch baking dish and smooth. Arrange peaches over the batter, placing them close together. In small bowl, mix the brown sugar and cinnamon together. Sprinkle it over the peaches. Pour the 1 cup of boiling water carefully over all. Bake for 60-70 minutes until a tooth pick inserted in the cake comes out clean. There may be some pudding mixture on it but the dough should show done. Serve warm with vanilla ice cream. Enjoy!


Friday, March 9, 2012

Tangy Glazed Pork Loin

 I love a good pork loin roast. If done properly, it will be very moist and tender, and with this wonderful glaze it will become heaven on a plate!  My husband and I practically licked our plates clean with this roast. The glaze is made with vinegar, soy sauce and sugar, so it's rich, sweet and tangy. The sage and garlic from the rub add wonderful flavor also.
My pictures don't do it justice, as the day was so dark and stormy, so there was not good light anywhere. But the taste was fantastic and that's what matters. This Tangy Glazed Pork Loin is a company worthy roast dinner.
 I found the recipe from Kay at the Church Cook. I don't know if you have visited her blog, but she cooks huge quantities of food for her church family, but usually gives the recipe for family size meals too. Her pictures and recipes are drool-worthy. I hope you'll give this recipe a try. I think you'll really like it!
Tangy Glazed Pork Loin
From Kay @ The Church Cook
Recipe from Ann Voskamp's book, The Spirit of Food
(I have not read this book)
NOTE: The recipe was for a 5 pound roast, but I used a small 2 1/4 pound roast for just my husband and I. Therefore I halved the recipe.

Ingredients:
For roast and rub-
1 teaspoon rubbed sage
1/2 teaspoon salt
1/4 teaspoon black pepper
1 clove garlic, minced
about a 2 1/2 pound pork loin roast, trimmed of any silver skin or tough membrane

Glaze ingredients:
1/2 cup sugar
1 tablespoon cornstarch
1/4 cup vinegar - I used white vinegar
1/4 cup water
2 tablespoons soy sauce

Let roast come almost to room temperature before roasting. Preheat oven to 325 degrees F. Place roast in a roasting pan. Mix rub ingredients together and sprinkle or rub all over the roast. Place pork loin in the oven and roast uncovered. About 30 minutes before the roast is done, you will baste it with the glaze several times. My small roast was done in about 1 hour and 20 minutes. Use a meat thermometer to make sure the roast cooks to  at least 145 degrees F. Mine went to 150, or a tad more, which was perfect for us.

To make glaze:
Stir together glaze ingredients in a sauce pan. Cook over low heat stirring until it thickens, remove from heat. Baste roast with glaze several times during the last 30 minutes of baking.
When done, remove pork loin from oven and tent loosely with foil. Let the meat rest about 15-30 minutes, before cutting into it. If using a much larger roast, let it rest longer.  Add some more glaze before carving. Enjoy!

Try my other pork roasts!
Orange-Glazed Pork Loin Roast
Adobo-Marinated Pork Tenderloin with Grilled Pineapple Salsa

Tuesday, March 6, 2012

Classic Coconut Cream Pie

If you love pie and coconut, then this creamy Coconut Cream Pie is for you. The creamy filling is chock full of toasted coconut, and then the pie is topped with fluffy golden meringue. I almost swooned the first time I tasted it two or three years ago. My husband loves it as much as I  do.
If meringue isn't your thing, then just top the pie with some homemade whipped cream and sprinkle on some more toasted coconut. Delicious! The filling is sweet, creamy and holds together well. Sometimes the filling in cream pies will be runny, but not this one. I have reduced the coconut used in the filling just a bit. I don't make this wonderful pie very often, because of it's addictive nature. So, it's best made when you can share with others. Hope you'll give it a try.
Coconut Cream Pie
Slightly adapted from Emeril Lagasse
Notes: Be sure to bake the pie shell in advance, so that it will be completely cool when you are ready to add the filling. I baked my own pie crust, but you are free to use purchased pie crust.

Ingredients:
1 blind baked 9 inch pie shell- cooled completely
2 1/4 cups whole milk, separated
3/4 cup granulated sugar, plus 1/4 cup used in meringue
3 eggs separated-egg yolks used in filling, whites in meringue
1/4 cup cornstarch
1 teaspoon vanilla
1 1/2 cups lightly toasted coconut*
1 tablespoon butter- I use salted butter
pinch if cream of tarter

* To Toast the coconut: Preheat oven to 350 degrees. Place coconut on baking sheet in thin layer. Bake in the oven, stirring every minute until coconut is lightly golden in color. Will take 4-5 minutes. Cool completely before adding to the pie filling.

Directions:
In a large saucepan, stir 2 cups of milk with the sugar. Place pan over medium heat and bring up to a simmer, stirring constantly. Whisk the egg yolks together. Temper the hot milk into the egg yolks. Here's what I do. Add about 1/4 cup of hot milk to the yolks, whisking continuously so the yolks won't cook. Then, add about the same amount of milk again, still whisking. Repeat again, then add the egg and milk mixture into the saucepan, while whisking. Mix the remaining 1/4 cup milk with the cornstarch, making a slurry. Whisk this mixture into the pudding and simmer, stirring constantly, until pie filling is very thick. Directions say 4-6 minutes, but mine is done before then. Remove pan from heat. Stir in the toasted coconut, vanilla and butter. Poor filling into cooled pie crust and smooth over the top. Cool completely. Prepare meringue, if using.

Meringue: Preheat oven to 400 degrees. With an electric mixer, beat the egg whites until soft peaks form. Add the remaining 1/4 cup sugar and the pinch of cream of tarter. Mix egg whites until stiff peaks form. Spread the egg whites over top of pie. I use the back of a spoon to create peaks or swirls in the meringue to look pretty. Be sure to bring the meringue up to the pie crust, making sure the meringue overlaps the crust a little, so it won't shrink back after baking. Sprinkle with a little more coconut if desired.
Bake for 3-4 minutes until meringue is golden. Cool. Enjoy!
NOTE: If you would like a higher meringue, just add 1 more egg white.