Showing posts with label healthy. Show all posts

Sunday, December 8, 2013

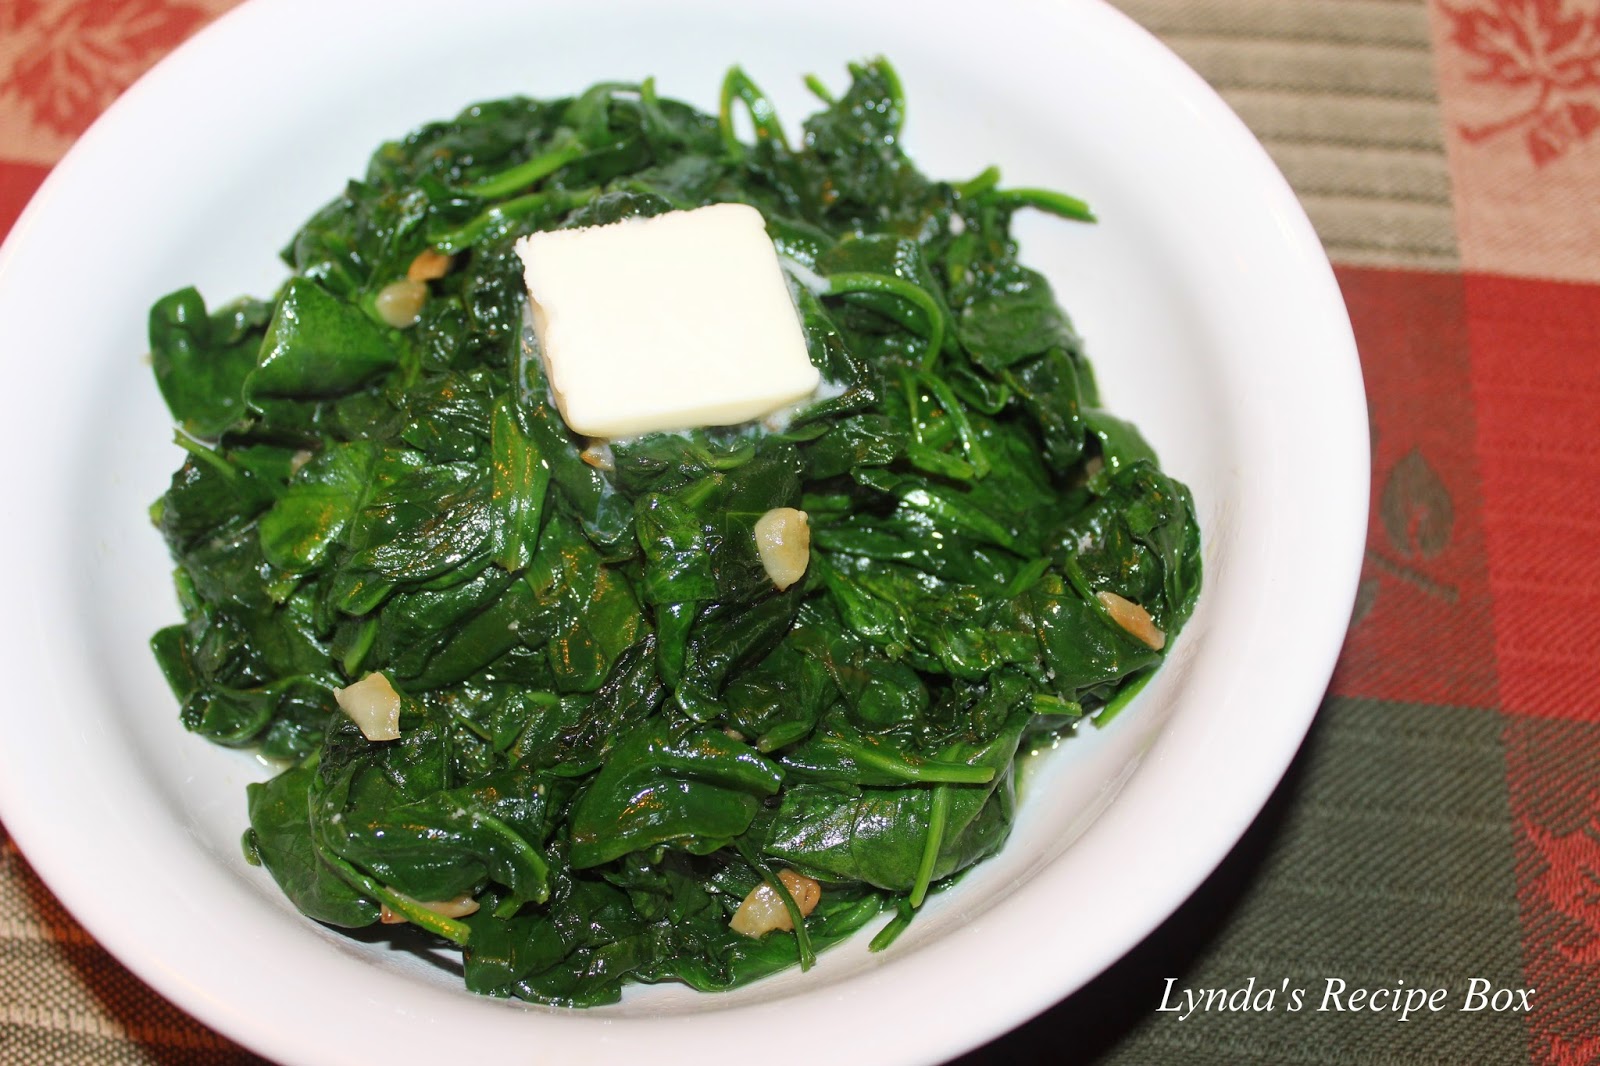
Garlic Sauteed Spinach

When I was a kid, the cartoon Popeye the Sailor Man was one of my favorite cartoons. I can remember wanting to be strong like him so I begged my mother to buy me the canned spinach that Popeye reportedly ate. When she prepared it for dinner one evening I can remember taking a few bites and then flexing my arm to see if I had muscles as large as Popeye's! Of course I didn't, but as we know spinach is considered a very healthy super-food adding lots of nutrients that our bodies need. Sauteing spinach in olive oil and garlic makes it a most delicious side dish. Really, if you love wilted spinach, I think you will enjoy this version adapted from Ina Garten, very much.

Garlic Sauteed Spinach
approximately 3-4 servings

1 pound of baby spinach, washed
4 cloves garlic, thinly sliced
1/2 teaspoon salt
1/4 teaspoon fresh black pepper
2 tablespoons olive oil
1 tablespoon butter
fresh lemon for squeezing

In a large pot or dutch oven, heat the oil over medium heat. Add the garlic and cook only about 1 minute. Don't let it get brown. Add all off the spinach, the salt and pepper to the pot. Give it a stir and cover the pot with a lid to let the spinach steam about 2 minutes. Remove the lid and give it a good stir and cook if needed, until all the spinach is wilted. Using a slotted spoon, remove the spinach to a serving dish. Top with the pat of butter and a good squeeze of lemon. Serve hot. Enjoy!


Thursday, March 7, 2013

Sauteed Kale with Roasted Butternut Squash, and Mushrooms

 I've started cooking with Kale this month. I like it sauteed with onions and mushrooms, and this last time I added some oven-roasted butternut squash to it. Yum!
I started a diet the first of February, and have lost 12 pounds! Yippee! My diet is called The Plan, by Lyn Genet, and it really is a change in eating  and considered an anti-inflammation diet. I won't get into the particulars too much, but will say that this is NOT a low fat diet. I still get to have lots of olive oil and butter. And I can eat dark chocolate too. My blood work ,(cholesterol), was perfect last week when I went to the Dr. He was amazed. My blood pressure meds also had to be adjusted. I'm very happy to say the least!
But let me get back to the kale. I was introduced to sauteed kale on The Plan, and found I really liked it with mushrooms and onion.
 So the next time I roasted some butternut squash, I added half of it to the kale. Very yummy! My store has only one type of kale, this curly leafed stuff. It needs to be washed very well as it sometimes feels a little gritty. I also prefer to cut out the thick stems and toss them out. This bunch of kale produced about 5 cups of chopped kale.
 I sliced some mushrooms and onions and sauteed them in olive oil for a couple of minutes, then added the the chopped kale. Then I sauteed the kale for another minute or two. You could add garlic too if desired.
 It's really good just this way, sprinkled with a little salt and pepper. The kale cooks down quite a bit, just like spinach does. I usually get 2 servings from a bunch of kale, but this bunch was a bit smaller.
 But adding in the oven-roasted butternut made this dish so delicious. You could use roasted sweet potatoes too, I'm sure. They certainly are easier to peel than butternut squash, but I'll definitely make this dish again with the butternut. I hope you'll give this a try!
Sauteed Kale, with Roasted Butternut Squash, and Mushrooms

butternut squash- peeled and cut into about 1 inch cubes-you will only need about 1/2 of the squash
1 bunch kale
1/2 of an onion, sliced thin
4 ounces sliced mushrooms-I've used Baby Bella and shiitakes
about 2 tablespoons olive oil
1 clove garlic, minced -optional
salt and pepper to taste

!. Cut the butternut squash in half and peel with a knife or a good vegetable peeler. Cut squash into about 1 inch cubes. Place on baking sheet, toss with some olive oil. Season with salt and pepper, or other seasonings of your choosing. Bake at 425 degrees F. for about 30 minutes, or until tender. Cool. You will use about 1/2 of the squash in the kale. I save the leftover squash for another meal.
2.Wash the kale; drain well and chop. Cut out the thick stems if desired. Slice mushrooms and onion. Mince garlic, if using.
3 In a large skillet heat the oil over medium heat. Add the mushrooms and onion. Stir, about 2 minutes until softened. Add the garlic and the chopped kale. Stir for 1 to 2 minutes, until the kale is softened to your liking. The kale will wilt, similar to spinach. Add salt and pepper to taste. Add in the butternut squash. Hope you enjoy!

Wednesday, May 9, 2012

Cajun Chicken Pasta - On the Lighter Side

 This may be a lighter version of the normally cream laden Cajun Chicken Pasta, but you wouldn't know it once you get a taste. This dish is just as packed with flavor and just as satisfying as the more fattening version. The cream sauce is actually made by combining low fat cream cheese, low fat milk and flour, and mixing into broth to make this dish so creamy and delicious. There are tons of veggies and I used a whole grain pasta, so this was healthy as well as packed with flavor from the Cajun spices. We loved it, so I'm already planning to make it again in a couple of days.
 This dish comes together very quickly after you get all the vegetables prepped and the sauce started. So it is crucial to have everything ready to go before you begin cooking. I made a few adjustments to the recipe, but nothing major. I made my own Cajun spice mixture, so that I can better control the salt. I used a little more olive oil, and 2% milk instead of skim, plus a couple of other slight changes. Be sure to check out the original recipe at Skinny Taste. There are many great looking recipes there. Now here's the recipe for this fantastic dish. I hope you will give this a try.
Cajun Chicken Pasta (On the Lighter Side)
Adapted from Skinny Taste

8 ounces uncooked linguine-I used Barilla's whole grain spaghetti instead
1 pound chicken breasts, cut into strips
1-2 teaspoons Cajun seasoning- I used almost 3 by the time it was done
about 2 tablespoons olive oil
1 red bell pepper, thinly sliced
1 yellow bell pepper, thinly sliced
8 ounces fresh mushrooms, sliced
1/2 of a red onion, sliced
3 cloves of garlic, minced or pressed
2 tomatoes, diced- I used Roma tomatoes
1 cup, fat free, low sodium chicken broth
1/3 cup skim milk- I used 2% because that's what we use
1 tablespoon flour
3 tablespoons light cream cheese
salt and pepper to taste
2 scallions/green onions, sliced

Directions:
1. Prepare all the vegetables, mushrooms and chicken.  Add the milk, flour, and cream cheese to a blender and  pulse until well combined and smooth. Set aside. Season the sliced chicken well with Cajun seasoning, and salt if needed. I used 2 teaspoons Cajun seasoning on the chicken. Use more or less, according to your preferences.
2. Cook pasta in salted water according to package directions.
3. Heat a large nonstick skillet over medium-high heat and spray with cooking spray. (I used a stainless skillet, so I had to use 1 tablespoon oil.) Add sliced chicken to skillet and saute for 5-6 minutes until done. You may need to do this in 2 batches. When done, place chicken on a plate and set aside.
4. Add 1 tablespoon oil to the skillet and reduce heat to medium. Add peppers, onions, mushrooms, garlic and a pinch of salt to skillet and saute 3-4 minutes. Add diced tomatoes and just heat through. Reduce the heat to medium low and add the chicken broth. when it simmers, stir in the cream cheese slurry, stirring until thickened about 2 minutes. Taste the sauce and adjust seasonings, if needed. I added a bit more Cajun spice at this point plus more salt.
5. Stir in the cooked pasta and heat through. Top with the sliced green onions and fresh ground pepper.  Boy is this good; Enjoy!
Wednesday, March 9, 2011

Tortellini Soup

There's nothing like a hot bowl of soup when you've been sick and it's cold outside to boot. I was wanting soup to eat the other night, but didn't want to spend too much time with it. I remembered this recipe that I had bookmarked, so decided to give it a try. With just a few ingredients, including purchased ravioli, it packs plenty of flavor and was plenty filling for me. It goes together very quickly, which is an added bonus. I hope you'll give it a try.

TORTELLINI SOUP
slightly adapted from The Well-Fed Newlyweds at Tasty KitchenBold
Ingredients:
1 tablespoon olive oil
2 cloves of garlic, minced
1/2 of a small onion, diced
1 large carrot, peeled and diced- my addition
1/2 teaspoon dried oregano
1/2 teaspoon dried basil-my addition
1 quart low sodium chicken broth, or stock
15 ounces small diced canned tomatoes-they used whole tomatoes
salt and pepper to taste
9 ounces tortellini, fresh or frozen- any variety (I used cheese filling)
3 cups fresh baby spinach
Parmesan cheese for topping

In a large pot heat the oil over medium heat. Add the onion and cook until softened. Then add the garlic and stir for about 30 seconds until fragrant. Add the oregano, basil, chicken broth, and tomatoes. Bring the soup to a boil and add the tortellini and cook according to the package directions. One minute before the tortellini are done, season with salt and pepper and add the spinach. Stir to combine. Dinner is now ready. Enjoy!


Friday, February 11, 2011

Moroccan Chicken Stew (Djej Kdra Touimiya)

I stepped outside of my comfort zone this week and tried food new to my palate. Not anything too drastic mind you, but I have not eaten Moroccan food before this. According to Saveur, this kdra is a cousin to a tagine. I did not have a clay pot to cook it in , just my dutch oven, but I thought it turned out delicious. And since this was my first foray into this type of dish, I need some feed back from any of you, my readers, as too how authentic this dish is. My husband was so quiet while eating that I thought he must not like it, but he said he was just enjoying the new flavors. So, I'll be making this again and next time I'll try some other dishes to go with it! I cut the recipe in half for just the two of us, and changed a couple of other things. My store didn't have blanched almonds, so I had to blanch my own, but it's quite easy to do. I'll give you the directions for that at the end of the recipe. Be sure to use the fresh lemon juice if you try this recipe; it really freshens the dish and adds pizazz to the flavors. The turmeric added a golden hue to the sauce and the almonds. The sauce is mildly sweet because of the cooked onions and with a hint of cinnamon and a splash of lemon, it is very tasty. It was a rather exotic meal for us in this cold weather. Let me know what you think!
Don't forget my CSN Giveaway; You have until Saturday, February 12th at 11:00 Pacific time to enter! Scroll down to the post to leave a comment to to enter. (Links are not working for some reason.)
MOROCCAN CHICKEN STEW (Djej Kdra Touimiya)
adapted from Saveur ( which is adapted from "Couscous and other Good Foods from Morocco")

Ingredients:
1 3 1/2 lb. chicken, cut into 8 pieces- I used 4 thighs because I made half the amount
1 cup blanched whole almonds- directions at end of recipe
1/4 teaspoon turmeric or saffron-I used turmeric
1 tsp. ground white pepper
1 tsp. ground dried ginger
1 cinnamon stick
2 tablespoons butter
2 yellow onions, thinly sliced
4 cups chicken stock or low sodium chicken broth
1/4 cup chopped parsley
kosher salt to taste
1/2 cup canned chickpeas, drained
2 tablespoons fresh lemon juice

1. Melt butter in a dutch oven over medium heat. Combine the chicken pieces, blanched almonds, turmeric, pepper, ginger, kosher salt and cinnamon stick in the pot and cook, turning, about 3-4 minutes. Add half of the sliced onions and broth; bring to a boil. Reduce heat to low; cover and simmer for 30minutes.
2. Add remaining onion and parsley to chicken; cover and cook until chicken is tender, about 20-30minutes. Remove chicken from the pot and set aside. Bring the sauce to a boil; cook until thicken 13-15 minutes. Since I halved the recipe, it took only about 5 minutes to thicken. Use your judgment with this. Return chicken to the dutch oven along with the chickpeas; heat through. Taste and add salt only if needed. Drizzle with the fresh lemon juice and serve. I served this dish with couscous, which soaked up the wonderful flavors of the sauce. Enjoy!
How to blanch almonds: Boil a pan of water; pour almonds into the hot water and soak for 1 minute. Almonds should be covered with the hot water. Drain the almonds into a colander, and then put almonds into cold water to cool them down. The skins will pull apart and slip off when you squeeze them between your fingers. Lay on a paper towel to dry.

Tuesday, November 2, 2010

Roasted Sesame and Garlic Green Beans

I have a new favorite green bean recipe now that is bursting with garlic and sesame flavor. I saw a recipe in a Cook's Illustrated magazine which was more involved than I wanted, so I just reduced and eliminated some of the ingredients and just used garlic and sesame for these yummy beans. The garlic is definitely assertive, but it does not over power the sesame seeds. The sesame flavor is very evident, which caused my husband to proclaim these beans as "awesome"! Make your taste buds happy and give these a try!

ROASTED SESAME and GARLIC GREEN BEANS

1 pound fresh green beans, stem ends snapped off
1 tablespoon olive oil
1 teaspoon grated fresh garlic
1 teaspoon sesame seed oil
2 teaspoons sesame seeds, toasted
1/8 teaspoon red pepper flakes
salt and pepper to taste

Heat oven to 450 degrees and line a baking sheet with aluminum foil. Spread beans on foil; drizzle the olive oil over the beans and toss well to distribute the oil. Sprinkle with coarse salt. Roast beans for 10 minutes.
Toast the sesame seeds in a pan for about 30 seconds until fragrant and slightly golden. Mix the sesame oil, red pepper flakes and garlic together. After the beans have roasted for 10 minutes in the oven, remove the pan from the oven. Using tongs, coat the beans with the sesame oil, garlic and red pepper mixture. Spread the beans out and place back in the oven for another 8-12 minutes. Green beans will appear shriveled and have golden brown spots when done. Remove from oven; adjust seasoning and toss with the toasted sesame seeds and serve. Enjoy!

Monday, October 4, 2010

Tuscan Minestrone Soup

The first chill of Fall air blew in finally last week, which overjoyed me, so I made one of my favorite easy soups. This yummy soup is full of healthy veggies and it's very simple to throw together. It uses canned chicken broth and tomatoes, which is a wonderful time saver. After all the vegetables are chopped, the soup only takes about 20 minutes to cook. My husband and I love this stuff, although he prefers some chicken added to it. Either way, this body warming soup is delicious,especially with some crusty bread. This recipe is based on one by Bob Greene, author of The Best Life Diet. Give it a try for a quick, delicious and healthy bowl of soup.

TUSCAN MINESTRONE SOUP
adapted from the book The Best Life Diet

2 tablespoons olive oil

1 small-medium zucchini, diced

1 small-medium yellow summer squash, diced

1 large carrot, finely diced-about 3/4 cup

1 small onion, diced

2 cloves garlic, minced

4 cups canned, low sodium, low fat chicken broth

1 (15 ounce) can of diced tomatoes-I used canned fire-roasted tomatoes

1 (15 ounce) can cannellini beans- I have a hard time finding these in my town, so I sub with Great Northern Beans when I have to.

1/2 cup pasta, elbow or small shells

fresh thyme sprigs, if available

1 teaspoon dried Italian herbs, or use fresh herbs that you have available

salt and pepper to taste

1/4 cup fresh basil, thinly sliced

Heat the oil in a dutch oven over medium heat. Add the carrot, onion, zucchini, and yellow squash to the pan and cook, stirring until the veggies begin to soften, about 10 minutes. Add the garlic and cook until fragrant, about 30 seconds. Pour the chicken broth and tomatoes into the pan, and bring to a boil. Add the beans, pasta and thyme and simmer until the pasta is done, about 10 minutes. Remove the thyme sprigs and season soup with salt and pepper. Stir in the fresh basil. Top each serving with freshly grated Parmesan cheese. Enjoy! Makes about 6 servings.

NOTE: I use whatever herbs I have available, oregano, basil and thyme. My thyme plant died in the heat this summer, so I used 1/2 teaspoon dried in this recipe. I also used 1 tablespoon fresh oregano in place of the teaspoon of dried herbs. Also, sometimes I have to use more chicken broth, depending on the size of squash used. Original recipe calls for medium sized squash.

Tuesday, August 24, 2010

Korean Beef Rice Bowl

I saw this dish recently at Steamy Kitchen and wanted to try it soon, and I'm so glad I didn't wait! My photo isn't as good as Jadens, but the meal was certainly excellent. Once you have all the vegetables chopped and the beef sliced, this meal comes together in just minutes. That is if you are not working around a 14 month old granddaughter who is trying to pull stuff out of your cabinets. She didn't take her planned nap, so meal preparation was a bit challenging, to say the least, with a very active and curious toddler around. But back to this meal- it's one of those lick the bowl clean type of dishes. Judging by the groaning that was coming from my husband, I knew he loved it. The sauce that the beef is marinated in is delicious; sweet but yet it's got so much flavor from the garlic and fresh ginger. I've got to make it again this week because it keeps calling my name! Here's what I did.

KOREAN BEEF RICE BOWL
slightly adapted from Steamy Kitchen

2 cups dry rice, your preference, cooked

1 pound beef, I used top sirloin, sliced thin

2 tablespoons soy sauce-I used low sodium

2 teaspoons sesame oil

1 teaspoon grated ginger

1 clove garlic, minced

1 tablespoon brown sugar 1 tablespoon cooking oil

1/2 of an onion, diced

1/2 cup of carrots cut into matchsticks -recipe calls for 1 cup

1 small zucchini, diced

2 handfuls of fresh spinach

1 tablespoon of toasted sesame seeds

Directions:

Put your rice on to cook first, using whatever kind you like. The vegetables can be prepared a day ahead if desired. If doing them at time of meal, have them chopped before you begin cooking. Slice beef very thin, across the grain. It can be prepared several hours in advance also.
Mix the minced garlic, grated ginger, sesame oil and brown sugar together in a bowl. Pour over the beef and let marinate.
Heat a wok or skillet to medium heat. add the 1 tablespoon oil and the onion and cook for a couple of minutes. Turn up to high heat, add beef and cook until barely an pink left. Add the carrots and zucchini and stir fry for about 1 minute. Add the spinach and cook just until wilted. Stir in the toasted sesame seeds. Serve this over rice. Enjoy!

Monday, June 14, 2010

Roasted Chicken Breasts with Balsamic Vinegar Vinaigrette

If you love Balsamic Vinegar, you'll love this chicken that is marinated for several hours in it, producing flavorful and juicy meat. With the addition of Dijon mustard and garlic, these chicken breasts are easy enough to serve for a week night meal, but tasty enough to serve to company! However, the chicken needs to be marinated for several hours or it will be bland. The first time I made this dish I only marinated it about 3 hours. The recipe says 2-12 hours, but it's best just to go for the whole 12 hours if possible, especially when using mixed, bone-in chicken pieces. Just mix up the marinade in the morning and throw the chicken and marinade in a large zip lock bag. Place bag in a pan in the refrigerator, and later in the day, this chicken will be ready to plop into the oven or onto the grill. I marinated these boneless chicken breasts for about 5 hours and they were very moist and delicious. But the bone in chicken pieces were marinated about 12 hours. I hope you'll give them a try.

ROASTED CHICKEN BREASTS with BALSAMIC VINEGAR VINAIGRETTE
adapted slightly from Giada De Laurentiis

4-6 boneless, skinless chicken breasts, or 1 whole chicken cut-up
1/4 cup Balsamic Vinegar
2 large cloves garlic, pressed
2 tablespoons of Dijon mustard
2 tablespoons lemon juice
2 tablespoons olive oil
1/2 cup chicken broth

Mix balsamic vinegar, garlic, Dijon, lemon juice and olive oil into a large resealable baggie. Season chicken with salt and pepper and place chicken in bag. Place in a pan so that chicken can lay flat and place in the refrigerator for at least 5 hours. When ready to bake, preheat oven to 400 degrees, place chicken pieces on a baking sheet and bake about 20-25 minutes, or until juices in chicken run clear when pierced ed with a knife. If you like, you can make a quick sauce using the marinade to drizzle over the chicken. Pour the marinade in a sauce pan, add the chicken broth and simmer about 5 minutes. Pour over the chicken. I made this when I baked a whole, cut-up chicken and served it with rice, drizzled with the balsamic. It's very good! But this time, I served the chicken breasts with oven roasted potatoes, so I did not made the extra sauce. Either way, I'' be making this chicken again. I just love easy, delicious meals!
NOTE: If using bone-in chicken pieces, the cooking time will be about 45-60 minutes.

Tuesday, April 13, 2010

April's Family Recipes; Memories of Family, Food and Fun- And a Spinach, Romaine, Strawberry Salad with Balsamic Vinaigrette

Before I get to this delicious salad, I want to mention this months round up for Family Recipes; Memories of Family, Food and Fun! I am hosting for the month of April. Make a dish that is a favorite of your family's, whether it's yours, your moms, an aunt, cousin or whoever, and submit it to me, (Lynda), at whatscookin52 at sbcglobal dot net. Post it on your blog between now and April 30, 2010 (USA EST). All submissions must be in English, please. Provide a link in your post to this page. Email me with the recipe name and the URL of the post. I also need the URL of your blog and your location. New posts only please. You can send a photo, or I will grab a photo from your post. For complete rules, go here.
Now for this salad. When the weather warms up, I love having a large salad for lunch most days. Since it has been around 80 degrees for the past several days, a nice cool salad just hit the spot. I put together this main dish salad using ingredients I had on hand. I had some left over Rotisserie Chicken from Walmart, so I added it too. I love romaine lettuce as the basis for my salads, and then I pile on whatever else is in my fridge. The strawberries have been so good, so I decided to include them. There's not really a recipe as it depends on how many salads you are making and what ingredients you have. Here's what I did.

Spinach, Romaine and Strawberry Salad with Balsamic Vinaigrette:
from Lynda's Recipe box

Romaine lettuce, washed and torn or cut
baby spinach leaves, washed
toasted, sliced almonds
shredded rotisserie chicken
diced red onion
sliced strawberries
shredded Parmesan, or other cheese of choice

Balsamic vinaigrette: I only made a small amount to last a few days. I used 1/4 cup olive oil, 2 tablespoons balsamic vinegar, pinch of salt and pepper and 1 teaspoon sugar. I placed all ingredients in a jar with a lid and shook until well combined. Other vinegars may be subbed for the balsamic, and canola oil may be used instead of olive oil. This is a cool and delicious salad with the strawberries and balsamic vinegar. Hope you'll give it a try!

Friday, February 19, 2010

Quick Rigatoni with Italian Sausage - A Skillet Meal

Our family loves pasta, especially my daughter and I, so I make it almost weekly. I don't always have time to make a sauce that requires a long cooking time. Actually, a quick, light sauce can be just as flavorful as one that has cooked much longer. I have found that putting canned tomatoes in a blender and pulsing a few times, gives you a quick sauce to work with. I learned this trick out of necessity, because my boys would not eat a tomato based sauce that had chunks in it. So I've used the blender to just break up the tomatoes, whole or diced, but not puree them. It really works.
The other evening, I needed a quick meal as I had 5 people to feed, instead of just my daughter and I. So, I turned to this quick pasta dish. This sauce is not a heavy, gravy type that I would use for spaghetti, but is a light sauce that clings well to the pasta. The Italian Sausage adds wonderful spicy flavor to this dish, filling each pasta tube with its goodness. Ground beef could be used instead, but it won't have as much flavor. The only thing I missed was fresh basil, but since my plants are long gone, and my grocery store didn't have any, I had to use dried. Can't wait for gardening weather! Let me show you how to make this delicious skillet dinner.

QUICK RIGATONI WITH ITALIAN SAUSAGE
from Lynda's Recipe Box
12 ounces Rigatoni or other tube pasta - can use Penne
1 pound Italian Sausage, casings removed ( I used mild Italian sausage)
3 cans (14.5 ounces) diced tomatoes or whole tomatoes, pulsed in the blender
NOTE: If you like chunky sauce, don't pulse the tomatoes.
2 tablespoons tomato paste, or 1 can (8 ounces) tomato sauce
1 onion, diced - about 1 1/2 cups
3 cloves minced garlic
2 1/2 teaspoons dried Basil, or 3-4 tablespoons fresh chopped Basil
1/2 teaspoon dried oregano
2 teaspoons sugar
1 tablespoon olive oil, or more if needed
salt and pepper to taste
1/2 - 1 cup shredded mozzarella cheese
1/4 cup Parmesan cheese, shredded
Bring a large pot of water to a boil and cook the rigatoni according to the package directions. Add salt to the cooking water. When done, drain in a colander and put aside.
While pasta cooks, heat a large skillet over medium heat. Add 1 tablespoon, or more of olive oil. Break up the sausage in the skillet with a fork or spatula and let the meat start to brown. Add the onion and stir and let the meat and onion cook together. Lower the heat if the sausage begins to burn. Cook until the onion is soft, then add the minced garlic. Cook until the garlic is fragrant, 1 or 2 minutes more. Add in the canned tomatoes that have been pulsed in the blender, and the tomato paste or sauce. Add the Basil, oregano and sugar; mix well and simmer on low heat, covered, for 15 to 20 minutes. Remove the lid and stir in the cooked rigatoni and top with the cheeses. Remove the pan from the hot burner. Place lid back on pan and let it set for 5minutes or so, to let the cheese melt. Serve with salad and a good crusty bread. Enjoy!
The Italian sausage adds so much flavor to this dish that little, if any salt and pepper is needed, in my opinion. But be sure to taste before adding the cheese to adjust the seasonings.
If using fresh herbs, add them at the END of the cooking time for full flavor.


Friday, October 9, 2009

Cornmeal Crusted Tilapia Sandwiches

I love a good sandwich and this Cornmeal Crusted Tilapia Sandwich definitely fits into this category. Tilapia is a very mild tasting fish that is delicious used in lots of different styles of cooking. In this recipe, the fish is dredged in a spicy cornmeal mixture and cooked in a skillet with minimal oil. Topped with the last of my garden tomatoes, leaf lettuce and mashed avocado with onion and cilantro, this yummy sandwich is perfect for dinner on your busiest weeknights! Forget the drive-through at the fast food joints- make your own "fast food" at home! Serve this healthy, nutritious and delicious sandwich with oven roasted sweet potato fries, or with a steaming bowl of soup on a chilly evening. Try this tasty, easy sandwich on your next super busy day.
Cornmeal Crusted Tilapia Sandwiches
3 T. yellow cornmeal
1 T. chili powder
1 tsp. ground cumin
1/2 tsp. salt
1/8 tsp. ground red pepper
4 tilapia fillets
1 T. canola oil
2 avocados
2 T. diced red onion
juice of 1/2 lime
1 T. chopped fresh cilantro
sliced tomatoes
leaf lettuce
4 french bread sandwich rolls
Peel and seed the avocados. In a bowl, mash the avocado with a fork. Stir in the diced onion, lime juice and cilantro. Set aside. Heat a large skillet and 1 T. canola oil over medium heat. Mix the cornmeal and spices together in a container large enough to be able to lay the fish. Dry the fish with paper towels, then dredge the tilapia in the cornmeal mixture. Shake off excess. Lay fish in the hot skillet and cook about 3 minutes, and then turn over. Cook about 3 more minutes, or until fish flakes easily with a fork. Remove fish from skillet to a platter. Toast the sandwich rolls under the broiler if desired.
To assemble the sandwiches;
Spread the avocado mixture over each roll half. On the bottom half, lay the fish fillet, then a couple of tomato slices and the leaf lettuce. Top with other half of roll. Open mouth and insert sandwich! Enjoy!
I was inspired by a recipe in Cooking Light's 2009 cookbook, that is similar to this, but used lime butter instead of the avocado mix that I used. The fish was also broiled, instead of browned in a skillet. My husband and I both loved these tilapia sandwiches, so I'll be adding this to our rotation. A meal that is ready in less than 30 minutes- can't beat that! Have a great weekend!


Wednesday, September 16, 2009

Homemade Baked Chicken Strips

When my kids were growing up they loved Chicken Strips and Chicken Nuggets, but I didn't buy them too often. Reading all the unnatural ingredients on the package was enough to leave me looking for a homemade alternative. When Panko bread crumbs became available in my store, I finally found away to make delicious, crunchy Chicken Strips at home. They are way better than those fatty cousins you find at the fast food places! And they are easy to make. My kids, who are in their 20's still love em, and so do my husband and I. After all, we can't resist fried chicken, but these healthy, tasty strips are baked, not fried and much healthier than those found in bags in the frozen food section of your store. Try them. Your kids will thank you!
HOMEMADE BAKED CHICKEN STRIPS
1 cup Panko Bread Crumbs
1 egg, beaten
1/2 tsp. salt, or to taste
1/4 tsp.pepper
1/2 tsp. paprika
1/2 cup flour
about 1 1/2 pounds chicken breasts, or chicken tenders (thawed,if frozen)
Place Panko and spices in a bowl. In another bow, beat the egg. Line a baking sheet will foil and spray it with Pam or oil it. This makes clean up easier.
If using chicken breasts, cut them diagonally into about 3-4 slices. Dry the chicken with paper towels. Dip each chicken strip into flour and then shake to get rid of excess. Then dip into egg, and then into the seasoned Panko crumbs. Press crumbs into the chicken. Lay each strip onto the greased baking sheet. Before placing in the oven, spary chicken lightly with Pam, or drizzle with about 1 T. melted butter. I used the butter this time. Bake in a 425 degree preheated oven for about 15-20 minutes. And there you have some really crunchy and delicious chicken strips! Or, you can cut them into nugget size, if desired. I also found that you can mix regular bread crumbs with the Panko, about half and half, and still get tasty chicken. And, if you have the time, soaking the strips or tenders in buttermilk for an hour or two before cooking, really makes for moist chicken. Just be sure to dry them off well before dredging in the flour! You can also use additional spices, if desired. Try these on your family some evening. They are perfect for week night meals. I like to serve them with oven roasted vegetables for a truly healthy meal. Enjoy!


Tuesday, September 1, 2009

Spicy Sauteed Tilapia with Cherry Tomatoes

I found a recipe for sauteed fish recently that sounded so easy and delicious. It came in real handy this week, as I've started baby sitting with my granddaughter as of yesterday! Her momma had to go back to work, so I feel privileged to care for her. And since I haven't taken care of babies in such a long time, I thought this weeks meals had better be easy to prepare.
The hardest part of this recipe is just cutting the cherry tomatoes in half and mincing the garlic and herbs! The tilapia took about 5 minutes to saute and the tomatoes much less than that, but this dish had great fresh flavor. The original recipe called for olives, but I didn't have any, so therefore I used lemon to add a nice tang. We loved it!

Spicy Sauteed Tilapia with Cherry Tomatoes ( adapted from Epicurious)
1 pound tilapia fillets, thawed, if frozen
3 T. olive oil, more if needed
1 1/2-2 cups of cherry tomatoes, halved
2 T. chopped fresh parsley
1 T. chopped fresh Greek Oregano
1/4 tsp. dried, crushed red pepper
3 cloves minced garlic
juice of 1/2 lemon, or to taste
Feta cheese
In a large skillet over medium high heat, add 2 tablespoons of olive oil. Salt and pepper the fish fillets and lay in the skillet. Let them brown about 2 minutes, until they turn white around the edges. Carefully flip fish over with a spatula. Cook until the fish flakes, about another 2 minutes. This will depend on the thickness of the fish. Remove fish to a platter and keep warm. Add more oil to the skillet and add the minced garlic and the crushed red pepper. Stir until fragrant, but don't brown. Add the tomatoes and the herbs. Stir until heated through and then stir in the lemon juice. Pour over the fish and serve topped with Feta cheese. Enjoy this easy and flavorful dish. I will be making this one again!

Thursday, August 27, 2009

Five-Treasure Fried Rice ( Adapted from Ellie Krieger)

I've had this recipe from Fine Cooking earmarked to try for several months now, since I've been on the hunt for more ways to use brown rice. If you don't care for brown rice, you can sub white rice for this tasty recipe. But, I love the nuttiness of brown rice and it is so healthy so that's a big plus with me. I've been trying to add more fiber rich foods to our diet for several years now, so this recipe fits the bill perfectly. I cut the original recipe about in half, so that it would feed just my husband and myself, and then wished I hadn't, so that there would be some leftovers! So, I'll give you the complete recipe reflecting my changes of course. Ellie's recipe was written for broccoli stems, but I subbed zucchini. It also contains Edamame, but my store didn't have it, so I subbed frozen peas. I also didn't use the Canadian bacon, preferring to use some diced pork, so my husband would have more meat in the dish! It was delicious with the pork and a little more filling for him, so I hope he appreciated it! LOL, I'm sure he did!
Five-Treasure Fried Rice- adapted from Ellie Krieger at Fine Cooking
2 T. canola oil
1 1/2 cups diced zucchini ( she used 1 cup peeled, diced broccoli stems)
3/4 cup finely diced carrot
1/2 cup finely diced red bell pepper ( she used 3/4 cup)
3/4 cup frozen peas ( she used frozen, shelled edamame, which I couldn't find!)
3/4 cup corn kernels, fresh or frozen ( I used fresh)
4 green onions, scallions, thinly sliced- both white and green parts
4 ounces sliced mushrooms- my addition
2 T. finely grated ginger
2 large cloves garlic, minced
4 cups very cold, cooked, brown rice
1 1/2 cups diced pork loin (Ellie used 3/4 cup diced Canadian bacon)
2 large eggs, beaten lightly
1/4 cup low sodium soy sauce
Use rice that has been cooked the day before or early in the day, so that it will be well chilled. Using fresh cooked rice will give you mush, which is not good! Put the diced pork in a small bowl with about 2 T. soy sauce, I T. oil and 1 clove diced garlic and let marinate while you chop all the veggies. Prepare all the vegetables before you begin this dish. Heat 1 T. oil in a nonstick skillet or stir-fry pan over med-high heat. Add the drained pork to the pan and let it cook and brown well; then remove the pork to a plate. Add another T. of oil to the pan if needed. Add the zucchini, mushrooms, bell pepper, and carrots and cook, stirring frequently about 3-5 minutes. Then add the corn and peas and stir about 1 minute. Next, add the scallion, ginger and garlic and don't cook very long, maybe 1 minute. Cooking the ginger and garlic too long seems to kill the flavor. Add the rice and stir until heated through. Make a 3 inch well in the middle of the pan and add 1 tsp. oil, if needed. Add the eggs and stir them until almost fully scrambled. Then stir the eggs into the rice mixture. Add the cooked pork and soy sauce; stir and it's ready to serve! This is a very delicious and flavorful dish. I love the fresh ginger and garlic in this easy meal. Since I used very lean pork, I still think this was a very healthy meal. I needed it to be a main dish and it worked very well. All of the fresh veggies made this dish and I'll definitely be making it again. We loved it!
Now, if the sun would come out, maybe my pictures will be better! I'm taking pictures on my back porch by the windows, but the sun is hidden. We are having a strange August, so far, but I'm not complaining. I like 85 degrees better than 100! Have a great day!

Monday, August 10, 2009

Grilled Stuffed Chicken Breasts (slightly adapted from Steven Raichlen)

I've been wanting to try this recipe for awhile, so Saturday was the day, although it was very cloudy and looking like it could rain. The rain didn't come, but the dark skies sure made my photos dark. I tried to lighten them a bit, but then the chicken looked pink! Not very appetizing at all! Now today, I had some computer problems, but I think it's OK now, so I get to share this delicious recipe for Grilled Stuffed Chicken Breasts with you! It is from the book, "How to Grill", by Steven Raichlen. This is an easy, moist and very flavorful chicken; the hardest part is cutting a pocket in the chicken breasts without cutting through it. Even if there is a mishap, all is not lost! I did that to one breast, so I grilled it with the lid down so that it would cook through without having to flip it over. It was saved! To begin, with a sharp knife, cut a pocket on one side of the breast, but do not go all the way through the meat. Stuff with basil leaves and sun-dried
tomatoes. Top with a couple of pats of Goat cheese. Cover this with the other side of the breast and fasten with toothpicks that have been oiled with vegetable oil. The oil helps you to be able to push them through the meat. Marinate for at least 1 hour. Grill over high heat until done.

GRILLED STUFFED CHICKEN BREASTS (slightly adapted from "How to Grill")
4 large skinless, boneless chicken breast halves
8 sun-dried tomato slices, soaked in hot water for 1 hour
8 larges basil leaves
4 ounces creamy goat cheese
3 T. olive oil ( I used 4T.)
2 T. fresh lemon juice (I used 3T. )
2 large cloves of garlic, pressed or minced
sea salt and pepper to taste
Each breast half will have a chicken tender on the cut side of the breast, so pull this off and save the tenders for another use. Rinse chicken with cold water and pat dry with paper towels. On a cutting board, remove any fat from the breasts. Carefully cut a pocket in 1 side of each chicken breast and lay it open. On one side place 2 sun-dried tomatoes, 2 basil leaves and a couple of pats of goat cheese. Fold each breast back over the stuffing and use 2 oiled toothpicks to close the chicken. Place chicken in a non reactive pan. Mix together the lemon juice, olive oil, garlic and salt and pepper and pour over the chicken. Cover and marinate 1 hour. I marinated this for 2 hours and loved the extra flavor. If using a charcoal grill, set up for direct grilling over a hot fire. Oil the grill well. Place chicken breasts over fire and grill for 4-6 minutes per side. Remove breasts from the grill to a plate and let rest about 5 minutes before slicing. It looks wonderful sliced on a platter garnished with more basil, but would be fine just to plate it whole too. Enjoy!
The lemon and garlic marinade was perfect with this chicken! The combination of goat cheese, sun-dried tomatoes and basil made for a perfect meal for family or company. We had 7 adult family members present, and 3 of them did not care for the goat cheese, and 1 or 2 didn't care for the tomatoes. But they all tried something new! Those of us who loved this dish were wanting the leftovers, which made a really great addition to a salad the next day! So next time I'll change to Mozzarella or Parmesan, but otherwise, this dish was a hit. Hope you give it a try!

Sunday, August 2, 2009

Adobo-Marinated Pork Tenderloin with Grilled Pineapple Salsa

We had an amazing meal this week end thanks to a recipe I found in Cooking Light's, "Healthy Summer Grilling", cookbook that I purchased recently. The pork tenderloin marinates in a wonderful lime juice and garlic mixture which imparts a great citrus flavor and moistness to the meat. The salsa is a wonderful mix of pineapple and vegetables with a touch of lime. It also calls for crystallized ginger, which I could not find at the store I went to, so I just omitted it. I will try to find this before I make the flavorful meal again. We enjoyed this meal so much that it will be a part of out grilling rotation from now on! If you want to make a memorable meal that has family or guests raving, this would be the one! This pork tenderloin was about 2 pounds and came in a package of two. Trim off any fat and there is a silver membrane around part of it which you can cut off so that the marinade can penetrate the meat better. Slip a sharp knife under the silver part and slice it off. The recipe calls for the meat to be marinated for 1 hour, but I had some interruptions, so it was about 2 1/2 hours. I'll go that long again as the flavor was wonderful. Let's get started ! First, we'll mix up the marinade and throw in the meat. Be sure to use a non reactive pan! Cover and put in fridge.
Fire up your grill! We have a charcoal grill, so I used enough charcoal to grill both the pork and the pineapple at the same time. The recipe called for about 25 minutes grilling time for the meat, but I went longer, as we don't like pork to be very pink. The pineapple cooks quickly, so when it's done you can whip up the salsa while the meat finishes cooking. Lets start:
ADOBO-MARINATED PORK TENDERLOIN with GRILLED PINEAPPLE SALSA
Slightly adapted:
1 cup fresh lime juice
2 tsp. black pepper
2 tsp. dried oregano
2 tsp. ground cumin
1 1/2 tsp. salt
6 cloves of garlic, crushed
2 pounds of pork tenderloin
2 tsp. olive oil
cooking spray, for the grill
finely chopped green onions and cilantro for garnishing
Combine first 6 ingredients in a 2 quart non reactive baking dish. Trim up the pork and add it to the marinade in the dish. Cover and refrigerate for 1 hr. (I did it for almost 2 1/2 hrs). Fire up the grill. Coat grill rack with oil. Remove the tenderloins from the marinade, insert a meat thermometer, if using, and place pork on grill over the fire. Grill until pork is 160 degrees for slightly pink. I grilled it for about 35 minutes. We don't care for pink pork. And of course, it depends on how hot your fire as to how quickly the meat cooks. When pork is done, remove from the grill and let rest for about 10 minutes. Slice and serve with Grilled Pineapple Salsa. Recipe below.
GRILLED PINEAPPLE SALSA
1 fresh pineapple, peeled and cut into 1 inch slices
1 red bell pepper
1 yellow bell pepper- I used green, because I had them
1/2 cup diced red onion
1/2 cup chopped fresh cilantro
3 T. fresh lime juice
1 T.brown sugar
1 1/2 tsp. minced crystalized ginger, I didn't use this- will next time
2 jalapeno peppers, seeded and minced
1 drained, canned chipotle chile in adobe sauce, minced-I didn't use this
Lay pineapple slices, and red and yellow peppers on a hot, oiled grill and grill about 3 minutes each side. remove. Dice peppers and pineapple and combine with remaining ingredients. Serve over the pork tenderloin. Eat and be happy!

I served this delicious pork and salsa with grilled zucchini and my Tex-Mex rice. My husband is already wanting this again! It is supposed to serve 8, but not at this house!
This is an exciting week for me, as I'll be having my 100th post! I've learned so much since I started this blog! I'll mention more in my next post so check back again. I so appreciate all of my readers and all the comments you leave. You all are great!


Thursday, July 16, 2009

Avocado, Cucumber and Tomato Salad

My mother-in-law was a great cook. This is my version of a salad that she used to make that I absolutely loved, but I've not been able to make the dressing like she did. So, I changed it a bit and it worked great! My MIL was a very frugal shopper and cook, but she always made well balanced meals. This salad was a favorite in the summer when the tomatoes and cucumbers were ready in her garden. She cut all the veggies very thin and used more dressing, but I have cut these in a large dice and used minimal dressing. The result is a very delicious salad with crisp vegetables, creamy avocado and a simple, tangy dressing. This salad dresses up any summer meal. I've made a small salad here, as the avocados won't keep well, so you will need to double it for a larger group. However, I kept eating this after I made it and now there's not much left! I'll have to make more of this delicious and healthy salad!
AVOCADO, CUCUMBER and TOMATO SALAD
1 avocado, skin and seed removed, cut in a large dice
1/2 cup diced red onion
1/2 of a green bell pepper, diced
1 cup of cherry tomatoes, cut in half, (or, 1 cup of diced tomatoes)
1 cucumber, peeled and seeded, if desired and cut into chunks, I had a little over 1 cup
Put all veggies and avocado in a bowl. Make dressing.
Dressing ingredients:
2 T. olive oil
4 tsp. red wine vinegar
1/2 tsp. sugar, if desired (I always use it; sorry, I omitted this when first posted!)
pinch of sea salt
dash of pepper
Mix well and pour over salad. Stir lightly with a wooden spoon so you won't tear up the avocado.
Best served the day it's made. The dressing may seem too tangy if you taste it before adding it to the salad, but it mellows out after it is stirred into the veggies. Enjoy!


Thursday, July 9, 2009

Brown Rice, Tomatoes, and Basil (adapted from Ina Garten)

Well, I've been missing for about a week now and I hope everyone hasn't given up on me cuz, I'm back! I didn't go on vacation, but have had a lot going on, plus I had jury duty! I had never served on a jury before, so I found it interesting, very interesting. It was all this week and I was released last evening. I haven't cooked much this week, but I have this yummy recipe that I tried today. I've been looking for more brown rice recipes,and found this Brown Rice, Tomatoes and Basil recipe from Ina Garten on Food Network. It's a delicious and refreshing dish that is supposed to be served room temperature, but it's yummy cold too. Made with fresh, home grown tomatoes gives it amazing flavor! I used half of the basil called for as I thought it would be too strong. I also added some fresh chopped chives, and next time I'm going to add some green onions, as I like a bit of crunch in my food! This is a delicious and healthy dish, so try it!

Brown Rice, Tomatoes and Basil (adapted from Ina Garten)
1 cup brown rice
2 tsp. kosher salt, divided
1/4 cup rice wine vinegar or champagne vinegar
2 tsp. sugar.
1 T. olive oil
black pepper
1 pound of ripe diced tomatoes, large dice
1/2 cup packed fresh basil, chopped (recipe calls for 1 cup)
2 T. chopped fresh chives, or use sliced green onions, if desired
Bring 2 1/4 cups water to a boil. Add 1 tsp. kosher salt and brown rice and bring to a boil again. Cover pan and simmer rice on low heat for about 30-40 minutes until rice is tender and water is absorbed. Mix together vinegar, sugar, olive oil, 1 tsp. kosher salt and a pinch of black pepper. Pour dressing over rice; add chopped basil and chives and mix well. taste to check seasonings. Serve at room temperature. Serves 6. Enjoy!

Monday, June 29, 2009

Pasta and Shrimp Primavera

A few weeks ago, I won a contest at Grace's blog, A Southern Grace! I won! The prize? Well, the folks from Garofalo sent me pasta, three different varieties of delicious pasta! We love pasta in this house, so I was very happy, let me tell ya! Garofalo sent a pound of whole wheat spaghetti that I decided to use for this Pasta and Shrimp Primavera. A few years back, I had made a primavera that was loaded with veggies and had a tomato base instead of a cream base. But, I have lost the recipe, so I decided to wing it again and came up with my own version, which is extremely good! I will make this again and again as my husband and I really enjoyed it. It's a fairly quick meal, suitable for weeknight dinners, but yet nice enough to serve to company!
First of all, you need to prepare all the veggies, then saute some shrimp in olive oil. I bought frozen shrimp that was already shelled and deveined. That saved a lot of time, plus, I can't buy fresh shrimp here. I removed the shrimp from the skillet and added some asparagus, onion and zucchini and sauteed until tender crisp. Don't overcook!
I added a little more oil, some minced garlic and sauteed til fragrant. I wanted to use fresh, diced tomatoes, but mine aren't ripe yet, so I used a can of Fire Roasted Tomatoes, which worked really well. Add the cooked shrimp and stir this mixture til tomatoes are heated through. Add 16 ounces of hot, cooked pasta.
Toss ingredients together and serve! Be sure to add cheese! It is a delicious, very flavorful and healthy dish that isn't too time consuming to prepare. It was wonderful with Garofalo's whole wheat spaghetti, but you could use any pasta you desire. Enjoy it with a salad and some crusty bread.
PASTA and SHRIMP PRIMAVERA

16 ounces of cooked pasta

1 bag of frozen, shrimp- shelled and deveined (I used a 14 ounce bag)

2-4 T. olive oil

5 or 6 garlic cloves, minced

1 zucchini squash, or yellow squash, diced in bite size pieces

1 pound of asparagus, ends trimmed off and cut into 1 inch pieces

1 medium onion, diced- I used a red onion

1 can of Fire Roasted Tomatoes (about 15 ounces), or 2 cups of fresh, diced tomatoes

fresh basil- I used about 3T. of chopped fresh basil

salt and pepper to taste

Fresh Parmesan cheese or Feta cheese

Cook pasta and drain. While pasta is cooking, prepare all the vegetables. Break tough ends off of asparagus and cut stalks into 1 inch pieces. Cut zucchini in half lengthwise, then in half lengthwise again, and slice. Dice onions. Now, in a medium hot skillet, add 1 T. of olive oil and add in shrimp. Cook about 2minutes until shrimp are pink and opaque looking. Remove the shrimp from skillet. Add another T. of olive oil and add squash,onion and asparagus to the skillet-saute until crisp tender, about 4-5 minutes. Move veggies to side of pan and if needed, add more olive oil to saute the garlic. Only cook the garlic until very fragrant but not brown. Pour in the tomatoes and basil and stir to heat through. Stir shrimp back in and add the cooked pasta and toss well. Place primavera on plates or in a pasta bowl to serve. Serve with plenty of Parmesan cheese or Feta cheese. Enjoy!

So, are you a fan of whole wheat or whole grain pastas, or do you prefer the regular white pastas? NOTE: If you'd like an extra kick of flavor, try adding a good pinch of dried red pepper flakes with the garlic, and cook as directed.