Showing posts with label cream cheese. Show all posts

Wednesday, December 3, 2014

Pineapple Sheet Cake with Cream Cheese Frosting (AKA Mexican Fruit Cake)

I decided it was time to pull this Pineapple Sheet Cake from the archives and give it better picture. This is a very moist, delicious cake that was passed to me by my mother. My mom was not a pie person, so therefore during the holidays she would make cakes and cookies, but rarely a pie. This cake is a favorite of my husband , and it's always a hit wherever I take it. It's a perfect cake for a pot-luck, or a family dinner, or even to take to work. Even though the cake itself contains no fat, this is a very moist cake as long as you make it several hours before it is to be served. The crushed pineapple in the cake makes it very moist, and it just gets better every day that you have it. I hope you will enjoy it!
Pineapple Sheet Cake with Cream Cheese Frosting
From Lynda's Recipe Box, and my mother
(Note: the only pineapple I've found that DOES NOT work is from Aldi. It just didn't contain enough juice.)

Ingredients for cake:
2 cups all-purpose flour
2 cups granulated sugar
2 teaspoons baking soda
2 large eggs, beaten
1 (20 ounce) can of crushed pineapple with juice
1 teaspoon vanilla
1/2 cups chopped nuts, I usually use pecans or walnuts -optional

Preheat oven to 350 degrees F. Grease either a 9x13 inch pan or a 10x15 inch jelly roll pan. In a large bowl add the flour, sugar and soda and mix. Add all of the remaining ingredients and mix well. Bake for about 35-40 minutes for a 9x13 inch pan. (A 10x15 pan will take about 20-30 minutes). Remove from oven and cool. Can frost while cake is just warm.

Cream Cheese Frosting:
1 - 8 ounce cream cheese, softened
8 tablespoons unsalted butter, (1 stick), softened
3 1/2 cups confectioners sugar
1 teaspoon vanilla
about 3/4 cup chopped nuts, optional, but I always use them. Makes the cake extremely good.

Spread frosting evenly over cake and top with pecans or walnuts. Let it set for several hours before cutting so the pineapple will moisten the cake. Bet you can't eat just one bite- enjoy!

Wednesday, November 5, 2014

Pumkin Bundt Cake with Cream Cheese Frosting

 I just had to start off my fall baking with something pumpkin since it is one of my favorite fall and winter flavors! Apple is right up there too, so there will be an apple recipe coming real soon also. I have tried a couple of different Pumpkin Bundt Cake recipes and this is the best one so far so I'm sharing it with you.
 This Pumpkin Bundt Cake with Cream Cheese Frosting is dense and moist, much like pumpkin bread or pound cake. I topped this luscious cake with cream cheese frosting that contains some brown sugar, which gives the frosting a hint of caramel flavor! This is a perfect fall dessert which would be a delicious addition even your Thanksgiving table. And I confess that it was so good with my morning coffee also! Try taking it to any family gathering or even to work and I think people will be singing your praises. Here's the recipe.

Pumpkin Bundt Cake with Cream Cheese Frosting
Adapted from My Baking Addition

Ingredients:
Bundt Cake
If you don't have all the spices, you can sub pumpkin pie spice if desired.
2 1/4 cups granulated sugar
1 cup canola oil, or vegetable oil
3 large eggs
3 cups un-bleached flour
2 teaspoons baking soda
2 teaspoons ground cinnamon
1/2 teaspoon ground cloves
1/4 ground ginger
1/4 teaspoon ground nutmeg
1/2 teaspoon salt
1 can (15 ounces) pure pumpkin puree

Cream Cheese Frosting
4 ounces cream cheese, softened
4 tablespoons softened, unsalted butter
2 tablespoons light brown sugar
1 14 cup confectioners sugar (powdered sugar)
1/2 teaspoon vanilla extract
1-3 tablespoons milk, half and half or cream, if needed to thin the frosting
3/4 cup toasted, chopped pecans, if desired

Directions:
1. Preheat the oven to 350 F. Spray a 10 inch Bundt cake pan with nonstick cooking spray.

2. In a large bowl combine the oil and sugar and mix thoroughly with an electric mixer. Beat in eggs 1 at a time, then beat in the pumpkin. In a medium bowl mix together the flour, baking soda, spices and salt. Add flour mixture to the pumpkin mixture a little at a time, and mix until batter is just blended well.

3. Pour batter into the prepared Bundt pan and smooth the batter evenly around the pan. Bake in the preheated oven for 60-65 minutes until a toothpick inserted in the center if cake comes out clean. Cool the cake for 10-15 minutes. Then invert cake onto a wire rack to finish cooling. Place cake onto a cake plate to frost.

4. To make the frosting: In a large bowl add the softened cream cheese, butter and the brown sugar and beat until creamy and smooth, about 2 minutes. Then gradually add in the powdered sugar and beat well. Stir in the vanilla and milk if needed. If frosting is too thick add a bit more milk if needed to get the desired consistency. Spoon frosting over the cooled cake. Using a spoon or rubber spatula, push the frosting where you want it. (This is not a glaze that will pour). Top with the toasted pecans , if desired. Now enjoy!


Monday, March 4, 2013

Banana Layer Cake with Cream Cheese Frosting

This is a moist, delicious Banana Layer Cake that is perfect for any occasion. It is somewhat less dense than my banana bread recipe, but it's very moist and yummy with the decadent Cream Cheese Frosting. I made this wonderful cake for my husbands birthday back in January. I didn't get many pictures of the finished cake, but that seems to happen every time I prepare a meal for our family gatherings. Too busy for photos, and then the food is gone. Sigh~
I've posted this recipe before, but made a sheet cake instead of a layer cake. It is one of our favorite cakes now and is a perfect way to use those ripe bananas and turn them into a fabulous dessert.
I feel the need to apologize for not being around for almost 2 months. I've had some health issues, ( I'll share at a later time), and some life issues that we all sometimes go through, and I lost focus on my blog. But I'm cooking again and ready to share. So I hope you'll give this Banana Layer Cake a try for your next celebration. It's so very, very good. Like, lick your plate good!
Banana Layer Cake with Cream Cheese Frosting
Adapted from Evil Shananigans

Cake:
1 cup mashed bananas - about 2 large bananas
1 cup buttermilk, or can use soured milk (add 1 tablespoon vinegar to a cup and fill up with milk; let sit a minute)
2 cups all-purpose flour
1 teaspoon baking soda
1/4 teaspoon baking powder
1/4 teaspoon salt
1 stick unsalted butter, softened- 1/2 cup
1 3/4 cup granulated sugar
2 eggs, lightly beaten
1 tablespoon vanilla

1. Preheat oven to 350 degrees, (or if you are using dark pans, then 325). Grease 2 9 inch round layer cake pans.
2. In a bowl, mash the bananas well using a fork. Stir in the buttermilk.
3. Mix flour, baking soda, baking powder, and salt together in separate bowl.
4. Cream Butter and sugar together in a large bowl. Stir in the eggs and vanilla.
5. Alternately add the dry and wet ingredients into the butter mixture, beating well after each addition. Pour the batter evenly into the 2 prepared cake pans.
6. Bake in preheated oven for about 35 minutes, or until cake springs back when lightly touched in the center. Or you may test with a toothpick. Cool cake in pans on wire racks for 10 minutes, then invert cakes onto cooling racks and let cool completely. At this point, you can frost the cake, or wrap each layer well in plastic wrap and store in the refrigerator overnight. Then assemble and frost the next day.

Cream Cheese Frosting:

8 ounces cream cheese, room temperature
1 stick (1/2 cup) softened butter
31/2-4 cups powdered sugar
1 teaspoon vanilla

In a large bowl, cream the butter and cream cheese together with a mixer.
mix in the vanilla. Add the powdered sugar in about 3 additions, mixing well after each addition. If the frosting seems too stiff, you may add a tablespoon of cream or milk and mix until creamy.

To frost the cake: 
Place one cake layer on cake platter. Add about 3/4 to 1 cup of frosting on the cake and spread evenly to the edge. Top with the remaining cake layer and press cake gently down. Add remaining frosting to top and smooth down and around the sides. I usually swirl the top of the frosting with a knife. I like to refrigerate the cake for 30-60 minutes to set the frosting well.
Slice, serve and enjoy!

Sunday, September 9, 2012

Pumpkin Cake Bars

 Technically it is late summer, but fall weather blew in with the storm we had a couple of days ago. I absolutely love fall and fall foods, so I couldn't wait to make something pumpkin. I can't even remember where I got this recipe years ago, but the first time I made it I thought the name was deceiving. It was called Pumpkin Bars, and somehow I assumed that it would turn out somewhat like a brownie. I was wrong. These bars are cake-like and moist, almost as dense as pumpkin bread really, but delicious. This recipe has become a staple at my house because I always have canned pumpkin in my pantry, so I can whip it up at a last minutes notice. I've made these Pumpkin Cake Bars so many times through the years. They are always well received at our church's pot luck dinners, family get togethers and they have been devoured at many funeral dinners that I've helped with. Oh, and my husband loves them too. These Pumpkin Cake Bars are made in a jelly roll pan and topped with Cream Cheese Frosting, which is always a favorite. So if you need an easy, yummy dessert to make, give this a try.
Pumpkin Cake Bars
Origin of recipe forgotten-sorry!
(Update! It was pointed out to me that I had a couple of mistakes in my recipe. So sorry for any problems this may have caused. It has been corrected-thanks! 10-29-14)

Ingredients:
2 cups all purpose flour
2 cups sugar
2 teaspoons baking powder
1 teaspoon baking soda
1/2 teaspoon salt
1 teaspoon cinnamon
1 teaspoon pumpkin spice (or use another teas. cinnamon if desired)
1 cup oil
4 eggs, beaten
1 can of pumpkin

Preheat the oven to 350 degrees. Grease a jelly roll pan. I used a 17 1/2 x 12 1/2 inch jelly roll pan with 1 inch sides, also called a Baker's Half Sheet. (It will also fit in a 10 1/2 x 15 1/2 inch pan with 1 inch sides, but may need to bake a few minutes longer.) In a large bowl, mix the dry ingredients together with a whisk. In another bowl, mix the oil, eggs, and pumpkin. Add the wet ingredients to the dry and stir until just mixed. Pour batter into prepared pan and bake in oven for about 20-25 minutes, or until a toothpick inserted in middle comes out clean. Cool on a wire rack. Frost with Cream Cheese Icing. Enjoy!

Cream Cheese Frosting:
4 ounces cream cheese, softened
1/4 cup unsalted butter, softened
1 3/4 cups powdered sugar
1 teaspoon vanilla extract
In a large bowl, cream the butter and cream cheese together with a mixer. Mix in the powdered sugar and vanilla. Spread over cake. Enjoy!

NOTE: This makes a fairly thin layer of frosting, You may increase the amount of frosting if desired. I always top the frosting with about 1/2 cup of chopped pecans.
If you want a thicker frosting, use 8 ounces  cream cheese, 1/2 cup butter, 3 1/2 cups powdered sugar, and 1 1/2 teaspoon vanilla.

Sunday, July 8, 2012

Fruit Pizza

 What's not to love about Fruit Pizza? There's a huge sugar cookie topped with creamy filling and fresh fruit and berries and a yummy glaze over all. I don't know when it first began showing up in kitchens in America, but it was given to me in the mid 1980's by a friends mother. She brought it to a church dinner and it was an instant hit. Most recipes call for purchased cookie dough, and mine did as well. But I soon decided to use one of my sugar cookie recipes instead, because it would work with a larger pan. This recipe is very popular around this area for family gatherings and pot luck dinners. It is usually the first dessert to go. I love that you can use just about any fruit or berry. My recipe has a cooked citrus glaze which not only adds a bit of sheen to the fruit, but it also keeps some fruits from turning brown. I almost always include bananas in my Fruit Pizza, and have not had a problem with them browning. But I don't think I've ever had this dessert longer than 2 days, so I don't know how much longer bananas would last. One of my favorite combinations is strawberry and Kiwis, along with bananas. This time I got a little patriotic with blueberries and strawberries. It was so yummy!
 I use my own cookie recipe and spread it evenly over the pan. I use a Baker's Half Sheet, about 17 inches by 13 inches. I just dot the pan with dough and smooth it out with my fingers. It doesn't have to look fancy, just get it to all the sides and corners. Bake for 12 minutes and cool. Then comes the cream cheese filling, then a layer of fruit, and lastly the glaze. The citrus glaze adds flavor, helps set the fruit, and helps prevent browning. I think the glaze also dresses this dessert up some. Think of Fruit Pizza as a large tart.
 I like adding lots of fruit and berries, placing them closely together. You  can do a design with the fruit or just place it randomly. It will taste fantastic either way! Use whatever fruit or berries are available. I've used strawberries, Kiwi, apples, bananas, blueberries, oranges, etc. Here's how I make Fruit Pizza. You can use your own sugar cookie recipe if preferred.
Fruit Pizza
Recipe from Lynda's Recipe Box and friend

Sugar Cookie Recipe
3/4 cup shortening, or you can use soft butter
1 cup granulated sugar
2 large eggs
1 teaspoon vanilla
2 1/2 cups all purpose flour
1 teaspoon baking powder
1/2 teaspoon salt
Cream shortening and sugar until creamy. Add eggs and vanilla and beat until fluffy. Combine dry ingredients; add to the creamed mixture and mix well. Spread all the dough into a Half sheet baking sheet(about 17x13 in.). Bake in a preheated 350 degrees oven for 12 minutes. Cookie dough may not look done, but it will set up as it cools; don't over bake or it will be too hard. Cool completely.

While cookie bakes, make the citrus glaze.
Glaze:
1/2 cup orange juice
3 tablespoons lemon juice
1/2 cup sugar
1/3 cup water
2 tablespoons cornstarch
Heat juices in a saucepan.. Dissolve cornstarch in water and add to the hot juices. Stir continuously and cook until thick and clear, about 1-2 minutes. Cool. Glaze can be luke-warm when used, but if it thickens too much when you try to glaze the Fruit Pizza, just warm it a little and stir and it should be easy to brush.

Make filling while the cookie and glaze cool.
Filling:
1 1/2 bars, (12 ounces) 0f room temperature cream cheese
3/4 cup granulated sugar
1 1/2 teaspoons vanilla
In a large bowl, combine cream cheese, sugar and vanilla and beat with an electric mixer until creamy.
(Note: If you want a thicker filling, use 16 ounces cream cheese, 1 cup sugar and 2 teaspoons vanilla. )

To Assemble Fruit Pizza:
Spread the cream cheese filling evenly over the cooled cookie. Arrange fruit and berries over the filling, pressing in slightly just to set.
(I used about 1 quart of strawberries, halved, and almost 1 quart of blueberries, and 2-3 (I can't remember!), large bananas for this pizza.
Use a pastry brush to spread the citrus glaze. Topping the blueberries was a bit tricky, so I ended up dolloping the glaze on and spreading it gently.  The glaze needs to set before you cover the Fruit Pizza, so place in the refrigerator to chill, and cover in about an hour. Keep chilled until ready to serve. Enjoy!

NOTE: The cookie  layer can be baked a day ahead, if desired, and kept covered with foil until ready to assemble.

Wednesday, May 23, 2012

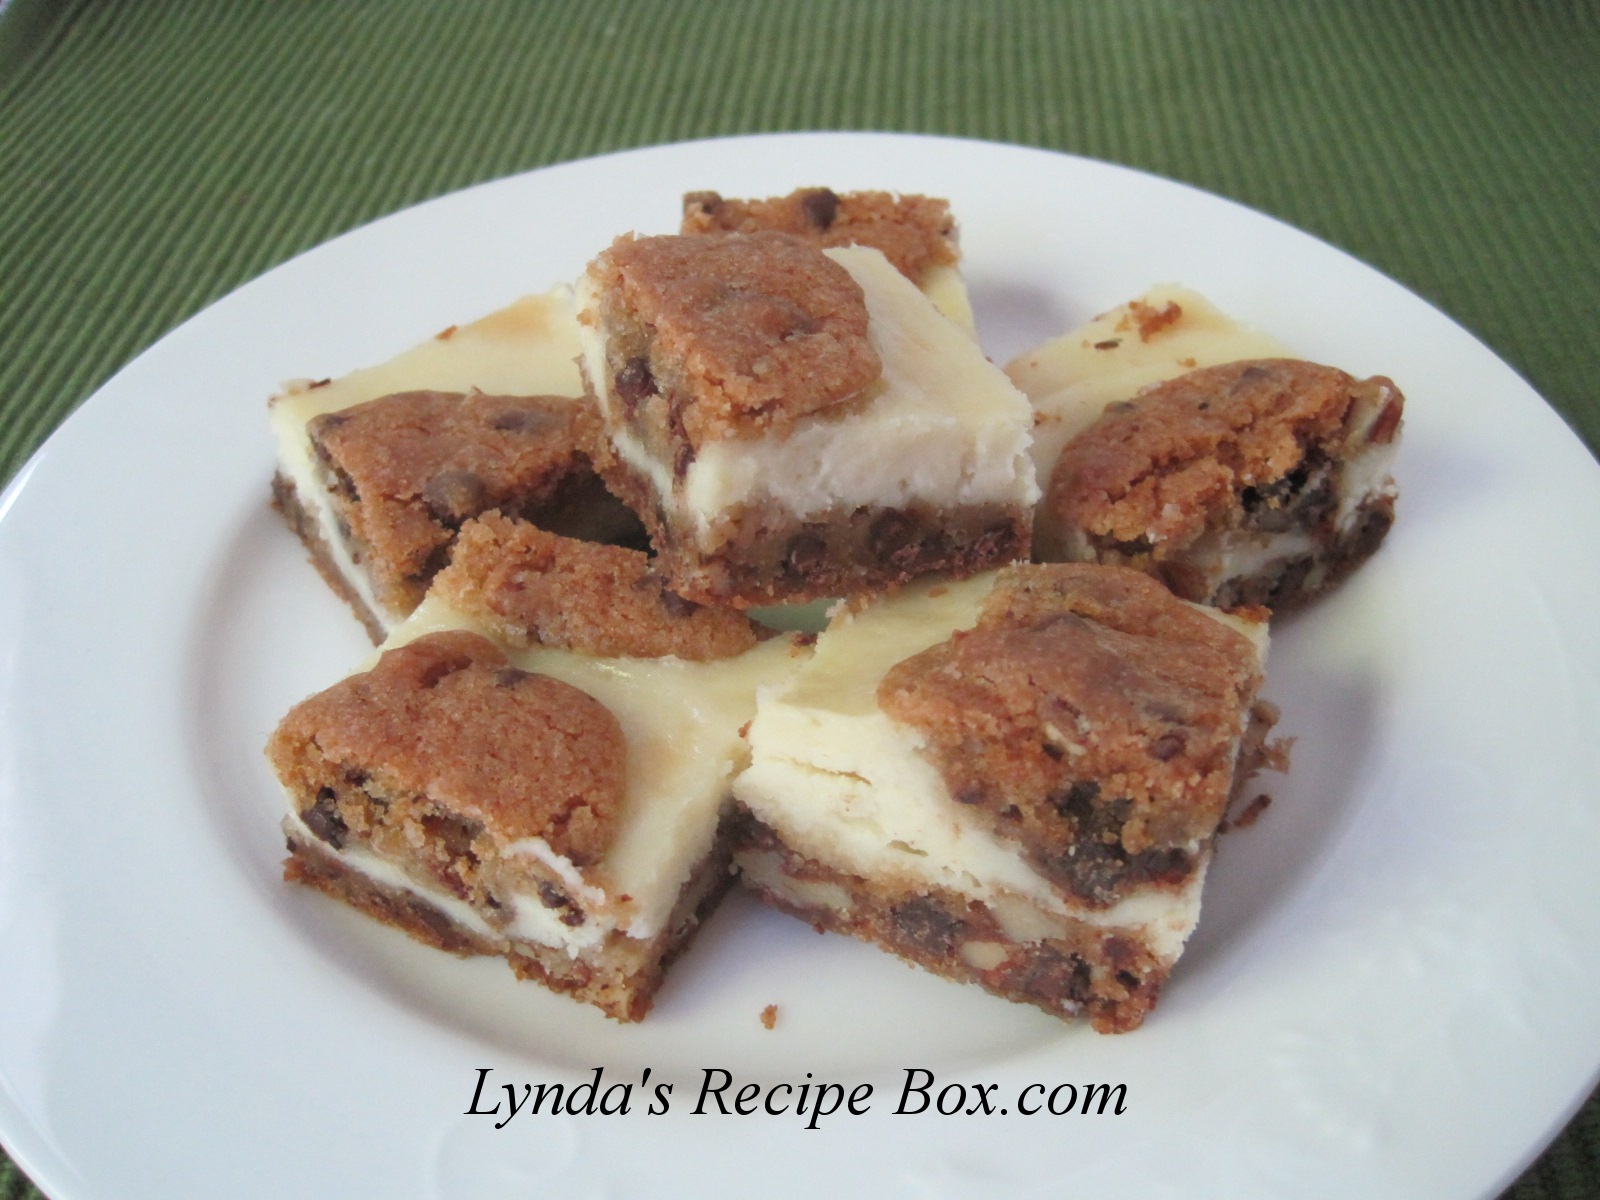
Chocolate Chip Cookie Cheesecake Bars

 Crisp chocolate chip cookie on the bottom, a creamy cheesecake middle dotted with more chocolate chip cookie- what could be better? These Chocolate Chip Cheesecake Bars may sound rather involved, but they really come together rather quickly. Mix up the chocolate chip dough first, and while the bottom crust is baking, you can stir up the cream cheese batter. If the cream cheese is at room temperature it creams and blends quickly.  They are rich and addictive and your family or company will be reaching for seconds. It is love at first bite. I sent some home with both my sons when they stopped by. I know when I can't be left alone with something this good! If you need a dessert for this Memorial Day weekend, this may be the one for you.
Chocolate Chip Cheesecake Bars
Slightly adapted from Taste of Home

Cookie Dough:
3/4 cup unsalted butter
3/4 cup granulated sugar
1/3 cup brown sugar
1 large egg
1 1/2 teaspoons vanilla
1 1/2 cups all-purpose flour
1/2 teaspoon salt
3/4 teaspoon baking soda
1 1/2 cups mini chocolate chips
3/4 cup chopped pecans
Filling:
2 (8 ounce) packages of cream cheese, softened
3/4 cup granulated sugar
2 eggs
1 teaspoon vanilla
Preheat oven to 350 degrees. Grease a 9x13 inch pan.
In a large mixing bowl, cream the butter and sugars. Beat in the egg and vanilla. In another bowl, combine the flour, baking soda, and salt. Add dry ingredients to the creamed mixture and mix well. Stir in the mini chocolate chips and chopped pecans.
Set aside 1/3 of the dough for the topping. Press the remaining 2/3 dough
into prepared 9x13 inch pan. Bake  for 8 minutes, and remove from the oven.
While crust bakes, beat softened cream cheese and sugar until smooth. Add in the vanilla and eggs and mix until creamy and incorporated.
Spoon the cream cheese mixture over the cookie crust and gently spread it to completely cover the bottom. ( Cookie dough will be very soft and maybe not set.) Drop small teaspoons full of reserved cookie dough over the filling. Return to the oven and bake for 30-40 minutes or until golden. Mine were done in 30 minutes, so check early. Cool completely on a wire rack. Cover and store in the refrigerator. Cut into small pieces. Enjoy!

Wednesday, May 9, 2012

Cajun Chicken Pasta - On the Lighter Side

 This may be a lighter version of the normally cream laden Cajun Chicken Pasta, but you wouldn't know it once you get a taste. This dish is just as packed with flavor and just as satisfying as the more fattening version. The cream sauce is actually made by combining low fat cream cheese, low fat milk and flour, and mixing into broth to make this dish so creamy and delicious. There are tons of veggies and I used a whole grain pasta, so this was healthy as well as packed with flavor from the Cajun spices. We loved it, so I'm already planning to make it again in a couple of days.
 This dish comes together very quickly after you get all the vegetables prepped and the sauce started. So it is crucial to have everything ready to go before you begin cooking. I made a few adjustments to the recipe, but nothing major. I made my own Cajun spice mixture, so that I can better control the salt. I used a little more olive oil, and 2% milk instead of skim, plus a couple of other slight changes. Be sure to check out the original recipe at Skinny Taste. There are many great looking recipes there. Now here's the recipe for this fantastic dish. I hope you will give this a try.
Cajun Chicken Pasta (On the Lighter Side)
Adapted from Skinny Taste

8 ounces uncooked linguine-I used Barilla's whole grain spaghetti instead
1 pound chicken breasts, cut into strips
1-2 teaspoons Cajun seasoning- I used almost 3 by the time it was done
about 2 tablespoons olive oil
1 red bell pepper, thinly sliced
1 yellow bell pepper, thinly sliced
8 ounces fresh mushrooms, sliced
1/2 of a red onion, sliced
3 cloves of garlic, minced or pressed
2 tomatoes, diced- I used Roma tomatoes
1 cup, fat free, low sodium chicken broth
1/3 cup skim milk- I used 2% because that's what we use
1 tablespoon flour
3 tablespoons light cream cheese
salt and pepper to taste
2 scallions/green onions, sliced

Directions:
1. Prepare all the vegetables, mushrooms and chicken.  Add the milk, flour, and cream cheese to a blender and  pulse until well combined and smooth. Set aside. Season the sliced chicken well with Cajun seasoning, and salt if needed. I used 2 teaspoons Cajun seasoning on the chicken. Use more or less, according to your preferences.
2. Cook pasta in salted water according to package directions.
3. Heat a large nonstick skillet over medium-high heat and spray with cooking spray. (I used a stainless skillet, so I had to use 1 tablespoon oil.) Add sliced chicken to skillet and saute for 5-6 minutes until done. You may need to do this in 2 batches. When done, place chicken on a plate and set aside.
4. Add 1 tablespoon oil to the skillet and reduce heat to medium. Add peppers, onions, mushrooms, garlic and a pinch of salt to skillet and saute 3-4 minutes. Add diced tomatoes and just heat through. Reduce the heat to medium low and add the chicken broth. when it simmers, stir in the cream cheese slurry, stirring until thickened about 2 minutes. Taste the sauce and adjust seasonings, if needed. I added a bit more Cajun spice at this point plus more salt.
5. Stir in the cooked pasta and heat through. Top with the sliced green onions and fresh ground pepper.  Boy is this good; Enjoy!

Monday, January 30, 2012

Brown Butter Pumpkin Layer Cake

 I know, many of you will think that pumpkin is so Fall like, but my husbands birthday was last week and he really wanted a pumpkin cake. I've had this cake bookmarked for quite a while, so decided to try it now. I wanted to make a special cake for my sweetie, who's getting older and wiser, and who does not always share my chocoholic tendencies. This cake did not disappoint. In fact we both thought it was one of, if not the best cake we've ever tasted! Being a pumpkin cake, it is dense and moist and the browned butter in the cake, AND in the Cream Cheese Frosting, makes this a "To Die For", dessert! The frosting also has brown sugar in it and it's delicious.We couldn't quit groaning as we shoveled it in. You've got this cinnamony, gingery, spice flavored cake with the browned butter, cream cheese combination that's just amazing. In short, this is a keeper. Can't wait to try making cupcakes.
 I changed the recipe some. I increased the cinnamon in the cake batter, and decreased the ginger. I decreased the brown sugar just a bit, but now I don't think I needed to. I thought the cake might be too sweet because I planned on increasing the frosting, but it was just fine. I knew that the amount of frosting wouldn't be enough, so I increased that. I also did not do the nut topping like the recipe. I just used some roasted pecans that I tossed with butter, sugar and a little salt and then decorated the cake rim. The next time I make this cake, I'm going to add some chopped pecans between the cake layer, like the recipe suggests. While this cake and the frosting use brown butter, this is not a hard cake to make. It does require a bit more time, so it would be best to make it early in the day, or make the cake layers the day before and then wrap them in plastic wrap. Then assemble the next day. Either way, this Browned Butter Pumpkin Layer Cake is worth the trouble.  Delicious, decadent, addictive and so much more; it's a cake to dream about. I hope you'll give it a try.

Brown Butter Pumpkin Layer Cake

For the cake:
3/4 cup, (12 tablespoons),  unsalted butter
2 cups unbleached, all purpose flour
1 1/2 teaspoons baking soda
2 teaspoons ground cinnamon
1/2 teaspoon ground ginger
1/4 teaspoon ground cloves
3/4 teaspoon table salt
1 1/2 cup granulated sugar
1/2 cup light brown sugar - originally calls for  2/3 cup
2 large eggs
1/3 cup buttermilk
1 can of pumpkin puree, or homemade puree

1. Preheat the oven to 350 degrees F. Move the oven rack to center of the oven.
2. Grease and flour 2 round cake pans that are 9x2 inches. Use parchment if desired. My cake did fine without it.
3. In a heavy bottomed saucepan, heat the butter over medium heat. Every minute or so, stir or roll the butter around. The butter will foam and begin to turn a nutty shade with bits of brown . This will take about 4 minutes. Pour into a bowl and cool.
4. In a large bowl, combine the flour, baking soda, cinnamon, ginger and cloves.  In another bowl, combine the granulated sugar, brown sugar, eggs, buttermilk, sugar, pumpkin and mix well.
5. Mix the wet ingredients into the dry ingredients together in intervals. Mix in the brown butter. Do not over mix this batter. You will not need and electric mixer for this cake.
6. Divide the batter evenly into the 2 cake pans and smooth the top. Bake for 25 - 30 minutes until done. Toothpick inserted into cake should come out clean. Cool the cake in pans for 10 minutes. Run knife around the cake and invert onto cooling racks. Cool completely.

Browned Butter Cream Cheese Frosting:
10 tablespoons unsalted butter
8 ounces cream cheese, room temperature
1/3 cup light brown sugar
3 cups powdered sugar

1. In a heavy pan, brown the butter just as you did for the cake. Pour into a small bowl, and set it in the freezer for 12-15 minutes. Don't let it get hard on the top. Butter needs to be cool to add to the frosting, but don't let it get too hard. Or, you could pour the butter through a small mesh sieve to catch the small browned bits. You won't pour the brown bits into the frosting. Take a spoon and spoon out the cooled butter, taking care to not scrape up the browned bits.
2. In a large bowl, cream the cream cheese well; mix in the brown sugar and beat until fluffy. Mix in the cooled brown butter, and the powdered sugar in with the cream cheese. Beat until creamy. If the frosting is too stiff, add about a tablespoon of cream, or milk.

Assemble and frost the cake:
Place one cake on your cake plate. Add about 1 cup frosting, or your desired amount, and spread evenly to the edge of cake. Place remaining cake on top of frosting. Frost sides and top of cake. Decorate with pecans.

For Pecans: Mix 1 cup pecans, tablespoon melted butter, 1 tablespoon sugar and 1/8 teaspoon salt. Toast in a skillet for a few minutes, or in the oven. Cool nuts completely on a paper towel lined plate. The original recipe calls for more nuts, and uses them between the layers of the cake, and then piling the rest on top of cake. It also calls for candied ginger, which I did not use.


Tuesday, December 20, 2011

Tortilla Pinwheel Appetizers

 I know, Tortilla Pinwheels have been around for years, but they are still a great appetizer to have in your arsenal. I've been making them for years and these pinwheels are always devoured. Cream cheese with sour cream, cheese, chilies, olives and green onions - whats not to love? They are a wonderful holiday appetizer and best served the day they are made. Here's my recipe.

Tortilla Pinwheel Appetizers
slightly adapted from and old Taste of Home recipe
Note: These should be made several hours before they are served. While they can be made a day ahead, the tortillas get really soft on the second day.

1 8 ounce package cream cheese- softened
1 cup sour cream- I use low fat
1 4 ounce can chopped black olives
1 4 ounce can chopped green chilies
1/2 half a large red bell pepper, finely diced
1/2 cup diced green onions
1 1/2 cups shredded cheddar cheese
1/2 teaspoon garlic powder
salt and pepper to taste
5 large tortillas, (10 inch, burrito size) plain or flavored - I used Missions Jalapeno Cheddar Wraps

In a large bowl, cream the softened cream cheese. I used a mixer for this. Mix in the sour cream, and then the remaining ingredients by hand, except the tortillas. Divide the cream cheese filling evenly among the 5 tortillas and spread over the tortillas. Roll up the tortillas as tightly as possible with out squeezing out the filling. Wrap in plastic wrap and leave in the fridge, until cold, at least a couple of hours.When ready to serve, cut off the ends of the tortilla wraps. The filling won't be in the very ends, so they aren't needed. Slice the Tortilla Pinwheels into slices with a sharp knife,  and arrange on a serving platter. I cut into about 3/4 inch slices. Serve along side your favorite salsa if desired. For several years we have had appetizers for our Christmas Eve together, and Tortilla Pinwheels are usually there. Hope you enjoy!

Wednesday, November 2, 2011

Pumpkin Cookies with Cream Cheese Frosting

I'm back! My daughter is happily married and life has slowed down a bit now, so I am ready to to blog again.
Boy do I love this time of year! We have had the most beautiful fall; The trees are just now turning their brillant colors, the air is crisp and there are pumpkins decorating almost every porch. I love just about anything made with pumpkin, so I deciced to make pumpkin cookies for the first time. Why I haven't made them before now, I don't know. I usually make bars, bread or pie and stop there. But I've added these delicious cookies to my recipe box now. these Pumpkin Cookies are cake-like, soft and moist, and topped with addictive cream cheese frosting. I made these and took a platter full to a meeting I went to and they were devoured quickly. It's hard to eat just one of cookies. I dare you to make these and eat just one! Here's the recipe.

Pumpkin Cookies with Cream Cheese Frosting
Adapted from Tasty Kitchen

1 cup unsalted butter
1 cup light brown sugar
1 egg
1 cup canned pumpkin puree
2 cups flour
1 teaspoon pumpkin pie spice
1 teaspoon ground cinnamon
1 teaspoon baking powder
1 teaspoon baking soda
1/2 teaspoon salt


Mix butter, sugar together until smooth. Then add the agg; mixwell and add the 1 cup pumpkin.
In another bowl, stir together the dry ingredients. Mix the dry ingredients with the pumpkin mixture in 2 parts. Mix well. Dough is going to be very soft. I used a tablespoon to measure the dough for cookies. You can refridgerate the dough to make it a bit easier to handle, if desired. Scoop dough evenly onto baking sheets and bake in a preheated 350 degree oven. Bake 9-10minutes. Remove to a cooling rack and cool completly before frosting with the Cream Cheese Frosting.

CREAM Cheese FROSTING
 !/2 cup softened butter
1- 8 ounce packages cream cheese, at room temperature
3 1/2 cups powdered sugat
1 teaspoon vanilla

In a large bowl, cream the butter and cream cheese together with a mixer. Add the vanilla and then the powdered sugar, a little at a time. Mix until smooth and creamy. If the frosting is too stiff add a little milk or cream to loosen a bit.

NOTE: I only used about half of the frosting on these cookies. But since the cookies are not very sweet, you may want to use more than I did.
These are awesome cookies!

Sunday, June 5, 2011

Banana Cake with Cream Cheese Frosting

 I have been gone from my blog too long and have missed reading your blogs so much. I'm trying to catch up, but I've been so busy. Our church has been a temporary home for some firefighters and other volunteers that came to help after the Joplin tornado 2 weeks ago. I can't believe it's already been two weeks! Anyway, some of my friends and I have been cooking breakfast and dinner for these hardworking men and women that have so unselfishly come to give a helping hand to those in need. Joplin and the surrounding area has been flooded with these wonderful people. Last Sunday, my husband and I went through part of Joplin, and believe me, the destruction is much worse looking in person. Such an overwhelming task is before the city. It looks as though a huge bomb was dropped and wiped out 1/3 of the city. The tornado was upgraded to and EF5 tornado, the strongest there is. The high school and 2 other schools were completely demolished and other schools were damaged. St Johns Hospital was destroyed. Thankfully there is another hospital in town. One hundred and thirty eight people have lost their lives so far. When you see what's left of the city, you can't help think that it's miracle that more weren't killed. I guess the 2nd siren got peoples attention. So much was lost.
On a positive note, our friends are improving. Sharon, the grandmother, is out of the hospital but fighting infection. The granddaughter is also home. The grandson is still very critical, but has opened his eyes and spoken a couple of words. They still have a far to go.
I made this delicious Banana Cake with Cream Cheese frosting for dinner one evening when the firefighters were here. There was none left. This awesome cake is supposed to be a layer cake, and I've made it that way before, but was in a hurry this time. But it's wonderful either way. The cake is not as heavy as banana bread, but it still has the yummy banana flavor and moist texture. And cream cheese frosting is the crowning glory! I've made this cake several times and it has become one of our favorite cakes. I hope you'll give it a try.
BANANA CAKE with CREAM CHEESE FROSTING
adapted slightly from Evil Shenanigans

1 cup mashed bananas
1 cup buttermilk
2 cups flour
1 teaspoon baking soda
1/4 teaspoon baking powder
1/4 teaspoon salt
1 stick (1/2 cup) unsalted butter
1 3/4 cup sugar
2 eggs
1 tablespoon vanilla

1. Grease pans. This cake will make a layer cake using 2- 9 inch round pans, or a 9x13 inch sheet cake.
2. In a bowl mash the bananas. It takes about 2 large ones. Stir in the buttermilk.
3. In another bowl mix the flour, baking soda, baking powder and salt together.
4. Cream the butter and sugar together in a large bowl. Stir in the eggs and vanilla and beat well.
5. Alternately add the dry ingredients into the butter mixture with the dry ingredients, mixing well after each addition. Pour batter into prepared pans and bake in a preheated 350 degree oven. If using a dark colored pan, reduce the heat to 325 degrees. Bake for about 35 minutes. Cake is done when it springs back when lightly touched. Cool round cake pans for 10 minutes, then turn out on cooling racks to cool completely. Frost with Cream Cheese Frosting.

CREAM CHEESE FROSTING:
1- 8 ounce package of cream cheese, room temperature
1 stick- 1/2 cup unsalted butter, at room temperature
3 1/2 cup to 4 cups powdered sugar
1 teaspoon vanilla extract

With a mixer, cream the butter and cream cheese together.  Mix in the vanilla and then add the powdered sugar a bit at a time. Beat until smooth and creamy. If frosting is too stiff to spread add teaspoon or more of milk or cream. This is enough frosting for a 2 layer cake. It will be too much frosting for a 9x13 inch cake, so I freeze whats left. Enjoy!

Wednesday, March 30, 2011

Cheesecake Bars - an oldie but Goodie

I love cheesecake, but don't always want to take the time to make one. That's where these delicious bars come in. They have all the flavor of cheesecake, but are quick and easy to make. We love the light lemon flavor, but if lemon is not your thing, just leave it out and double the vanilla. This retro recipe was given to me by a highschool friend way back during our senior year. I'm talking 1971 baby! I've taken the liberty of doubling the amount of filling that was in the original recipe because, in this instance, more is better. I don't want to be cheated on my cheesecake fix, do you? Give these groovy bars a try today! CHEESECAKE BARS
Ingredients for crust:

1/3 cup brown sugar

1/3 cup soft butter

1 cup flour

Cream the brown sugar and butter together. Then blend in the flour until crumbly. Separate 1 cup for topping. Place the rest in a 8x8 inch ungreased baking pan and press down to make crust. Bake at 350 degrees for about 10 minutes. Remove from oven to cool.


Ingredients for filling:

2 - 8 ounce bars of cream cheese, softened

1/2 cup granulated sugar

2 eggs

4 tablespoons milk

2 tablespoons fresh lemon juice

1/2 teaspoon vanilla

In a large bowl, beat the cream cheese and sugar until creamy. Add the eggs, milk, lemon juice and vanilla and beat well. Pour the cream cheese mixture over the crust and spread out evenly. Sprinkle the reserved flour mixture (topping), over the cream cheese filling. Bake at 350 degress for about 25 minutes. Cool and refrigerate. Cut into bars and enjoy!

Wednesday, January 19, 2011

Dulce de Leche Cheesecake Bars Warning: May be Habit Forming!

Luscious. Awesome. Addictive. Words are not enough to explain these delicious Dulce de Leche Cheesecake Bars. The graham cracker crust is loaded with butter and cinnamon and baked until golden. The sweet creamy filling is silky smooth; rich, but not too rich to want more than one piece. The topping, oh the topping-pure Dulce de Leche thinned with cream and spread over the bars. The crowning glory. Major addiction going on here!
This is my first time using Dulce de Leche in a recipe because it is hard to find here, so I made my own. It is very thick, but velvety to the tongue. It made me want more and more. I may have eaten some from the can!
Dulce de Leche is a Latin American form of caramel, glorious caramel. I have seen it in several forms (on the web, not in my town). It can be found in the Hispanic section of many grocery stores, or in Hispanic markets. Here are some links for recipes to make your own dulce de leche. I made mine in the crock pot. To do this, remove the paper from cans of sweetened condensed milk, and lay them down in the crock pot. Add water to cover the cans to about an inch over the cans. Turn the crock pot on low setting and cook for 8 hours. You will have deliciously thick Dulce de Leche! Carefully remove cans from the crock pot and let them cool completely before trying to open. Here's a stove top recipe from Recipe Girl and various recipes from another source.
Here's the recipe I used for these bars. You must try these! DULCE de LECHE CHEESECAKE BARS
Crust:
2 1/4 cups finely crushed graham crackers
2 tablespoons granulated sugar
1/4 teaspoon ground cinnamon
10 tablespoons unsalted, melted butter
Filling:
3 (8 ounce) packages of cream cheese, room temperature
1 cup sugar
3 large eggs
1/2 cup dulce de leche
2 teaspoons vanilla extract
Glaze:
2/3 cup dulce de leche
3 tablespoons of heavy whipping cream- I used 4 tablespoons of half and half
Fleur de sel to sprinkle on top- (I did not use this; not found in my town)
PREPARATION:
Crust:
Preheat the oven to 350 degrees. Grease the bottom of a 9x13 inch metal baking dish. Mix graham crackers crumbs, butter, sugar and cinnamon in a medium bowl. Pour crumb mixture into the baking pan and press evenly onto the bottom of the pan. Bake for about 10 minutes, until crust is golden. Cool completely on a rack.
Filling:
Blend cream cheese and sugar until smooth and creamy with a mixer or food processor. Add eggs, one at a time, blending well between additions. Add dulce de leche and vanilla and blend well. Spread the batter evenly over the cooled crust. Bake until the center is set and the edges are puffed and slightly cracked. The middle should not jiggle when you shake the pan. Bake about 38 minutes. Mine were done in 32 minutes, so start checking your pan at about 30 minutes to be safe. Cool completely on a wire rack.
Glaze:
Heat duce de leche and 3 tablespoons cream in a microwave safe bowl. Heat at about 10 second intervals until melted. Stir well, and add more cream if needed. I used half and half, because I was out of cream and it worked perfect. I needed 1 more T. cream than called for. The amount of cream you need will depend on the brand of dulce de leche you use. Pour glaze over the cooled cheesecake and spread evenly. Refrigerate until chilled, about 1 hour. Cut into bars and enjoy!
NOTE: Bars can be made up to 2 days ahead. Cover and keep chilled.

Monday, April 19, 2010

Spinach and Artichoke Dip

I know, there are many recipes for Spinach and Artichoke Dip on the web. But I was craving it after reading Kathleen's post last week. Her photo was enticing and I had stuff on hand to make it happen. I had half a bag of spinach that needed to be used, and a can of artichokes in the pantry. I toasted some baguette slices, mixed the dip, stuck it the oven and indulged. Ahhh, it was so good! So here's my version of her delicious dip.

SPINACH AND ARTICHOKE DIP
adapted from Kathleen's recipe

8 ounces cream cheese, room temperature
1/4 cup mayo
1/2 cup sour cream, I used low fat
3/4 cup freshly grated Parmesan cheese
5 ounces fresh baby spinach leaves
1 can artichoke hearts, water packed, drained and chopped
1/4 teaspoon garlic powder
1/4 teaspoon red pepper flakes

Since I used fresh spinach, I quickly sauteed it in a skillet in 1 teaspoon olive oil. It was wilted in just a minute. Stir in the softened cream cheese, sour cream, mayo, Parmesan cheese, chopped artichoke hearts, garlic powder, and pepper flakes. Pour into a baking dish and bake in a preheated 350 degree oven for about 45-50 minutes until golden and bubbly. Serve with baguette slices, pita chips or whatever you like. It's good with anything!

NOTE: More spinach can be used, if desired. This made 2 1/2 - 3 cups of dip.

Sunday, April 26, 2009

Pineapple Sheet Cake with Cream Cheese Frosting (a.k.a. Mexican Fruit Cake)

After a couple of days of my computer not working very well, I'm finally able to post, I hope so anyway! I hope that you all are having a wonderful weekend and enjoying your favorite meals. I spent Saturday working in the garden, so today it was nice to have lunch at our church, where there was a nice Tex-Mex dinner being held! This was a fundraiser to send the kids to kids camp this summer. My contribution to the dinner was a Pineapple Sheet Cake, which is a recipe that I got from my Mother, and is a favorite anywhere I take it. It is also the easiest cake recipe I have! It's also a very moist, dense cake topped with my favorite Cream Cheese Frosting, which is so addictive and rich and even sinful! I don't know how long the recipe has been around, but it is a favorite of many that I know, so let's make it, OK? It can be made in a 9x13 cake pan , or a jelly roll pan, which is what I used for this one. It does equally well in either one.

Pineapple Sheet Cake ( a.k.a. Mexican Fruit Cake)
Grease and flour a 9x13 inch pan or a 11x15 inch jelly roll pan. This cake is acidic because of the whole can of pineapple, so I normally make it in a glass 9x13. But it's your choice.
Pre heat oven to 350 degrees. You will need;
2 cups flour
2 cups sugar
2tsp. baking soda
2 large eggs, beaten
1 large can crushed pineapple with juice (20 ounce)
1 tsp. vanilla
1/2 cup pecans or walnuts ( I use pecans)
In a large bowl, mix flour, sugar and soda. Add remaining ingredients and mix batter well. (Do not use electric mixer). The batter may bubble a bit because of the juice reacting with the soda. Pour batter into prepared pan and place in oven. A 9x13 pan will take about35-40 minutes to bake . A 11x15 inch pan will take about25 minutes. The cake gets really brown while baking so don't be alarmed. My picture didn't turn out for that. Remove from oven. Frost cake while warm.
Cream Cheese Frosting
8 ounces cream cheese, room temperature
3 cups powdered sugar
1 stick butter, softened (1/2 cup)
1 tsp. vanilla
1/2 cup chopped nuts
In a deep bowl, with electric mixer, beat all ingredients until smooth and creamy. Frost cake while warm. I usually don't add the nuts to the frosting, I sprinkle them on top of the frosting, but it's your choice. If possible, let cake cool before digging in! Oh, it's hard, especially if you lick that frosting off of your fingers! It's just so yummy and it gets really moist the longer you have it. After the first day, I usually keep it in the fridge. So give it a try, it's great for company too!See that creamy frosting? It's calling your name! What's your favorite cake to make?