Showing posts with label Grilling. Show all posts

Tuesday, July 31, 2012

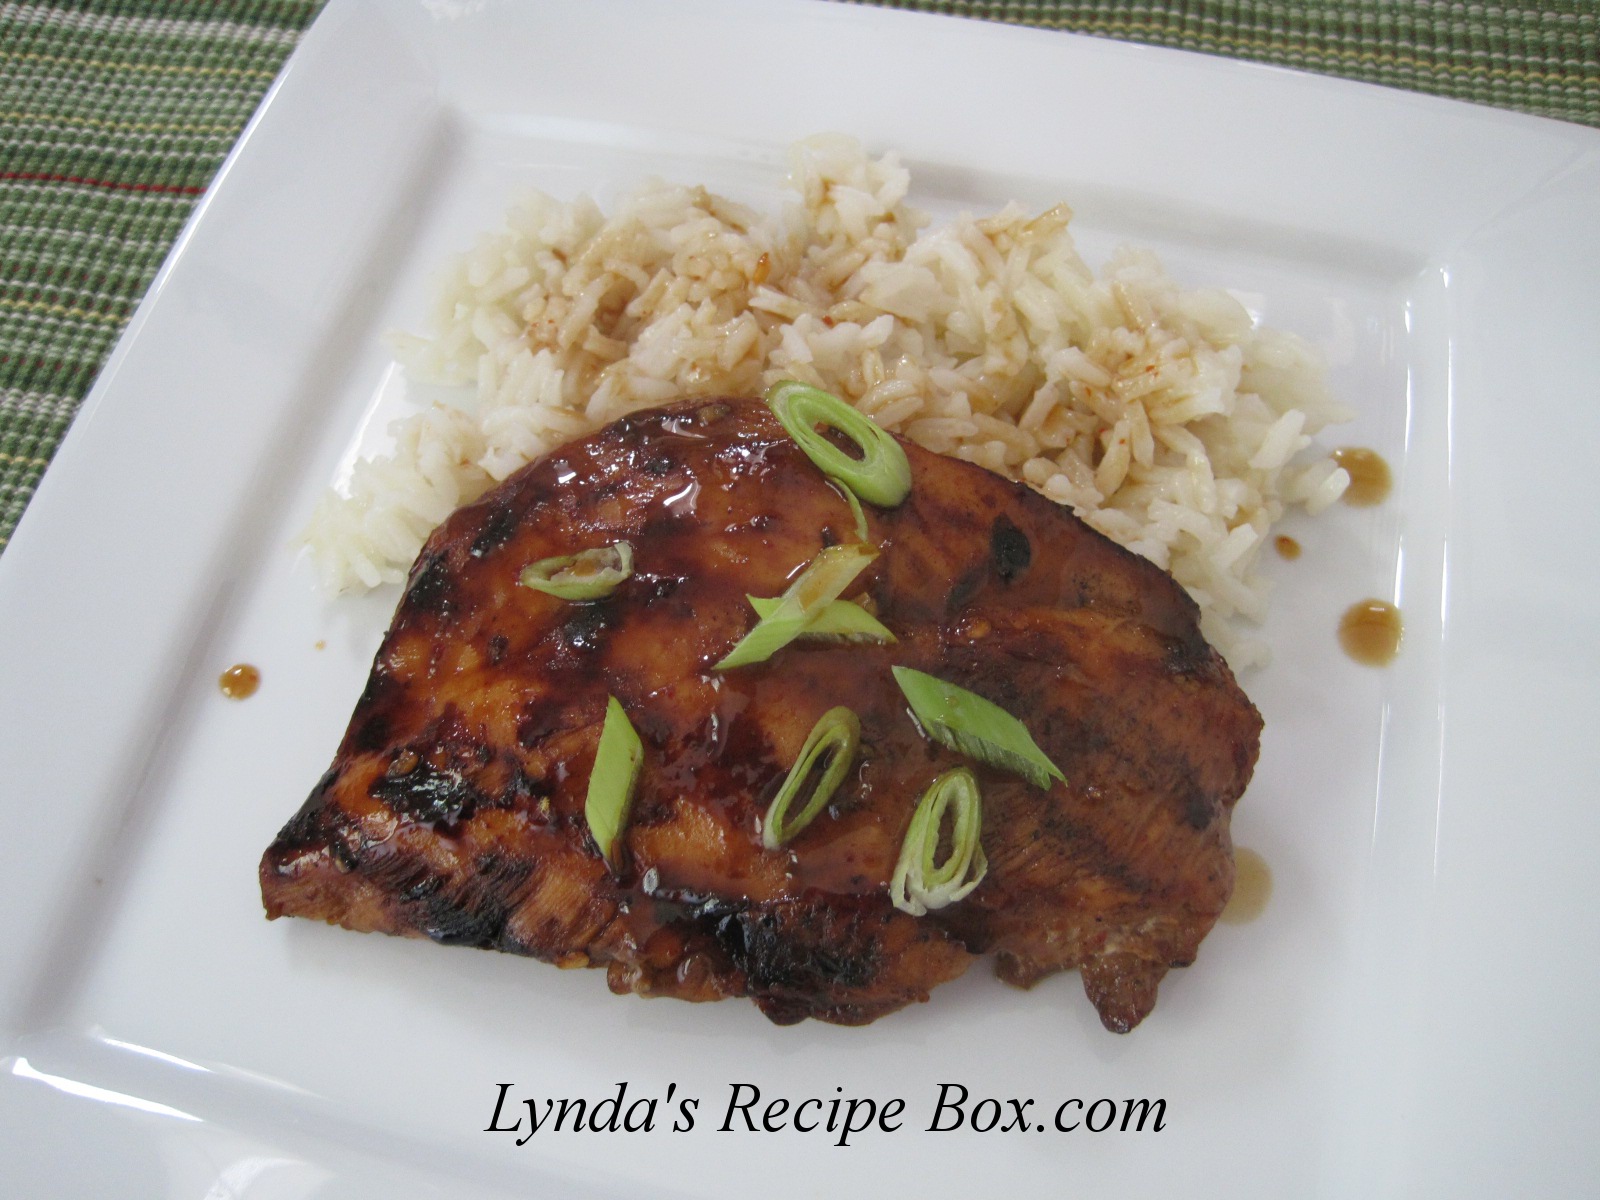
Asian Barbecued Chicken

I love Asian flavors but I don't venture into that realm often. This recipe for Asian Barbecue Chicken is wonderful as the ingredients are probably in every ones pantry and there's nothing fancy or hard to find. All you need are some basic ingredients and a grill and you can have some really delicious chicken. I used a charcoal grill for cooking, but an indoor grill would work too. I used boneless chicken breasts, which I pounded slightly to make them an even thickness so they would cook more evenly. And they cooked faster which was nice since it was still 107 degrees outside! I haven't grilled much this summer with the intense heat, and some towns in our area are banning the use of outdoor grills since it is so dry here. So I may have to wait for rain before I grill again. We'll see. But this chicken was so full of flavor and I will make it often. Leftovers were fantastic in salad. There is a little bite from the red pepper, but not drastic. I served it with simple rice with some of the remaining  marinade spooned on. So delicious so I hope you'll give this a try.
Asian Barbecued Chicken
Adapted from Cooking Light
Skinless chicken thighs were used in the original recipe. I subbed boneless breasts, that I pounded slightly to make them a more uniform thickness.

1/4 cup packed brown sugar
1/4 cup low-sodium soy sauce
3 tablespoons fresh lime juice
1/2 teaspoon crushed red pepper flakes
3 cloves minced garlic cloves
4-6 boneless, skinless chicken breasts. The original recipe uses 8 skinless thighs.
Mix together all ingredients, except chicken, in a bowl. Place chicken in a large resealable baggie and pour the marinade in with the chicken. Seal and place in refrigerator to marinate about 1-2 hours for the breasts. Bone-in chicken thighs should marinate longer, (4 hours in the recipe).
Prepare your grill, leaving a cool area to use in case you need to move the chicken to it. My grill had a temp of 350 degrees.
When fire is ready, remove the chicken from the marinade, shaking it off well before placing on the grill. Boil the remaining marinade for about 2 minutes to baste the chicken as it cooks. (The marinade is safe to use as long as it is boiled.) Grill chicken until it turns white around the edges, and then turn over to finish. Chicken is done when the juices run clear. Mine was done in 8-10 minutes, but cooking time will depend on the temp of your grill and the size of the chicken parts. Enjoy!

NOTE: I marinated the chicken breasts for about 1 1/2 hours, but my husband thought the flavors too strong, so next time I'll do an hour or so. But I loved the flavors, so I chalk it up to different palates. If you try this, let me know your thoughts on the flavors.


Monday, June 28, 2010

Pulled Chicken Sandwiches

Obviously, this is not an exotic recipe that I have to share. And this isn't a perfect photo either. This is just an any day meal, that I make quite often when I grill on the week end. Normally, I grill leg quarters for the Pulled Chicken. Dark meat is more moist and is best for this dish. But this time I had a whole chicken that I either needed to cook, or put in the freezer. The grill was ready to go.
So I cut up the chicken into 4 pieces. I had grilled burgers and hot dogs last Saturday and still had lots of life left in the coals, so I put this chicken on the grill and closed the lid. About 35 minutes later, I had some beautiful grilled chicken, perfect for these flavorful sandwiches. I hate to waste any fire that's left, so I like to cook this chicken for the next meal. You could leave the chicken whole if desired, but it will take longer to cook. These grilled, Pulled Chicken Sandwiches are delicious and smokey and are particularly tasty topped with BBQ sauce, or slaw, pickles and onion, or grilled pineapple! Give them a try! PULLED CHICKEN SANDWICHES
from Lynda's Recipe Box
About 4 1/2 pounds leg quarters, or a whole chicken cut into quarters
salt and pepper
spices- I used chili powder, ground cumin and garlic powder (or you may use a purchased rub)
Buns
toppings of choice-onion, pickles, BBQ sauce, grilled pineapple, etc.,etc.
Set up grill with a cool spot on one side of grill. I sprinkle the chicken on all sides with salt, pepper, chili powder, cumin and garlic. Or you may use a purchased rub for this. Place chicken over a hot fire and add soaked wood chips, if desired. Close lid and cook until browned and then turn chicken over. Take care not to burn it. When browned, move the chicken to the cool side off of the coals and close lid to finish cooking. Cooking time will depend on the size of the chicken pieces and the heat of the fire. Chicken is done when the meat is pierced and the juices run clear. These pieces took 35-40 minutes.
Remove the chicken to a pan. When cool enough to handle, pull the meat off the bones, pulling into shreds. Serve on buns with toppings of choice. This is just a simple, delicious meal that doesn't require much thought on my part. some days, that is very helpful!
NOTE: Pulled Chicken is not as moist as Pulled Pork, so I dilute a bit of barbecue sauce with water, and drizzle it over the chicken and give it a toss. This keeps the chicken moist, especially when reheated. Cover well and refrigerate. Then rewarm for the next meal.

Sunday, June 20, 2010

Buffalo Chicken Wings! On the Grill or in the Oven!

A happy Father's Day to all the wonderful Fathers reading this! I hope you had a wonderful day. I grilled today; just some easy burgers, polish sausages and these delicious chicken wings. I don't crave wings like some do, but a couple of the guys in my family are crazy about them. So I looked for a recipe and this one was a huge hit. I had to get a photo quickly before they disappeared! The smoky, grilled flavor was an instant hit with my barbecue lovers, so I'll be making these again. I have to admit, I really enjoyed them too, even though I felt like a fire breathing dragon for a short time. These wings are spicy, but my oldest son said they actually could be hotter! I had left out the cayenne pepper from the sauce, so if you enjoy lots of fire, you might want to add it in. I cooked these wings on a charcoal grill, but I'll give you directions for the oven too. I hope you'll try these and let me know how you liked them. BUFFALO CHICKEN WINGS-On The Grill or in The Oven!
Adapted from this recipe at Serious Eats and Cook's Illustrated

3 pounds chicken wings, tips cut off and discarded, and cut in half at the joint
1 teaspoon kosher salt
1/2 teaspoon black pepper
1/2 teaspoon ground cayenne pepper
Cut off the wing tips and discard, or freeze them to make broth. Cut through joints of wings with a sharp knife. Pat chicken dry with paper towels and season both sides with the salt, pepper and cayenne.

Wing Sauce:
4 tablespoons unsalted butter
1/2 cup hot sauce-I used Franks Original Hot Sauce
2 tablespoons brown sugar
2 teaspoons cider vinegar
2 tablespoons Tabasco Sauce-I omitted this, but if you like it hot, use it!
1/4 teaspoon cayenne pepper- I omitted, but again use it if you want.
In a sauce pan, add all of the ingredients and bring to a boil. Remove from heat.


For the Grill: Set up the grill with coals on one side for indirect grilling. When fire is hot and ready, place wing portions on side not over the coals. I let them cook about 15 minutes this way with the lid down. The fire was hot and some of the fat was released from the wings. Then move the wings over the coals for another 15 minutes, or so until they are browned and crisp looking, but not burned. Cooking time will depend on how hot your fire is. Remember to turn them over while cooking. I had to move them once because my fire was a bit hot. When done, remove wings from grill and place in a non reactive pan or bowl. Pour the sauce over the wings and stir to completely coat them with the sauce. Serve while hot. Enjoy!

For the oven: Season the wings. Line a shallow baking sheet with aluminum foil and coat with cooking spray. Place wings on the pan and bake in a 425 degree oven, about 25-30 minutes, or longer until they are golden and the skin is crispy. Turn them over about halfway through cooking. You can even place them under the broiler for the last 5 minutes or so, but you must pour off any accumulated grease in the pan first. Remove wings from oven and place in a non reactive bowl with the sauce. Stir to coat, and serve immediately. Your taste buds will love these!

Tuesday, June 1, 2010

Smoke-Roasted Pears

Like many people here in the U.S., we grilled yesterday for our Memorial Day enjoyment. We had the usuals, like Barbecued Chicken, hamburgers, potato salad, Cole Slaw and Baked Beans.
And we also had these amazing Smoke-Roasted Pears, which were also done on the grill. It all started Saturday as my daughter and I were watching PBS. They had an all day marathon of Steven Raichlen shows, with scenes of glorious barbecue calling to us and making our stomachs rumble. In case you don't know, Steven Raichlen wrote the Barbecue Bible, and How to Grill, and other cookbooks. My daughter really wanted to try his Smoke-Roasted Pears, so that's what she made on Monday. Oh my, They are incredibly delicious! The pears are cored and filled with a struesel like filling which when smoked, gives the flavor of a rich, smokey, caramel filling. Yum! The photos do not do these pears justice, but they are delicious!
The cored pears are put in a foil baking pan, filled with the brown sugar mixture and then put on the grill over an indirect fire. In other words, don't put them directly over the coals, or they will burn. I cooked them with the BBQ chicken, setting the pan at the far edge of the grill, opposite the chicken. Doing it this way, I had to rotate the pan a couple of times to ensure even cooking. If you cook the pears only, the coals can be placed on each side of the grill and the pears in the center. The grill is covered, and the pears were done in about 35 minutes. It will depend on the temperature of your grill as to how fast they cook. I put hickory chips on the coals, which gave Hailey's pears the smokey brown appearance. They are done when you squeeze them and they feel soft, but not too soft, and the brown sugar butter mixture is bubbly. It should take 40-6o minutes, according to the book. You've got to try these! Although we ate them alone, they'd be irresistible with vanilla ice cream.


SMOKE-ROASTED PEARS
adapted from Steven Raichlen's, How to Grill

Ingredients:
6 ripe pears- we used anjou

5 tablespoons butter, room temperature

5 tablespoons brown sugar

5 tablespoons graham cracker crumbs (or ground hazelnuts)

1/2 teaspoon ground cinnamon

1 teaspoon vanilla

juice from 1/2 lemon

To make filling:
Beat the butter and brown sugar in a bowl with a wooden spoon. Stir in the graham crackers, cinnamon and vanilla.

Prepare the pears:
1. Cut a thin slice off the bottom of each pear, so that it will stand upright in the pan without wobbling.

2. With a paring knife, cut out the stem end and remove it.

3. Using a melon baller, scoop out the core and the seeds of the pears.

4. Rub the bottoms and tops of pears with lemon juice. Squeeze a few drops of lemon juice inside each pear to prevent browning.

5. Stuff each pear with the filling and place in an oiled foil pan. Place the stem cap back on top pf the pears. Can be prepared several hours ahead, if desired.

6. Set up your grill for indirect heat. I use a charcoal grill, and I placed a handful of hickory wood chips in the coals after I placed the pears on the grill.

7. Close the grill and smoke roast the pears until browned and soft on the sides, and the stuffing mixture is bubbly. This took 35 minutes for us, but the recipe calls for 40-60 minutes. Serve immediately, if desired. Ours were served about an hour later and they were wonderful! These smoke roasted pears were to die for! We will be making these smoky, caramel flavored pears often!

Note: The recipe also calls for nutmeg, ground cloves, and 1 T. rum, but my daughter didn't want to use them. I wouldn't change a thing in her method.



Monday, September 28, 2009

Pulled Pork- done on the grill!

We've had the most beautiful weather lately, and this past weekend was gorgeous! Yes, fall is in the air, but it's still perfect grilling weather. I like to grill as long as possible, even if it's just grilled burgers and sausages. I've been wanting to try grilling a pork shoulder for pulled pork for sometime, but it is not one of those quick dishes that I normally like to make, so I've been putting it off. If my family didn't love barbecue so much, I wouldn't have tried this. But my boys are BBQ fanatics, and I have to admit that I enjoy it too. Especially when it turns out well!
Recently, I found pork shoulder on sale at our grocery store for 99 cents per pound! I just couldn't pass that up, even if I did have to buy a 9 pound roast! The wheels were turning as I drove home. Since I have Steven Raichlen's cookbook, "How to Grill", I turned to it for guidance. I also went to Epicurious for his recipe from "The Barbecue Bible", for extra help. I followed his method, but used my own rub for the meat. I must say, it turned out wonderful for my first try. And the guys in my family were thrilled. Nine pounds of meat; it's a good thing we had some company to help us eat it. And we had leftovers too. This was one smoky and juicy pork shoulder. Here's what I did. I cut that huge hunk of meat in half so that it would hopefully get done in one afternoon. Then I added a spice rub, liberally, over it.

You're supposed to cover it and let it stay in the refrigerator for several hours, but I only managed that for a couple of hours. I set up our charcoal grill for indirect heat by setting up charcoal at each end of the grill and placing a drip pan between the piles. When the coals are ready, I placed the 2 pork roasts in the center of the grill over the drip pan. These porkers cooked for 6 hours, with intervals of mopping with a mop sauce and adding more charcoal. You definitely have to plan your day if you want to try this recipe as you have to be home. Charcoal had to be added every hour and also the mop sauce. Was it worth it? YES! This Pulled Pork was deliciously smoky, with a nice spicy crust, and tender enough to pull apart easily.

After removing the roasts from the grill, I placed them in a roaster and covered it with foil for about 30-40 minutes to rest. The pork stayed plenty hot. After resting, I removed the pork to a cutting board and cut it apart into large chunks and then proceeded to shred it with my fingers. It was still hot. I was pleased to see a smoke ring, and the meat tasted so smoky and good. After shredding and removing all the fat, I took a knife and coarsely chopped the meat. At this point, you can add a Carolina Vinegar Sauce, if desired. I prefer to use a thinned down barbecue sauce to pour over the meat to keep it moist. Just my preference. Which ever you do, the meat tastes amazingly tender and smoky. This was a very delicious, enjoyable meal, even if it was time consuming. These porkers "smoked" for 6 hours until they were fall apart tender. They reached 195 degrees on a meat thermometer when I took them off the grill.
Pulled Pork- done on the grill!
You may use a purchased rub, or use my version:
1/4 cup sweet paprika
1 T. brown sugar
1 T. black pepper 1/2 tsp. cayenne pepper
2 T. coarse salt
1 tsp. garlic powder
1 tsp. onion powder
Mix ingredients in a small bowl.
Sprinkle rub over meat and gently"rub" into meat. Cover and refrigerate for up to 24 hours if desired. Early in the day, set up the grill for indirect grilling and place a drip pan in the middle. When coals are ready, place pork roast over the drip pan and close lid of the grill. Grill for about 4-6 hours, until meat is tender and the internal temperature is about 195 degrees. Mop meat with a mop sauce every hour to keep it moist. Add about 10-12 charcoal briquettes to each side of grill at the same time. I was able to keep the grill temperature at about 250-300 degrees.
When meat is done, let it rest covered in foil for 30minutes or so. Shred meat; chop coarsely, if desired. Spoon a vinegar sauce over meat to keep it moist. I like to use a diluted BBQ sauce for this step. The meat will freeze well as long as it has the extra sauce on it. I served it with baked beans, slaw and potato wedges. When served on a bun, top it off with some slaw for an extra YUM factor! I forgot to do that for pictures! This was wonderful pulled pork! I'll be making this again, just not right away. I'm back to easier meals for awhile!
If you have any advice for my next attempt at making pulled pork this way, just let me know in the comments! Have a great day!


Monday, August 10, 2009

Grilled Stuffed Chicken Breasts (slightly adapted from Steven Raichlen)

I've been wanting to try this recipe for awhile, so Saturday was the day, although it was very cloudy and looking like it could rain. The rain didn't come, but the dark skies sure made my photos dark. I tried to lighten them a bit, but then the chicken looked pink! Not very appetizing at all! Now today, I had some computer problems, but I think it's OK now, so I get to share this delicious recipe for Grilled Stuffed Chicken Breasts with you! It is from the book, "How to Grill", by Steven Raichlen. This is an easy, moist and very flavorful chicken; the hardest part is cutting a pocket in the chicken breasts without cutting through it. Even if there is a mishap, all is not lost! I did that to one breast, so I grilled it with the lid down so that it would cook through without having to flip it over. It was saved! To begin, with a sharp knife, cut a pocket on one side of the breast, but do not go all the way through the meat. Stuff with basil leaves and sun-dried
tomatoes. Top with a couple of pats of Goat cheese. Cover this with the other side of the breast and fasten with toothpicks that have been oiled with vegetable oil. The oil helps you to be able to push them through the meat. Marinate for at least 1 hour. Grill over high heat until done.

GRILLED STUFFED CHICKEN BREASTS (slightly adapted from "How to Grill")
4 large skinless, boneless chicken breast halves
8 sun-dried tomato slices, soaked in hot water for 1 hour
8 larges basil leaves
4 ounces creamy goat cheese
3 T. olive oil ( I used 4T.)
2 T. fresh lemon juice (I used 3T. )
2 large cloves of garlic, pressed or minced
sea salt and pepper to taste
Each breast half will have a chicken tender on the cut side of the breast, so pull this off and save the tenders for another use. Rinse chicken with cold water and pat dry with paper towels. On a cutting board, remove any fat from the breasts. Carefully cut a pocket in 1 side of each chicken breast and lay it open. On one side place 2 sun-dried tomatoes, 2 basil leaves and a couple of pats of goat cheese. Fold each breast back over the stuffing and use 2 oiled toothpicks to close the chicken. Place chicken in a non reactive pan. Mix together the lemon juice, olive oil, garlic and salt and pepper and pour over the chicken. Cover and marinate 1 hour. I marinated this for 2 hours and loved the extra flavor. If using a charcoal grill, set up for direct grilling over a hot fire. Oil the grill well. Place chicken breasts over fire and grill for 4-6 minutes per side. Remove breasts from the grill to a plate and let rest about 5 minutes before slicing. It looks wonderful sliced on a platter garnished with more basil, but would be fine just to plate it whole too. Enjoy!
The lemon and garlic marinade was perfect with this chicken! The combination of goat cheese, sun-dried tomatoes and basil made for a perfect meal for family or company. We had 7 adult family members present, and 3 of them did not care for the goat cheese, and 1 or 2 didn't care for the tomatoes. But they all tried something new! Those of us who loved this dish were wanting the leftovers, which made a really great addition to a salad the next day! So next time I'll change to Mozzarella or Parmesan, but otherwise, this dish was a hit. Hope you give it a try!

Sunday, August 2, 2009

Adobo-Marinated Pork Tenderloin with Grilled Pineapple Salsa

We had an amazing meal this week end thanks to a recipe I found in Cooking Light's, "Healthy Summer Grilling", cookbook that I purchased recently. The pork tenderloin marinates in a wonderful lime juice and garlic mixture which imparts a great citrus flavor and moistness to the meat. The salsa is a wonderful mix of pineapple and vegetables with a touch of lime. It also calls for crystallized ginger, which I could not find at the store I went to, so I just omitted it. I will try to find this before I make the flavorful meal again. We enjoyed this meal so much that it will be a part of out grilling rotation from now on! If you want to make a memorable meal that has family or guests raving, this would be the one! This pork tenderloin was about 2 pounds and came in a package of two. Trim off any fat and there is a silver membrane around part of it which you can cut off so that the marinade can penetrate the meat better. Slip a sharp knife under the silver part and slice it off. The recipe calls for the meat to be marinated for 1 hour, but I had some interruptions, so it was about 2 1/2 hours. I'll go that long again as the flavor was wonderful. Let's get started ! First, we'll mix up the marinade and throw in the meat. Be sure to use a non reactive pan! Cover and put in fridge.
Fire up your grill! We have a charcoal grill, so I used enough charcoal to grill both the pork and the pineapple at the same time. The recipe called for about 25 minutes grilling time for the meat, but I went longer, as we don't like pork to be very pink. The pineapple cooks quickly, so when it's done you can whip up the salsa while the meat finishes cooking. Lets start:
ADOBO-MARINATED PORK TENDERLOIN with GRILLED PINEAPPLE SALSA
Slightly adapted:
1 cup fresh lime juice
2 tsp. black pepper
2 tsp. dried oregano
2 tsp. ground cumin
1 1/2 tsp. salt
6 cloves of garlic, crushed
2 pounds of pork tenderloin
2 tsp. olive oil
cooking spray, for the grill
finely chopped green onions and cilantro for garnishing
Combine first 6 ingredients in a 2 quart non reactive baking dish. Trim up the pork and add it to the marinade in the dish. Cover and refrigerate for 1 hr. (I did it for almost 2 1/2 hrs). Fire up the grill. Coat grill rack with oil. Remove the tenderloins from the marinade, insert a meat thermometer, if using, and place pork on grill over the fire. Grill until pork is 160 degrees for slightly pink. I grilled it for about 35 minutes. We don't care for pink pork. And of course, it depends on how hot your fire as to how quickly the meat cooks. When pork is done, remove from the grill and let rest for about 10 minutes. Slice and serve with Grilled Pineapple Salsa. Recipe below.
GRILLED PINEAPPLE SALSA
1 fresh pineapple, peeled and cut into 1 inch slices
1 red bell pepper
1 yellow bell pepper- I used green, because I had them
1/2 cup diced red onion
1/2 cup chopped fresh cilantro
3 T. fresh lime juice
1 T.brown sugar
1 1/2 tsp. minced crystalized ginger, I didn't use this- will next time
2 jalapeno peppers, seeded and minced
1 drained, canned chipotle chile in adobe sauce, minced-I didn't use this
Lay pineapple slices, and red and yellow peppers on a hot, oiled grill and grill about 3 minutes each side. remove. Dice peppers and pineapple and combine with remaining ingredients. Serve over the pork tenderloin. Eat and be happy!

I served this delicious pork and salsa with grilled zucchini and my Tex-Mex rice. My husband is already wanting this again! It is supposed to serve 8, but not at this house!
This is an exciting week for me, as I'll be having my 100th post! I've learned so much since I started this blog! I'll mention more in my next post so check back again. I so appreciate all of my readers and all the comments you leave. You all are great!


Wednesday, July 15, 2009

Basic Barbecue Sauce ( from Steven Raichlen)

I actually made homemade barbecue sauce for the Grilled Baby Back Ribs that I made over the weekend! I've not tried that before, which is too bad because it is sooo easy and sooo delicious! The only extra advice I can give is to be sure to make it in a deep pot as the sauce is thick and as it simmers it pops out of the pan! This recipe is from Steven Raichlen's book, "How To Grill", and it is tangy, spicy, sweet and delicious! I loved it! However, a couple of family members requested that next time I leave out the Tabasco sauce, so you may want to taste the sauce before you add the Tabasco!
BASIC BARBECUE SAUCE
2 cups ketchup
1/4 cup cider vinegar
1/4 cup Worcestershire sauce
1/4 cup packed brown sugar
2 T. molasses
2 T. prepared mustard
1 T. Tabasco sauce-optional  (I don't use the Tabasco anymore when I make this sauce)
1 T. of your favorite barbecue rub (I used this Basic Barbecue Rub)
2 tsp. liquid smoke
1/2 tsp. black pepper
Combine all ingredients in a non reactive sauce pan and bring slowly to a simmer. Reduce heat to slow-simmer for about 20minutes until thick and rich.Transfer to a clean jar and store in the fridge. It's good for several months according to the book. Enjoy!

I'm going to share a few pics from my flower bed a couple of weeks ago when these flowers first burst forth. I am in no way a professional gardener, I just like to grow things and hopefully they will cooperate! The whole flower bed was not that great looking, rather patchy actually, but separately these beauties look great!
This is the second year for these pretty, pink lilies! They should multiply every year and be quite
plentiful in a couple more years. They certainly had lots of blooms. I just wish they would last all summer, but they are perennials, so they only bloom for a time. I also had a pretty pink Astilbe

blooming by the house. It's soft pink fronds are next to some Columbine which had just a few blooms left. I think I must have planted last years Easter Lily too deep, as here it is blooming next to the Shasta Daisies! Very strange indeed, but they were pretty together!


Next week I hope to show you some more and maybe some veggies too. My tomatoes, green beans and peppers are at least still alive! I did pick my first cherry tomatoes this week and they taste so good! How about you, do you plant flowers or vegetables?


Monday, July 13, 2009

Grilled Baby Back Ribs

My family loves ribs and I have made them in the oven and on the grill and both taste great! Our sons love grilled ribs so I have been experimenting the last couple of years. For one thing, I love to watch Steven Raichlen, author of the "Barbecue Bible", and other books, on PBS when ever he is on. If you have ever watched his show, you know how good his food looks! It's very drool worthy! Last summer, I made his Baby Back ribs and followed the directions perfectly and had very smokey, spicy, delicious ribs. They could have been a little more tender, so, I am experimenting to find the most flavorful and tender way to do them. Our oldest sons birthday is tomorrow, so this past weekend we did a birthday dinner with ribs. I wrapped them in foil which produced the most tender and moist ribs ever! They didn't pick up as much smoke flavoring as I wanted, but they were really good and received high praises from everyone at the table. They are easy to do, you just need to plan ahead. Steven Raichlen suggests putting the rub on the ribs the day before and letting them marinate for a day, but I have done it just a few hours ahead and they are still delicious. So, lets start these mouth watering ribs!
The ribs have a membrane on the back and it really needs to come off as it is rather tough and the spices can't penetrate it. Take a small knife or screwdriver and loosen the corner and pull up and back to pull it off. You may need to use a paper towel or kitchen towel to hold onto it. Pull it completely off. Mix up your rub recipe or use a prepared on. I used one of Raichlen's, adapted.
I rinsed the ribs with water and dried well with paper towels. Spread the rub over both sides of the ribs and gently rub so that it will adhere to the meat. Wrap the ribs in heavy duty aluminum foil and refrigerate until ready to grill. We have a charcoal grill, so I set it up for indirect grilling, with a grill pan in the middle and coals on either side, so that the meat will not burn over the coals. Place foil wrapped ribs on hot grill and close grill lid and grill for two hours. Pull the foil back, brush with BBQ sauce if desired, and grill for about 20 more minutes. Remove ribs from grill. Oh, the aroma of these tender and moist pork ribs! Just sink your teeth into one of these ribs and your taste buds will thank you, and family and friends will love you! No kidding!
BASIC BARBECUE RUB ( slightly adapted from Steven Raichlen
1/4 cup packed brown sugar
1/4 cup sweet paprika
2 T.black pepper
3 T. kosher salt
2 tsp. garlic powder
2 tsp. onion powder
2 tsp. celery seed
1 tsp.cayenne pepper
Mix spices. I used about 3 T. of rub on each rack of ribs, but you can use less, or more. Keep what you don't use in an air tight container. Remove the membrane from the ribs and apply spice rub to both sides. Wrap each slab of ribs in heavy duty foil. Lay on grill over indirect heat. Cover grill with lid and cook for two hours. Peel back the foil and check ribs; they should be tender when poked with a fork. Apply BBQ sauce, if desired and grill for another 20 minutes will grill lid closed. I cooked 2 racks of ribs and only used BBQ sauce on 1 rack. Some people prefer just the dry rub. Remove ribs to a pan cool slightly, and cut into serving pieces.
Arrange on a serving platter and get ready for some lip smackin and finger lickin compliments!
These were so tender and moist! These can also be done in your oven- just prepare the same way and wrap in foil and bake for 2 hours at about 350. But, grilled is my favorite. Enjoy!


Sunday, June 7, 2009

California Kabobs

Over the weekend, I decided I wanted to grill some kabobs, but I haven't made them in years. I remembered that Heidi at, Tried and True Cooking with Heidi, had posted a recipe in the last week, so I decided to try them, as they looked especially good! I already had an assortment of veggies, and some sirloin steak in the fridge, so I was set to go. I used zucchini, mushrooms, onion wedges, bell peppers, grape tomato, pineapple and even a little asparagus that I had left. I marinated the meat for about 3 hours and put it on wooden skewers alternately with the veggies and grilled them over a hot grill, maybe 5 minutes per side, some a little longer. They are delicious! The meat was tender and had a wonderful flavor, and of course grilled vegetables are always good. Try them, you'll like them!
CALIFORNIA KABOBS
1/3 cup lemon juice (I used lime juice; I was out of lemons)
2 tbs. oil
2 tsp. Worcestershire sauce
1 tsp. paprika
1/2 tsp. sugar
1/8 tsp hot sauce (I used 1/4)
3/4 pound steak, cut in cubes
Cut your steak in pieces and put into a large resealable bag. Mix together the rest of ingredients, add some salt and pepper and pour 1/4 cup of the marinade into the bag with the meat.Reserve the remaining marinade to brush over kabobs when assembled. Seal bag and place in fridge for at least 2 hours, longer if you have the time. When ready to grill place steak on skewers along with veggies of choice, brush with the reserved marinade, and grill over a hot fire until done. Enjoy! NOTE: Bamboo skewers need to soak in water 2 hours before using or they will burn!

I served the California Kabobs with baked beans, grilled pineapple and rolls. It was a great summer meal, very tasty and easy to put together. Thanks, Heidi!


Tuesday, May 26, 2009

Grilled Spice Rubbed Pork Chops

I love pork chops; you can do quite a lot with them. I wanted to grill yesterday, but I got started sort of late, so I just applied a spice rub to the chops and added some veggies to the grill so that I wouldn't heat up the house. I love meals without too many dishes, don't you? Rather than look up a recipe in a cook book for the rub, I decided to "wing it", which can be a bad thing sometimes
and result in some disappointing disasters! Thankfully, this time was a success as the chops were very flavorful and spicy, but not too spicy! And as you can see, I bought corn, not local corn as it is way too early, but I'm just so impatient for the fresh stuff that I couldn't wait! It will satisfy me for now, but I am really looking forward to some home grown corn!

GRILLED SPICE RUBBED PORK CHOPS
1 Tbs. black pepper
1 tsp. garlic powder
1 tsp. cumin
1 1/2 tsp. kosher salt
2 tsp. paprika
1/2 tsp. sugar
I used 6, 1 inch thick, boneless, pork loin chops ( bone in chops may be juicier)
Mix spices together and sprinkle on both sides of chops. Lay chops on a wax paper lined baking sheet and let set for 20 minutes or so, or you may do this step early in the day so that the pork can marinate, in the fridge, of course. I use a charcoal grill, so when the coals were covered in a light ash and, I placed the chops on the grill over the coals to sear the sides. These chops were grilled about 10 minutes each side, moving only if there was a flare up. The grilling time will depend on the thickness of the meat and the temperature of the grill, so cooking times will vary.
These chops can also be done indoors in a heavy skillet or grill pan and they turn out great! These are moist and very flavorful and I'll make these often. Enjoy!


Sunday, May 17, 2009

Grilled Ginger Peach Glazed Chicken

I had it in my head to grill yesterday and nothing was going to stop me! I had a recipe I've been wanting to try, but so many days we all were just not home at the same time, and our weather has been so stormy with it raining most days lately! Yesterday we saw the sun, so I pulled out this recipe from Better Homes and Gardens, July 2007 issue. This recipe, from Fred Thompson, a South Carolina cook book author, was so delicious and different from the usual BBQ sauces that we like. We like the spicy, sweet and tangy tomato based sauces, but I decided to spring a new one on my brood. The new sauce is supposed to have prepared horseradish in it, but my husband doesn't like it, so I subbed something a little milder, plus I used a different vinegar than called for, but this was an amazing sauce. It's a keeper that I'll be making again! We have a charcoal grill and for this recipe it has to be set up for indirect heat. In other words, the chicken is cooked over a grill pan, with the coals placed on either side of the pan. That way, the chicken doesn't burn and it slow cooks until done. It was so tender and juicy! I used thighs and legs and I removed the skin on about half the pieces to see how it would do. I don't really like eating grilled chicken skin, so if I remove it after it's cooked, I lose the sauce. And I didn't want to lose this yummy sauce! It's sweet and spicy, but with a wonderful peach flavor! Try it!
Grilled Ginger Peach Glazed Chicken
2-3 pounds chicken pieces( thighs and legs or breast halves, skin removed, if desired)
salt and pepper
1/2 cup peach preserves, large pieces cut up
1 Tbs. white wine vinegar, (I used rice vinegar)
1 Tbs. prepared horseradish, (I subbed Inglehoffer deli mustard with grated horseradish, Yum!)
1 tsp. freshly grated gingerroot
Sprinkle chicken lightly with salt and pepper. For a charcoal grill,arrange preheated coals around a drip pan. Place chicken pieces on grill over drip pan and cover grill. Grill over medium heat for 35-40 minutes. While chicken is cooking, place peach preserves in a small sauce pan along with vinegar, horseradish, gingerrroot, 1/4 tsps. salt and 1/2tsp. pepper. Heat just until preserves have melted. Brush peach mixture on chicken and grill covered another 10-20 minutes, until chicken is done, about 180 degrees in dark meat. Brush several times with peach mixture during last minutes of grilling. Use all the sauce; it's too good to waste! Enjoy! I served this with baked beans, ( a staple my son insists we must have), and coleslaw. It was a perfect, late evening meal for four.