Showing posts with label bread. Show all posts

Thursday, November 20, 2014

Quick Potato Rolls

Thanksgiving is almost here, and in my opinion you have to have homemade rolls for the feast. At least in our family you do that is. I've got several delicious roll recipes, but I thought I'd share this Easy Potato Roll recipe today. I love Potato Rolls because of their tender, soft interiors, which come from the addition of mashed potatoes to the dough. This recipe is so easy because it uses the convenience of instant mashed potatoes! Plus, this recipe is a quick rise roll, in which you set the pan of rolls over hot water and they are then ready to bake in just 15 minutes! And they smell heavenly, and fill your home with the aroma of fresh baked bread. Mmmm, Thanksgiving isn't the same without this fragrance.
This quick roll is stirred together, lightly kneaded, then formed into 12 rolls and placed in a greased pan. After they are covered, the pan is placed over a pan of very hot water. The rolls rise for about 15 minutes.
When the rise is over, just pop them into the oven and bake Voila! You have tender, melt in your mouth homemade Potato Rolls. I like to brush them with melted butter right out of the oven, then I just can't wait to eat one. Hope you'll give them a try.
Quick Potato Rolls
Adapted from Taste of Home

Ingredients:
3 1/2 - 4 cups of all-purpose unbleached flour, divided
1 tablespoon sugar
1 package (1/4 ounce), quick-rise yeast
1 teaspoon fine sea salt
3/4 cup warm water (about 120 degrees F.)
1/2 cup warm whole milk (about 120 degrees)
1/4 cup melted butter
1/4 cup dry instant mashed potatoes
1 egg
melted butter to brush over the rolls,(about 1 tablespoon)

Directions:
In a large bowl, combine 1 cup of flour, sugar, yeast, sugar and salt. In another bowl, mix the water milk, and the 1/4 cup melted butter. Stir in the potato flakes and let stand 1 minute. Add the egg and beat until smooth. Add the wet mixture to the dry mixture and mix well. Add enough of the remaining flour to make a soft dough. Turn dough onto a floured surface and knead for 4-6 minutes until smooth and elastic. Cover dough and let rise 10 minutes. Uncover dough and cut into 12 equal pieces. Shape each piece into a ball and place in a greased 9x13 inch baking pan. Place a large baking pan on the counter and fill half full with boiling water. Place the baking pan of rolls over the hot water. Cover the rolls and let rise for 15 minutes. ( I place a baking rack or cookie sheet over the boiling water if needed to hold the pan. Then I cover the rolls with plastic wrap to rise). Preheat the oven to 375 degrees F. while the rolls are rising. After 15 minutes of rising, place the rolls in the oven and bake for20-25 minutes until golden. Remove to a wire rack to cool. Brush with melted butter and enjoy!!

Tuesday, November 26, 2013

Sage Stuffing (or Dressing-whatever you want to call it!)

Here it is, 2 days before Thanksgiving. Time really flies by fast this time of year doesn't it? If you are hosting the meal on the big day I hope that you already have some of the preparations out of the way so that you can enjoy your time with family and friends. Our family had our big dinner this past Sunday. Now that our kids are all married, it seemed like a good idea to celebrate on a different day than Thanksgiving. That frees up the kids to go to the other side of the family on the big day. I mean, it's not really fun if you have to make it to 3 dinners in one day. So this worked well for us.
I thought I'd share my stuffing recipe with you today. Dressing or stuffing, I've called it both names. For years I've tried to make my stuffing like my mother-in-law used to. But she didn't follow a recipe, she had a method that she followed every year that produced a moist and spicy bread dressing that we loved. I'm getting closer. I think I would have nailed it this year, but I needed more sage. But this was still a yummy dressing full of fresh herbs that made tasty leftovers too. My photo was taken quickly, before we sat down to devour our food. Here is my method.
Sage Stuffing
From Lynda's Recipe Box
(Hint) You may use all bread if desired, instead of adding cornbread. To save time on the big day, prepare the corn bread 2 days ahead of your dinner. Also cube the bread at this time. Use a hearty white bread. It will then be dried out enough to stir up the day before your dinner. Just mix up the stuffing and place in a greased baking dish; cover and refrigerate. Take out of fridge about 30 minutes before placing in the oven, Bake and serve.

Ingredients:
about 8 cups of white bread cubes- trim crusts from bread and cut into small cubes
about 4 cups of cornbread, cubed or crumbled- from this recipe, or your own recipe
1/4 cup chopped fresh parsley
3 tablespoons fresh sage, finely chopped- or about 1 tablespoons dried sage
1 teaspoon fresh thyme or rosemary, finely chopped
1 teaspoon salt
about 1/2 teaspoon pepper
1 stick (1/2 cup), unsalted butter, melted
1 large sweet onion, finely diced
2 stalks celery, finely diced
2 large eggs, beaten
1 cup of unsalted chicken stock or broth, or more
1/3 cup half and half or heavy cream

Preparation:
If you need to dry the bread and cornbread more, place the cubes on 2 baking sheets and place in a 300 degree oven for 15-20 minutes until dry. Cool in pans, then transfer to a large bowl. When ready to stir up the dressing, stir in the herbs and the salt and pepper.

Melt butter in a heavy skillet over medium low heat. Add the onions and celery and cook until tender, about 5minutes. Pour into the bowl with the bead. Mix the eggs and half and half together. Pour over the bread. Add the chicken broth and toss all the ingredients together. if you need more broth stir it in. I used about 1 1/3 cup.

Transfer stuffing to a greased 2 1/2 quart to 3 quart baking dish. Cover with foil. (At this point you can refrigerate the stuffing for 1 day.) If ready to bake, place it covered, in the middle of the oven at 350 degrees for 25minnutes. Uncover and bake another 25 - 30minutes until golden. Remove from oven and enjoy.
Also check out my recipe for Sausage and Cornbread Dressing.

My daughter Hailey has started a food blog also. She'd be so happy if you stopped by to "hi" at Tasteful Cuisine.

Thursday, April 4, 2013

Basic Homemade White Bread

 Does anything smell better than bread baking in the oven? I think not!
So yesterday, I made this fantastic white bread that I have had bookmarked forever it seems like, and my house smelled heavenly with the aroma of freshly baked bread. This simple white bread has a tender, moist, but sturdy crumb, and makes the most wonderful toast. I can't wait to make grilled cheese sandwiches with it too.
I must admit to an accident though. When taking the bread out of the pans, I dropped a pan and it landed upside down on a chair! Thankfully not on the floor, but the top of the bread was torn up some. sigh~ So we ate that one first. I don't know if I've ever mentioned what a klutz I am; now you know.
 Anyway, these loaves are delicious to eat, easy to cut and make wonderful toast and sandwiches. Just what I was looking for in a homemade white bread. And the dough was so easy to work with. I used my mixer to stir it up, (and I about killed my hand-mixer) and then kneaded it for about 5 minutes. It only bakes for about 30 minutes so this bread was ready in time for lunch. I hope you'll give it a try!
Basic White Bread
Adapted from this wonderful blog, Living in the Kitchen with Puppies. Natasha adapted it from Bernard Clayton's New Complete Book of Bread.

5 cups bread flour (all-purpose flour can be used)
3 tablespoons sugar
2 teaspoons salt-I used fine sea salt
1 package Quick Rise yeast (2 1/4 teas.)
2 cups whole milk, warmed to about 120 degrees
3 tablespoons melted shortening, cooled

Directions: The recipe is originally mixed with a stand mixer, (but I used and almost killed my hand mixer). *Directions for stand mixer below.
1. Grease 2 loaf pans.
2. Put all ingredients into a large bowl. If mixing by hand, use 4 1/2 cups flour to start and add the extra 1/2 cup as needed. Stir bread well until it comes together. Turn dough out on a lightly floured surface and knead for about 5 minutes. Dough will come together in a nice ball and be very workable.
3. Place dough in a greased bowl and let rise until doubled, about 1 hour. If kitchen is cool, it can take longer to double.
4. When dough has doubled, punch down. That release the air in the dough. Now divide the dough evenly in half. Shape each half in an oval, then roll ups and tuck the ends under. Lay into greased loaf pans. Cover and let dough rise about 45 minutes.
5.Preheat oven to 400 degrees F. Bake bread for 10 minutes. Then reduce the temperature to 350 degrees and bake another 20 minutes. Internal temperature on bread should be 200 degrees F. When done, and loaves should sound hollow when tapped on bottom. Remove bread  (carefully), from pans and cool on wire racks. Enjoy!

*If using a stand mixer, mix with dough hook for 3 minutes to combine, and then 5minutes to knead. Then turn dough out on a floured surface and knead until it forms into a soft ball. Follow remaining directions above.

Wednesday, March 21, 2012

Homemade Sandwich Buns

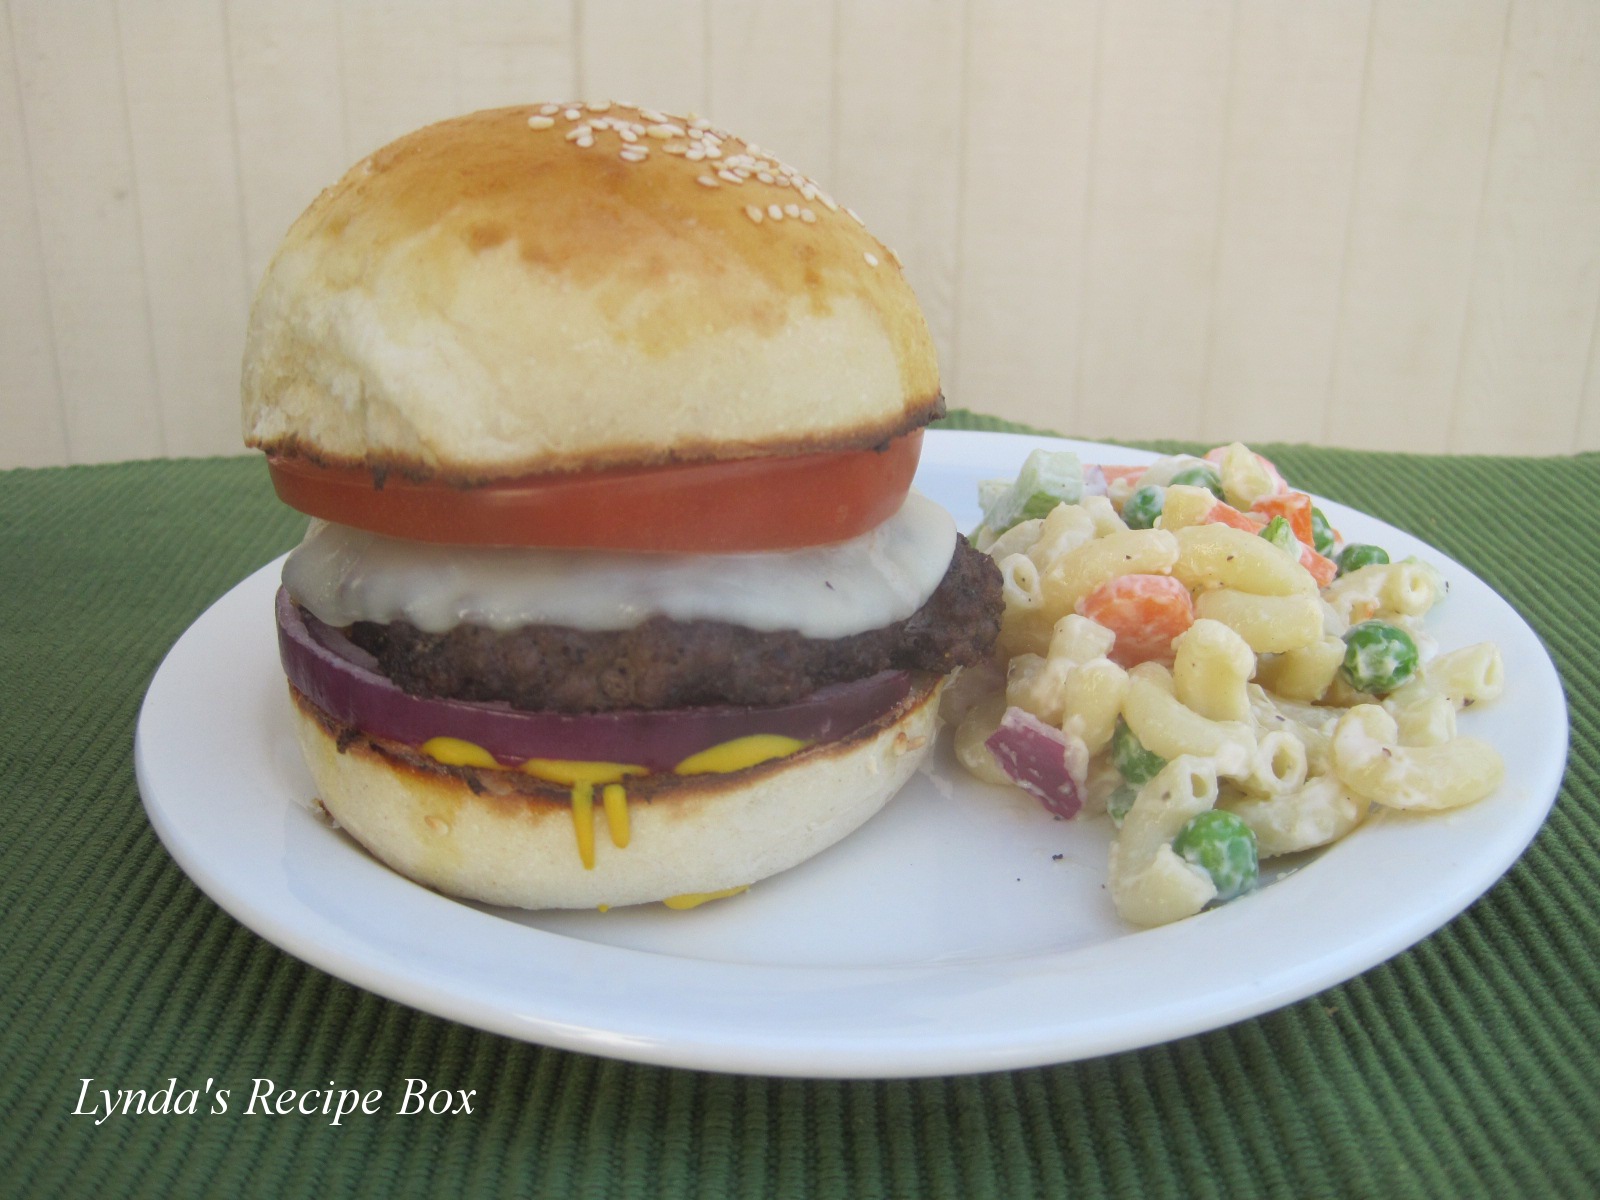
 I finally made these fantastic Homemade Sandwich Buns last week. I've had them bookmarked forever from Cathy at Wives With Knives. If you haven't sen her blog, you need to pay her a visit. With gorgeous pictures and mouthwatering recipes, I can always find something to try there. These sandwich rolls are wonderful for any type of sandwich and they are ready  in about 60 minutes, start to finish! I used them for ham and cheese sandwiches and hamburgers and loved them. I made larger buns than Cathy does, which my husband loved, but they were too large for me. I made 10 buns, but next time will try 12. My husband ate the first one while it was still hot, you know, just to make sure they were OK. HaHa! Even a plain skillet fried hamburger tasted wonderful in these buns. They freeze wonderfully, so I'll be keeping these on hand. Hope you'll give them a try!
Homemade Sandwich Buns
Slightly adapted from Wives With Knives

1 cup milk - I used 2%
1/2 cup water
1 tablespoon honey
1/4 cup butter- I used unsalted butter
1 large egg, room temperature
4 1/2 cups flour- I used unbleached
1 package instant yeast (2 1/4 teaspoon)
1 1/2 teaspoon salt-I only used 1 teaspoon
1 beaten egg yolk, for brushing on the rolls before they bake
Sesame or poppy seeds for sprinkling on tops before baking

1. Heat the milk, honey, water and butter until the butter is melted. Cool to 120F. Beat in the egg.
2. Mix 2 cups of the flour, salt and yeast together. Stir into the milk mixture. Stir in the rest of the flour, 1/2 cup at a time and beat well after each addition.
3. When the dough pulls together and forms a soft ball, turn it out onto a floured surface and knead it until smooth, about 5 minutes. If dough is sticky, add a little more flour as you knead.
4. Divide dough into equal parts. I made 10 rolls, which turned out to be just right for my husband, but too much for me. Next time I'll make 12 rolls, like Cathy does.
5. Shape the dough into smooth balls and place on a baking sheet lined with parchment paper. Flatten the rolls slightly with your hand.
6. Cover loosely with plastic wrap and let rise 30-40 minutes. When rolls are almost double in size, brush with beaten egg yolk, if desired. Sprinkle with poppy seeds or sesame seeds. Bake in a preheated oven for 10-12 minutes. Since my rolls were a bit larger, I baked them about 14 minutes.
7. Enjoy!


Thursday, February 16, 2012

Cuban Bread

  Wouldn't you love to have some wonderful homemade bread to eat in 2 hours or less, from start to finish? This is the easiest bread I've ever made. All you do is stir together 5 ingredients, let it rest about 25 minutes, divide into 2 loaves, place in cold oven. Turn on oven and bake. Like I said, this bread is so easy. Oh, and it tastes good too, real good. It developes a great flavor in a very short time. And the sesame seeds add a wonderful toasted flavor to this bread. I've made it twice in one week and we can't stay out of it. When I saw this recipe on Heather's site  I knew I'd have to make it. She makes lots of bread, so I trusted her judgement. This Cuban bread has a thick crust with a very substantial, but soft interior. I made Cuban bread years ago a few times, but it was a long loaf similar to french bread. Seriously, there's not a good reason to not have homemade bread in the house when it comes together this fast. My husband and I love it. Hope you give it a try!
Cuban Bread
adapted from Bernard Clayton's New Complete Book of Breads

Ingredients:
5-6 cups of bread flour
2 packages dry yeast, I used quick rise
1 tablespoon salt- I used 2 teaspoons
2 tablespoons sugar
2 cups hot water- I just used hot water from the faucet
sesame or poppy seed for top, optional
cornmeal for the baking sheet

1. Place 4 cups of bread flour in a large mixing bowl and add the yeast, salt and sugar. Stir until blended. Pour in the hot water and beat 100 strokes by hand, or about 3 minutes with a mixer.
2. Gradually work in the rest of the flour, 1/2 cup at a time, until the dough is no longer sticky. I ended up using almost 5 1/2 cups.
3. Sprinkle your work surface with flour, and work in the flour as you knead by hand, until the dough is smooth and elastic, about 8 minutes. OR, or beat with a dough hook of mixer until smooth.
4. Place dough in a greased bowl, cover with plastic wrap, and place in a warm spot until double in bulk -15 to 25 minutes.
5. Punch dough down and turn the dough out on work surface. Cut in half. Shape each piece into a round and place on baking sheet that has been dusted with cornmeal.
6. Take a sharp knife or razor and slash an  X on each loaf. Mist with water and then sprinkle with sesame seeds or poppy seeds.
7. Place baking sheet in cold oven on the middle rack. Place a pan of hot water on the lower shelf of oven. Turn oven on to 400 degrees F (205 C). The bread will rise while the oven heats.
8.Bake for about 50 minutes, until the loaves are golden and bottom crusts sound hard and hollow when thumped. Cool the loaves on a wire rack a bit before slicing. Enjoy!

Sunday, January 16, 2011

Homemade French Bread

Don't you just love the aroma of homemade bread bread baking in the oven? Last week when the weather was cold and snowy, I had the urge to bake this French Bread to go with a big pot of soup. It's been quite awhile since I have made this, but this tasty bread is one of my family's favorites. Chewy and deliciously crusty on the outside, and soft, but yet dense on the inside, this bread is perfect with soups and stews or used to make garlic toast. I've been working on this post for several days and happy to finally have it posted as Blogger has been giving me fits. But we've been savoring our French Bread. If you like to bake your own bread, I think you will enjoy this one. Let me show you how.
After the dough is all stirred up it will be rather sticky looking, but will smooth out as it is kneaded. I like kneading the dough; I find it very therapeutic!

After a few minutes of kneading it should be a nice smooth, elastic ball. Then it needs to rise.

Isn't it pretty? It will double in size in about an hour.

After it has risen you "punch it down", which deflates the air out of the dough. Then It has to rise a second time, only about 30 minutes this time around. Deflate it again and divide the dough into three equal pieces.

Each piece of dough is rolled out a bit and then rolled up into individual loaves, and placed on baking sheets that have been greased and dusted with corn meal.


Cover each loaf with a kitchen towel and let rise until doubles again. This is the last rising. Preheat your oven at this time.

When the dough has doubled, take a sharp knife and gently score each loaf of bread. don't cut too deeply. Then brush each loaf with beaten egg white. Bake in the oven till golden and you will have some fantastic looking bread! Try not to cut it right away and let it cool-yea, right! When my kids were all home everyone was standing around like vultures waiting for a hot slice to slather with butter. The first loaf was gone in a matter of minutes! It's a good thing this recipe makes 3 loaves. Or sometimes I make two larger loaves. Here's the recipe.

CRUSTY FRENCH BREAD
from a Family Circle cookbook
1 envelope active dry yeast- 2 1/4 teaspoons
2 cups very warm water
6 cups sifted all purpose flour-you may not use all of it
2 tablespoons granulated sugar
2 teaspoons salt-Recipe calls for 3 tea.
2 tablespoons shortening-I sometimes use olive oil
cornmeal for dusting the pans
1 egg white
1 tablespoon cold water
1. Pour the very warm water in a large bowl. (The water should feel comfortably warm when dropped on your wrist). Sprinkle the yeast into the water. Stir until the yeast dissolves.
2. Stir in 3 cups of the flour, the sugar, shortening and salt; beat until smooth. Slowly beat in enough of the remaining 3 cups of flour to make a stiff dough. It will still be somewhat sticky in appearance.
3. Turn the dough onto a lightly floured surface; knead for about 5 minutes. I find this rather therapeutic! Knead until the dough is smooth and elastic, using only as much of the remaining flour to keep dough from sticking. Like I said, you may not end up using all the flour.
4. Place the dough in a large greased bowl and turn to coat all over with the shortening. Or, brush very lightly with oil. Cover with a clean towel and place in a warm place to rise. It should double in 45-60 minutes.
5. When dough has doubled, punch it down (deflate it), and cover and let it rise a second time, until doubled in size. This will take around 30 minutes.
6. Punch down the dough again and knead 1 minute on a lightly floured surface. cut the dough into 3 equal pieces. Roll each piece into about a 12x9 inch rectangle. Roll up jelly roll fashion and pinch the seam together. Tuck the ends underneath. Grease baking sheet and sprinkle with cornmeal.
7. Place the bread on the prepared baking sheets: cover and let rise until doubles again, about 30 minutes. Preheat oven to 400 degrees F. at least 15 minutes before loaves are ready to bake.
8. Make several evenly placed diagonal cuts on top of each loaf. Beat together the egg white and the 1 tablespoon of cold water: brush over each loaf of bread gently with a pastry brush.
9. Place a pan of hot water on bottom shelf of the oven. Place baking sheet with loaves on shelf above the water.
10. Bake in a hot 400 degree oven for 25-30 minutes, or until the loaves are golden brown and sound hollow when tapped. Remove from baking pans and cool on wire racks. Enjoy!
NOTE: If your baking sheet is very large you may be able to bake all three loaves on 1 sheet. But you don't want the loaves too close together. Since I made one round loaf, I baked it on a second baking pan.
Another NOTE: I usually freeze 1 or 2 loaves of this bread. Double wrap it in plastic wrap and then in foil or a heavy freezer bag. It will keep for a couple of weeks.