Sunday, December 29, 2013

Rolo Pretzel Turtle Candies

I hope everyone has had a Merry Christmas and that you are looking forward to the New Year! Food is such a big part of our holidays aren't they. You've all probably eaten these delicious Rolo Pretzel Turtle Candies at some time. These candies are such easy little Turtle candies to make and so addictive once you pop one in your mouth. I made some of them into sandwiches for anyone that can't have nuts. I wanted to drizzle them with more chocolate, but I had depleted my stash of chocolate. Oh well, I'll do it next time. I will be making these yummy treats again.
Easy and delicious too, they don't require many steps. Here's the directions to make the Rolo Pretzel Turtles.
Rolo Pretzel Turtle Candies
Make as many candies as you wish. I used all of the Rolos. Baking too long will cause the Rolos to break open when pressed with a pecan, so don't over bake.
1 bag individual Rolo Candies, unwrapped
1 bad waffle shaped pretzels, I used Snyder's
pecan halves- enough for all the candies you are making
 
Preheat oven to 350 degrees F. Line a baking sheet with parchment paper or foil. Place the pretzels on the baking sheet, not too closely. Place 1 Rolo on each pretzel. Put pan in oven and bake 2-3 minutes. Remove pan from oven and press a pecan half on each candy. Let cool completely before serving. Enjoy!


Sunday, December 8, 2013

Garlic Sauteed Spinach

When I was a kid, the cartoon Popeye the Sailor Man was one of my favorite cartoons. I can remember wanting to be strong like him so I begged my mother to buy me the canned spinach that Popeye reportedly ate. When she prepared it for dinner one evening I can remember taking a few bites and then flexing my arm to see if I had muscles as large as Popeye's! Of course I didn't, but as we know spinach is considered a very healthy super-food adding lots of nutrients that our bodies need. Sauteing spinach in olive oil and garlic makes it a most delicious side dish. Really, if you love wilted spinach, I think you will enjoy this version adapted from Ina Garten, very much.

Garlic Sauteed Spinach
approximately 3-4 servings

1 pound of baby spinach, washed
4 cloves garlic, thinly sliced
1/2 teaspoon salt
1/4 teaspoon fresh black pepper
2 tablespoons olive oil
1 tablespoon butter
fresh lemon for squeezing

In a large pot or dutch oven, heat the oil over medium heat. Add the garlic and cook only about 1 minute. Don't let it get brown. Add all off the spinach, the salt and pepper to the pot. Give it a stir and cover the pot with a lid to let the spinach steam about 2 minutes. Remove the lid and give it a good stir and cook if needed, until all the spinach is wilted. Using a slotted spoon, remove the spinach to a serving dish. Top with the pat of butter and a good squeeze of lemon. Serve hot. Enjoy!


Wednesday, November 27, 2013

Homemade Cranberry Sauce

Well, it's just a few hours until Thanksgiving officially is here. Are you ready? I thought I'd share a very quick recipe for Homemade Cranberry Sauce that is delicious. I grew up eating the cranberry sauce from the can. That's all my mother ever bought. I didn't have the homemade stuff until I was married and had my first holiday at my mother-in-laws house. I fell in love with the tart, fresh flavor of the cranberries. I've made several different recipes through the years, like Cranberry Apple Relish which I have also posted. This is the quickest recipe and will only take you about 15 minutes! There's definitely time for you to make this before dinner!

Homemade Cranberry Sauce
From Lynda's Recipe Box
I used the juice from an orange plus enough water to make 1 cup of liquid. There is just a hint of orange in the taste. You could use all water, or another juice like apple or pomegranate if desired. You can also stir in chopped nuts after cooking.

Ingredients:
12 ounce bag of fresh cranberries
zest from 1 orange
juice from 1 orange, plus enough added water to make 1 cup of liquid
1 cup of granulated sugar

Directions:
In a 3 quart sauce pan bring the water mixture and the sugar to a simmer; add the cranberries and bring to a rolling boil. Turn heat down to medium low, still boiling, and cook for 10 minutes. Stir frequently. Stir in the orange zest and remove pan from heat. The cranberry sauce will be foaming, but as it begins to cool, it will disappear when you give it a stir. Or you may skim the foam off if preferred. Pour sauce into a serving dish and chill until time to serve. I hope you enjoy your deliciously sweet, but tart Cranberry Sauce
Happy Thanksgiving!

Tuesday, November 26, 2013

Sage Stuffing (or Dressing-whatever you want to call it!)

Here it is, 2 days before Thanksgiving. Time really flies by fast this time of year doesn't it? If you are hosting the meal on the big day I hope that you already have some of the preparations out of the way so that you can enjoy your time with family and friends. Our family had our big dinner this past Sunday. Now that our kids are all married, it seemed like a good idea to celebrate on a different day than Thanksgiving. That frees up the kids to go to the other side of the family on the big day. I mean, it's not really fun if you have to make it to 3 dinners in one day. So this worked well for us.
I thought I'd share my stuffing recipe with you today. Dressing or stuffing, I've called it both names. For years I've tried to make my stuffing like my mother-in-law used to. But she didn't follow a recipe, she had a method that she followed every year that produced a moist and spicy bread dressing that we loved. I'm getting closer. I think I would have nailed it this year, but I needed more sage. But this was still a yummy dressing full of fresh herbs that made tasty leftovers too. My photo was taken quickly, before we sat down to devour our food. Here is my method.
Sage Stuffing
From Lynda's Recipe Box
(Hint) You may use all bread if desired, instead of adding cornbread. To save time on the big day, prepare the corn bread 2 days ahead of your dinner. Also cube the bread at this time. Use a hearty white bread. It will then be dried out enough to stir up the day before your dinner. Just mix up the stuffing and place in a greased baking dish; cover and refrigerate. Take out of fridge about 30 minutes before placing in the oven, Bake and serve.

Ingredients:
about 8 cups of white bread cubes- trim crusts from bread and cut into small cubes
about 4 cups of cornbread, cubed or crumbled- from this recipe, or your own recipe
1/4 cup chopped fresh parsley
3 tablespoons fresh sage, finely chopped- or about 1 tablespoons dried sage
1 teaspoon fresh thyme or rosemary, finely chopped
1 teaspoon salt
about 1/2 teaspoon pepper
1 stick (1/2 cup), unsalted butter, melted
1 large sweet onion, finely diced
2 stalks celery, finely diced
2 large eggs, beaten
1 cup of unsalted chicken stock or broth, or more
1/3 cup half and half or heavy cream

Preparation:
If you need to dry the bread and cornbread more, place the cubes on 2 baking sheets and place in a 300 degree oven for 15-20 minutes until dry. Cool in pans, then transfer to a large bowl. When ready to stir up the dressing, stir in the herbs and the salt and pepper.

Melt butter in a heavy skillet over medium low heat. Add the onions and celery and cook until tender, about 5minutes. Pour into the bowl with the bead. Mix the eggs and half and half together. Pour over the bread. Add the chicken broth and toss all the ingredients together. if you need more broth stir it in. I used about 1 1/3 cup.

Transfer stuffing to a greased 2 1/2 quart to 3 quart baking dish. Cover with foil. (At this point you can refrigerate the stuffing for 1 day.) If ready to bake, place it covered, in the middle of the oven at 350 degrees for 25minnutes. Uncover and bake another 25 - 30minutes until golden. Remove from oven and enjoy.
Also check out my recipe for Sausage and Cornbread Dressing.

My daughter Hailey has started a food blog also. She'd be so happy if you stopped by to "hi" at Tasteful Cuisine.

Wednesday, November 20, 2013

Oatmeal Peanut Butter Chocolate Chip Cookies

 I love cookies. My favorites are peanut butter, oatmeal cookies and chocolate chip cookies. So when I found this recipe that contained all three ingredients in one cookie I was thrilled. I must say they taste amazing! Soft and chewy in the middle and crisp around the edges these are the perfect cookie in my opinion. The aroma while baking made it really difficult to resist when they were done. So I just gave in. They are just so delicious!  The dough freezes well too, making it easy to make ahead and thaw for later use. These Oatmeal Peanut Butter Chocolate Chip Cookies are going to be on my cookie trays this holiday season. Here's the recipe.
Oatmeal Peanut Butter Chocolate Chip Cookies
adapted from Epicurious
This dough can keep in the refrigerator up to 1 week before baking. It also freezes very well. I baked about half the dough and froze the rest. I thawed it out about 2 weeks later and baked the rest. Perfect cookies!

Ingredients:
1 1/2 cups old-fashioned rolled oats
2   cups all-purpose flour
1 teaspoon baking powder
1 teaspoon baking soda
1/2 teaspoon salt
2 sticks (1 cup) unsalted butter, softened
1 cup granulated sugar
1 cup light brown sugar, firmly packed
1 tablespoon vanilla extract, (yes, that right!)
3/4 cup regular peanut butter- either plain or chunky works
2 large eggs
1 1/2 bags (about 18 ounces, or more if you wish), of semi-sweet chocolate chips

Directions:
In a food processor pulse 1 cup of the oats until fine. In a large bowl mix together the ground oats, the other 1/2 cup of rolled oats, flour, baking powder, soda, and salt.

In another bowl with a mixer beat together the butter and sugars until fluffy. Beat in vanilla and peanut butter and beat well. Add eggs one at a time. Gradually beat in the flour mixture, or mix it by hand if desired. Add the chocolate chips and mix until combined.. Chill cookie dough covered,  at least 2 hours, or up to 1 week.

To bake:
Preheat the oven to 325 degrees F.
Form rounded tablespoons of dough and place on baking sheet about 2 inches apart. Flatten balls just slightly. Bake in the middle rack of the oven 15 minutes just until pale golden. Cool on baking sheet 5 minutes an then remove cookies to cooling rack. Enjoy!

Wednesday, October 16, 2013

Pumpkin Coffee Cake with Brown Sugar-Pecan Streusel

 I am so happy that fall is here! I want to spend more time in the kitchen when the cooler weather arrives, and I always love trying new pumpkin and apple recipes to add to my recipe collection . I must admit that I've struggled with cooking and blogging the last few months since I had surgery, but fall is my favorite time to experiment in the kitchen. This Pumpkin Coffee Cake with Brown Sugar-Pecan Streusel is delicious and was a real treat for my husband and I. We both love pumpkin so there's nothing bad to say about this recipe. This cake is not as heavy and moist as my pumpkin bread, because it uses butter instead of oil. The streusel is so yummy with the toasted pecans and made this cake such a treat with a steaming mug of coffee! I also love the size of the cake; it's made in a 9 inch springform pan so it's not too huge for a small group. It was perfect for us. Here's the recipe.
Pumpkin Coffee Cake with Brown Sugar-Pecan Streusel
Adapted from Williams-Sonoma
(The only thing I changed in the recipe was the spice amounts.)

Ingredients:
For the streusel;
1/3 cup all-purpose flour
1/2 cup firmly packed light brown sugar
1 teaspoon cinnamon
pinch of salt
6 tablespoons cold unsalted butter
1 cup chopped pecans, lightly toasted (Spread pecans on baking sheet; toast   at 325 for 5 minutes. Cool before adding to streusel.)

For the batter:
1 1/2 cups all purpose flour
2 teaspoons baking powder
1/2 teaspoon baking soda
1 1/2 teaspoons cinnamon
1/2 teaspoon ground ginger
1/4 teaspoon ground nutmeg
1/2 teaspoon salt
8 tablespoons unsalted butter, softened
1 cup firmly packed light brown sugar
2 large eggs
1/2 cup canned pumpkin puree
1/2 cup sour cream

For the glaze:
1/2 cup confectioners sugar
about 2-3 teaspoons of milk
1 teaspoon vanilla extract

Directions:
Preheat oven to 350 degrees F. Grease and flour a 9 inch springform pan.

To make the streusel, combine the flour, brown sugar, salt and cinnamon in a bowl. Add the butter; use a pastry cutter to cut in the butter until mixture looks like coarse crumbs. Or you may use  a food processor. Stir in the pecans. Set aside.

For batter; in a large bowl, sift together the flour, baking powder, baking soda, cinnamon, ginger, nutmeg and salt. In another bowl, beat together the butter and sugar, until combined. beat in the eggs, one at a time. Add the pumpkin and sour cream and mix. Stir in the dry ingredients. Batter is very thick.

Spread half the batter in the prepared springform pan. Sprinkle half of the streusel over the batter. Dollop the remaining batter over the streusel and spread over the streusel as best you can. (This was the hardest part of the recipe for me as the batter does not want to spread well. but it turns out delicious anyway.) Top with the remaining streusel. Bake until a toothpick inserted into the center of the cake come out clean, about 50-55 minutes. Place pan on a wire cooling rack for 15 minutes. Remove the sides of the pan from the cake and slide cake onto rack to finish cooling.

To glaze, whisk together the confectioners sugar, milk and vanilla until smooth. Place cake on serving platter. Drizzle glaze over cake. Enjoy!


Tuesday, August 6, 2013

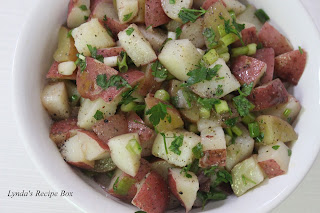
I'm Back with an Oil and Vinegar Potato Salad Recipe

 I thought I'd drop in and share a quick, delicious potato salad recipe that I made recently. It is so easy to put together and is healthy, delicious and perfect for hot weather. Made with a dressing of red wine vinegar and olive oil, it stays light and tangy and complements just about any main dish from grilled and smoked meats, fried chicken, sandwiches and anything else you can think of. It is yummy served room temperature or cold. So if you like a light and tangy potato salad, this recipe is for you. I will caution you to not over-cook the potatos though as this salad is best when the potatoes hold their shape and are not mushy. So watch them carefully while they boil.
As a quick update, I am doing well with my new knee. It has been almost 3 months since my surgery and I am walking so much better. I have awhile before I'll be back to normal, but I'm getting there. I'm more interested in cooking again, so more recipes are on the way! Thanks for all the well wishes and prayers that you have sent my way!
 Now, here's the recipe.
Oil and Vinegar Potato Salad
Adapted from here

1 1/2 pounds new, small red potatoes, scrubbed and diced
1/4 cup red wine vinegar
1/3 cup olive oil
1/2 cup sliced green onions, or 1/2 of a small red onion diced
1 teaspoon sugar
2 tablespoons chopped fresh Italian parsley
2-3 teaspoons of mustard, if desired- I used 2 teas.

Add diced new potatoes to a pot; cover with cold water and bring to a boil. Reduce heat and simmer until potatoes are just tender, (mine took about 5-10 minutes depending on how small you dice them).
Boil potatoes only until they are just tender. Drain them well, and spread the potatoes out on a baking sheet to cool. (I usually place them in the fridge to hurry up the cooling.)
Put cooled potatoes into a bowl with the diced onions. Mix the dressing ingredients together and pour over the potatoes and onions. Stir gently; serve immediately, or refrigerate for later. So easy and yummy - enjoy!

Monday, May 27, 2013

Memorial Day Recipes

 Hi! Remember me? Please don't give up on me. I'll share more of my current situation after the recipes. I've got a couple of delicious food ideas for your summertime dinner celebrations, starting with today's Memorial Day Cookouts. First up is my Springtime Macaroni Salad with Peas, which is one of out family favorite recipes. It also is one of the most popular recipes on my blog. Made with elbow macaroni and lots of spring veggies, it is cool, creamy and delicious, and one of my all time favorite salads. I could eat just a plate of this and be very happy! Here are some more salads ideas for your table!
And this Four Layer Pudding Dessert is a favorite from way back. My family will devour this dessert way before they even touch anything else. No kidding, I could spend hours over the most wonderful layer cake or fancy pie, but this dessert will win hands down with my family, every time. It is delicious and easy to make as well. You will be the star of the potluck!
I have many other winning recipes for this summers cookouts that I wish I could list here. But this is a quick post; here's what I've been up to in the last 2 weeks.
I underwent knee replacement surgery on May 8th of this month and am recuperating nicely, but I am not back to cooking yet. Physical therapy is taking up most of my time right now, and my appetite has not been very good yet either. I am so grateful to my friends and family who have prepared delicious meals for me, so I haven't had to worry about what we will eat on any particular day. And I have plenty of salad fixins to fall back on at lunch time too, so I'm definitely not hurting for food. I'm also suffering from some sciatic nerve pain at this time, so sitting for long periods blogging is not easy right now. I am trying to catch up, but I am slow. Please bear with me while I get my strength back and keep me in your thoughts and prayers. I have some recipes that I will be posting very soon that will get you taste buds revved up for summer! Happy summer!

Friday, May 3, 2013

Butternut Squash Soup

 Creamy and mildly sweet, this body warming soup is perfect with a salad or sandwich, and was perfect for this cold weather. Snow in May? That usually doesn't happen here in Southwest Missouri, but that's what's going on. After about 3 days of 80 degree weather, we had a cold front come through yesterday which brought lots of freezing rain and 2 inches of heavy snow. So this soup tasted so good. I was glad I purchased a butternut squash at the market earlier in the week. I love its mild flavor, and though I usually roast them in the oven, I made soup this time, and it is delicious. This is a keeper recipe for me. It is simple and mildly seasoned so the flavor of the squash shines through. This squash is a fall veggie, but it sure was tasty on this freezing May day.
Butternut Squash Soup
Adapted from Brown Eyed Baker, which she adapted from America's Test Kitchen

2 1/2 tablespoons unsalted butter
1 small shallot, diced fine
1 butternut squash, about 2 pounds, cut in half lengthwise, with the seeds and strings scraped out and reserved
4 cups water
3/4 teaspoon sea salt
1/3 cup half and half or heavy cream
1 teaspoon brown sugar
pinch of cinnamon or nutmeg

1. In a large Dutch oven, melt the butter and add the diced shallot. Cook and stir for about 3 minutes over medium-low heat until softened, but not browned. Add the squash scrapings and seeds and cook until the butter is saffron colored, about 4 minutes.
2. Add water and salt to the Dutch oven, bring to a boil over high heat. Reduce heat to medium low again. Cut squash halves in half cross-wise. Place a steamer basket in the Dutch oven and the squash in the steamer basket, cut sides down. Cover pot and simmer for about 30minutes until squash is fork tender. Remove the pot from the heat. Use tongs to remove the squash from the steamer basket and transfer to a plate or baking sheet. When cool enough to handle, scoop the flesh out of the skins and put in a bowl. Discard the skins.
3. Strain the hot cooking liquid through a mesh strainer into a second bowl. Discard the solids. Rinse and dry the pot.
4. Puree the squash in batches in a food processor or blender, adding some of the cooking liquid until it has a smooth consistency. Pour puree into the pot; add the cream, and brown sugar and more cooking liquid if needed and heat the soup over medium-low heat for about 3 minutes until hot. Do not boil. Add a pinch of cinnamon and salt to taste. Stir, taste, and adjust seasoning if needed. Serve in bowls with a another pinch of cinnamon. Delicious!

Tuesday, April 9, 2013

Blueberry Pie Bars

 If you love blueberries, and you love pie you will be thrilled with this yummy recipe for Blueberry Pie Bars. The blueberries are in a creamy filling and surrounded by a crumb style crust. When I saw the recipe last week, I knew I had to make them immediately. The bottom crust is pretty sturdy to hold the filling and there is a thin layer of crust on top also. These blueberry treats are a definite winner in our household. I hope you give these delicious treats a try.
Blueberry Pie Bars
Adapted from a wonderful blog, Annie's Eats. She used blackberries instead of blueberries.

Ingredients:
For crust and topping-
1 1/2 cups all-purpose flour
3/4 cup sugar
pinch of salt
zest of half a lemon
3/4 cup (12 tbsp.) unsalted butter

For the filling-
2 large eggs
1 cup sugar
1/2 cup Greek yogurt or sour cream- I used vanilla Greek yogurt
6 tablespoons flour
pinch of salt
juice of half a lemon
1 teaspoon vanilla-I omitted since I used vanilla yogurt
15-16 ounces fresh blueberries (can use frozen if they have been thawed and drained of excess juices)

Directions:
1. Preheat oven to 350 degrees F. Line a 9x9 inch baking pan with foil and spray with cooking spray. In the bowl of a food processor, combine the flour, sugar, salt and zest. Add the cold butte and process pulse in short bursts until the mixture is crumbly.

2. Reserve 3/4 of the mixture to use as topping. Add the rest of the crumb mixture to the prepared pan and press to form an even layer of crust on bottom of pan. Bake 12-15 minutes until light golden. Let cool 10 minutes before proceeding.

3. In a medium bowl. make the filling. Combine eggs, sugar, yogurt (or sour cream), flour, salt lemon juice and vanilla. Whisk until smooth. Gently stir in the blueberries. Spread the filling over the pre-baked crust. Crumble the reserved topping evenly over the filling.

4. Bake until the top is beginning to brown and the bars are just set, about 45 minutes. Let cool completely on a wire rack. Chill to firm up the bars before slicing and serving. Enjoy!

Thursday, April 4, 2013

Basic Homemade White Bread

 Does anything smell better than bread baking in the oven? I think not!
So yesterday, I made this fantastic white bread that I have had bookmarked forever it seems like, and my house smelled heavenly with the aroma of freshly baked bread. This simple white bread has a tender, moist, but sturdy crumb, and makes the most wonderful toast. I can't wait to make grilled cheese sandwiches with it too.
I must admit to an accident though. When taking the bread out of the pans, I dropped a pan and it landed upside down on a chair! Thankfully not on the floor, but the top of the bread was torn up some. sigh~ So we ate that one first. I don't know if I've ever mentioned what a klutz I am; now you know.
 Anyway, these loaves are delicious to eat, easy to cut and make wonderful toast and sandwiches. Just what I was looking for in a homemade white bread. And the dough was so easy to work with. I used my mixer to stir it up, (and I about killed my hand-mixer) and then kneaded it for about 5 minutes. It only bakes for about 30 minutes so this bread was ready in time for lunch. I hope you'll give it a try!
Basic White Bread
Adapted from this wonderful blog, Living in the Kitchen with Puppies. Natasha adapted it from Bernard Clayton's New Complete Book of Bread.

5 cups bread flour (all-purpose flour can be used)
3 tablespoons sugar
2 teaspoons salt-I used fine sea salt
1 package Quick Rise yeast (2 1/4 teas.)
2 cups whole milk, warmed to about 120 degrees
3 tablespoons melted shortening, cooled

Directions: The recipe is originally mixed with a stand mixer, (but I used and almost killed my hand mixer). *Directions for stand mixer below.
1. Grease 2 loaf pans.
2. Put all ingredients into a large bowl. If mixing by hand, use 4 1/2 cups flour to start and add the extra 1/2 cup as needed. Stir bread well until it comes together. Turn dough out on a lightly floured surface and knead for about 5 minutes. Dough will come together in a nice ball and be very workable.
3. Place dough in a greased bowl and let rise until doubled, about 1 hour. If kitchen is cool, it can take longer to double.
4. When dough has doubled, punch down. That release the air in the dough. Now divide the dough evenly in half. Shape each half in an oval, then roll ups and tuck the ends under. Lay into greased loaf pans. Cover and let dough rise about 45 minutes.
5.Preheat oven to 400 degrees F. Bake bread for 10 minutes. Then reduce the temperature to 350 degrees and bake another 20 minutes. Internal temperature on bread should be 200 degrees F. When done, and loaves should sound hollow when tapped on bottom. Remove bread  (carefully), from pans and cool on wire racks. Enjoy!

*If using a stand mixer, mix with dough hook for 3 minutes to combine, and then 5minutes to knead. Then turn dough out on a floured surface and knead until it forms into a soft ball. Follow remaining directions above.

Sunday, March 31, 2013

What to do with left-over Ham

Our family Easter dinner was last night and I didn't get any pictures of our ham. Sorry, it was beautiful, delicious and everyone was hungry. So we ate. I baked a ham and I'll just have to bake another soon, when I can take pictures. But we have plenty for some great tasting leftovers, that won't taste like leftovers. Sandwiches are wonderful, but here's some other ideas if you have a good portion of ham hanging out in your fridge.
 Scalloped Potatoes and Ham are awesome. Really, this is a dish that's easy to overindulge in. I have to be very careful because it is so delicious!
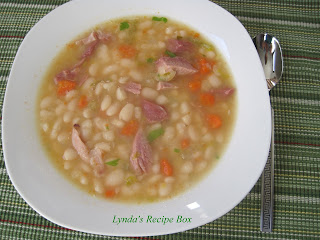
 White Beans and Ham Soup. I use great northern dried beans for this hearty dish.
 Asparagus, Ham and Fried Egg Stacks. So yummy and perfect for breakfast, lunch or dinner.
 Red Beans and Rice. If your craving a little southern comfort, then look no further. Spice it up as much as you like.
 I love a good Western Omelet, made with ham or bacon. Perfect for anytime of day.
 Green Beans and New Potatoes. Of course this dish is best with garden beans, but I froze my ham bone to use for the season's first green beans. Don't ever throw out your ham bone! Just wrap it in plastic wrap, then in heavy foil or put it in a freezer bag. Date it and freeze to use in green beans, or soup. It will last several months in the freezer.
 
And this is a tree, not food. I was outside today and it is so beautiful that I had to take some pictures. It is 70 plus degrees and gorgeous! Our trees are beginning to bloom. Spring just may have arrived, for a few days anyway.
I hope you all have had a fantastic Easter and hopefully you've  found some good ham recipes. Love to my readers!


Friday, March 29, 2013

He did it for us!

Have a blessed Good Friday! Remember the sacrifice that Christ made for us.

Tuesday, March 26, 2013

The Best Cheesy Broccoli and Rice Casserole (No canned Soup!)

 If you would like a really creamy, really cheesy Broccoli and Rice recipe, look no further. This awesome recipe is the best I've ever had, and there is absolutely no canned soup involved. I made it this week and my husband and I both loved it's creaminess, with lots of broccoli goodness and great cheese flavor too. I won't make any other, ever. In my early married years I made the old canned soup version, but it doesn't hold a candle to the real thing. I used to always serve Broccoli and Rice Casserole at Easter dinner, and sometimes for other holidays too. Broccoli is a great spring vegetable, even though it is readily available all year long now. I love it raw, in salads and in casseroles. It is my all time favorite veggie. Anyway, I hope you'll give this recipe a try; it's really delicious and addictive.
Cheesy Broccoli and Rice Casserole
Adapted from Mel's Kitchen Cafe (which she adapted from Cook's Country)

Ingredients:
For topping;
2/3 cup Panko bread crumbs
3 tablespoons melted butter
1/4 cup freshly shredded Parmesan cheese
1 clove garlic, minced
For casserole;
2 pounds broccoli- (about 3-4 heads), florets cut into 1 inch pieces and stems chopped
2 tablespoons butter
1 medium onion, finely diced
1 1/4 cups long grain white rice
4 cups low-sodium chicken broth
1 1/4 cups half and half
3/4 teaspoon salt
about 1/4 teaspoon black pepper (subbed for 1/8 tea. cayenne pepper)
2 cups shredded extra sharp cheddar cheese
1/2 cup shredded Parmesan cheese

Directions:
1. Place oven rack in center position and preheat oven to 400 degrees. Grease a 9x13 inch baking dish. In a small bowl combine the panko crumbs, melted butter, 1/2 cup grated Parmesan and garlic. Set aside.
2. Microwave broccoli florets (save stems for later), covered in a large bowl until bright green and tender, 2-3 minutes. Be careful to not overcook. Melt the 2 tablespoons butter in a large pot over medium heat. Cook onion and broccoli stems until softened and tender, about 8-10 minutes. Add rice and cook stirring, about 1 minute. Stir in broth and half and half and bring to a boil. Reduce heat to medium-low and cook until rice is tender. Be sure to stir rice often. Cook for 20-25 minutes. Off heat, stir in the salt, pepper, cheddar and Parmesan cheeses, and the broccoli florets. Pour the mixture into the prepared baking pan. Top with the reserved panko crumb mixture and bake until the sauce is bubbly and the top is golden, about 15 minutes. Cool 5 minutes. Serve and enjoy!

Note: This dish can be prepared ahead of time. Follow recipe instructions. After pouring the mixture into the baking dish, cover it with plastic wrap and refrigerate up to 8 hours. Store the crumb mixture in a separate container in fridge. Before baking, sprinkle the crumbs on top of casserole. Bake at 375 degrees for 25-30 minutes until hot and bubbly.

Sunday, March 24, 2013

Skillet Chicken, Broccoli, and Penne

 I just love a good one pot meal. In this case it is a yummy skillet meal with thin slices of chicken, penne pasta, tender-crisp broccoli with an easy and delicious sauce. This meal is easy to put together and perfect for a weeknight dinner. The only problem with this recipe is that the broccoli tends to fall apart a little as you stir the Parmesan into the dish at the finish. So if that bothers you too, you can cook the broccoli separate from this dish. Either way, this is a real tasty meal that I've made several times. Hubby also gives a thumbs up! Here's the recipe.
Skillet Chicken, Broccoli, and Penne
Adapted from The Best chicken Recipes, by Cook's Illustrated
I replaced the wine in this recipe with more chicken broth, and used Penne instead of the Ziti that was called for.

Ingredients:
4 tablespoons olive oil
1 pound boneless, skinless chicken breasts, sliced thin
1 medium onion, minced
1/4 salt
6 garlic cloves, minced or pressed
pinch of red pepper flakes
2 1/2 cups low-sodium chicken broth
2 cups water
8 ounces penne pasta
8 ounces, about 3 cups, broccoli florets
1 cup freshly grated Parmesan cheese (2 ounces)

Directions:
1. Heat 1 tablespoon oil in a 12 inch skillet(non-stick, if you have one. Mine is stainless steel and it worked ok). Add the sliced chicken and break it up. Don't stir-let the chicken brown for about 1 minute, then stir and break it up. Cook and stir for another 2 minutes until chicken is done. Transfer chicken to a bowl; cover to keep warm.
2. Add 1 more tablespoon oil to the skillet and the onion and about 1/4 teaspoon salt. Cook over medium heat until onion is softened, about 5-7 minutes. Stir in the garlic and pepper flakes and cook about 30 seconds until fragrant. Stir in the broth, water and pasta. Increase the heat to high and cook, uncovered, for 12 minutes, stirring often so pasta doesn't stick to pan. Add the broccoli and simmer for 4-5 minutes, until tender crisp and the liquid has thickened some.
3. Return the chicken to the skillet and heat until it is warmed through. Off heat, stir in the remaining 2 tablespoons olive oil and the 1 cup of Parmesan. Season with salt and pepper to taste. Great with crusty bread and a salad. Enjoy!

Monday, March 18, 2013

Oatmeal Scotchies with Pecans

 Like a delicious oatmeal cookie? Well these Oatmeal Scotchies with Pecans are so good, fantastic really, and also so rich. My husband loves anything butterscotch, so I made these just for him as they are one of his favorite cookies. I had intended to make Peanut Butter Cookies, but hubby had these goodies on his mind instead. This recipe makes too much for us, so anymore I just freeze half of the cookie dough for a later use. But they are also a great gift for any cookie lovers you may know! Here is the recipe.
Oatmeal Scotchies with Pecans
Adapted from Nestle - I increased the cinnamon and added pecans to the recipe. The cookie dough freezes well, if you don't want to bake the whole recipe.

Ingredients:
1 1/4 cups all-purpose flour
1 teaspoon baking soda
1/2 teaspoon salt
1 teaspoon cinnamon
1 cup butter, softened
3/4 cup granulated sugar
3/4 cup brown sugar, packed
2 large eggs
1 teaspoon vanilla
3 cups of quick cooking oats (or may use old fashioned oats)
11 ounce package of Nestle Butterscotch Morsels
3/4 cup coarsely chopped pecans

Preheat the oven to 375 degrees F.
In a small bowl combine the flour, soda, salt and cinnamon.
In a large bowl cream the softened butter with the sugars. Stir in the eggs and vanilla until well combined.
Gradually  beat in the flour mixture. Stir in the oatmeal, butterscotch morsels, and the pecans.
Drop dough by rounded tablespoon onto ungreased baking sheets.
Bake for about 7-9 minutes for chewy cookies. Cool cookies on baking sheets for about 2 minutes; then remove to cooling racks. Enjoy! Makes about 4 dozen.

Thursday, March 14, 2013

Italian Wedding Soup (from Ina Garten)

I love this soup! It's hearty with the zesty meatballs and all the healthy veggies, and it's so comforting on cool nights. We had another cold snap earlier this week, so I made this delicious soup. I've made it before, but just now have tweaked it to our liking.
The recipe calls for ground chicken for the meatballs, but our stores rarely have it, so I use ground turkey most of the time. Ground beef also makes some tasty meatballs. This recipe makes a bunch of soup, plenty for company. But if you are going to make it for just 2 or 3, I advise you to cook the pasta separately, and add it to the bowls individually when you are ready to serve the soup. The pasta really soaks up the broth if cooked in it and then not eaten right away. This soup is delicious on it's own, but also good with a salad and some crusty bread. The meatballs have tons of flavor and the veggie filled broth is super good. Hope you'll give it a try!
Italian Wedding Soup
Adapted from Ina Garten

Ingredients:
For meatballs:
3/4 pound ground turkey (or ground chicken or beef)
1/2 pound turkey sausage, casings removed ( or again, chicken, beef,)
2/3 cup fresh, white breadcrumbs
2 cloves fresh garlic, minced
3 tablespoons fresh parsley, chopped
1/2 cup freshly grated Parmesan cheese
3 tablespoons milk
1 large egg, beaten
salt and pepper- I only use about 1/8 teaspoon salt because the cheese is salty. But I'm also a low salt cook, so use your judgement.

For the Soup:
2 tablespoons olive oil
1 cup minced yellow onion
1 clove garlic, minced
1 cup diced carrots
3/4 cup diced celery
10 cups homemade chicken stock, (or use canned, low sodium chicken broth or stock)
1 cup small pasta-I used Ditalini
2 teaspoons dried oregano
about 6-8 ounces kale, washed and chopped-about 4 cups or more (may sub spinach if preferred)

Directions:
Preheat oven to 350 degrees F. In a bowl combine the ground turkey, sausage, bread crumbs, garlic, parsley, cheese, milk egg, salt and pepper and mix with a fork. With a spoon drop about 1 inch meatballs onto a parchment or foil lined baking sheet. You'll have around 40 meatballs. Bake for about 30 minutes.

While meatballs are cooking, heat olive oil over medium-low heat in a heavy soup pot. Add the chopped onions, garlic, carrots and celery. Saute until softened, about 5-6 minutes, stirring occasionally. Add the chicken stock or broth and bring to a boil. Add the pasta and cook about 5 to 6 minutes. Stir in the kale, meatballs and the oregano or other herbs of choice, and simmer about 2 minutes. Season with salt and pepper to taste. Ladle into soup bowls and top with Parmesan cheese. Yum! Enjoy with bread and/or salad!

Thursday, March 7, 2013

Sauteed Kale with Roasted Butternut Squash, and Mushrooms

 I've started cooking with Kale this month. I like it sauteed with onions and mushrooms, and this last time I added some oven-roasted butternut squash to it. Yum!
I started a diet the first of February, and have lost 12 pounds! Yippee! My diet is called The Plan, by Lyn Genet, and it really is a change in eating  and considered an anti-inflammation diet. I won't get into the particulars too much, but will say that this is NOT a low fat diet. I still get to have lots of olive oil and butter. And I can eat dark chocolate too. My blood work ,(cholesterol), was perfect last week when I went to the Dr. He was amazed. My blood pressure meds also had to be adjusted. I'm very happy to say the least!
But let me get back to the kale. I was introduced to sauteed kale on The Plan, and found I really liked it with mushrooms and onion.
 So the next time I roasted some butternut squash, I added half of it to the kale. Very yummy! My store has only one type of kale, this curly leafed stuff. It needs to be washed very well as it sometimes feels a little gritty. I also prefer to cut out the thick stems and toss them out. This bunch of kale produced about 5 cups of chopped kale.
 I sliced some mushrooms and onions and sauteed them in olive oil for a couple of minutes, then added the the chopped kale. Then I sauteed the kale for another minute or two. You could add garlic too if desired.
 It's really good just this way, sprinkled with a little salt and pepper. The kale cooks down quite a bit, just like spinach does. I usually get 2 servings from a bunch of kale, but this bunch was a bit smaller.
 But adding in the oven-roasted butternut made this dish so delicious. You could use roasted sweet potatoes too, I'm sure. They certainly are easier to peel than butternut squash, but I'll definitely make this dish again with the butternut. I hope you'll give this a try!
Sauteed Kale, with Roasted Butternut Squash, and Mushrooms

butternut squash- peeled and cut into about 1 inch cubes-you will only need about 1/2 of the squash
1 bunch kale
1/2 of an onion, sliced thin
4 ounces sliced mushrooms-I've used Baby Bella and shiitakes
about 2 tablespoons olive oil
1 clove garlic, minced -optional
salt and pepper to taste

!. Cut the butternut squash in half and peel with a knife or a good vegetable peeler. Cut squash into about 1 inch cubes. Place on baking sheet, toss with some olive oil. Season with salt and pepper, or other seasonings of your choosing. Bake at 425 degrees F. for about 30 minutes, or until tender. Cool. You will use about 1/2 of the squash in the kale. I save the leftover squash for another meal.
2.Wash the kale; drain well and chop. Cut out the thick stems if desired. Slice mushrooms and onion. Mince garlic, if using.
3 In a large skillet heat the oil over medium heat. Add the mushrooms and onion. Stir, about 2 minutes until softened. Add the garlic and the chopped kale. Stir for 1 to 2 minutes, until the kale is softened to your liking. The kale will wilt, similar to spinach. Add salt and pepper to taste. Add in the butternut squash. Hope you enjoy!

Monday, March 4, 2013

Banana Layer Cake with Cream Cheese Frosting

This is a moist, delicious Banana Layer Cake that is perfect for any occasion. It is somewhat less dense than my banana bread recipe, but it's very moist and yummy with the decadent Cream Cheese Frosting. I made this wonderful cake for my husbands birthday back in January. I didn't get many pictures of the finished cake, but that seems to happen every time I prepare a meal for our family gatherings. Too busy for photos, and then the food is gone. Sigh~
I've posted this recipe before, but made a sheet cake instead of a layer cake. It is one of our favorite cakes now and is a perfect way to use those ripe bananas and turn them into a fabulous dessert.
I feel the need to apologize for not being around for almost 2 months. I've had some health issues, ( I'll share at a later time), and some life issues that we all sometimes go through, and I lost focus on my blog. But I'm cooking again and ready to share. So I hope you'll give this Banana Layer Cake a try for your next celebration. It's so very, very good. Like, lick your plate good!
Banana Layer Cake with Cream Cheese Frosting
Adapted from Evil Shananigans

Cake:
1 cup mashed bananas - about 2 large bananas
1 cup buttermilk, or can use soured milk (add 1 tablespoon vinegar to a cup and fill up with milk; let sit a minute)
2 cups all-purpose flour
1 teaspoon baking soda
1/4 teaspoon baking powder
1/4 teaspoon salt
1 stick unsalted butter, softened- 1/2 cup
1 3/4 cup granulated sugar
2 eggs, lightly beaten
1 tablespoon vanilla

1. Preheat oven to 350 degrees, (or if you are using dark pans, then 325). Grease 2 9 inch round layer cake pans.
2. In a bowl, mash the bananas well using a fork. Stir in the buttermilk.
3. Mix flour, baking soda, baking powder, and salt together in separate bowl.
4. Cream Butter and sugar together in a large bowl. Stir in the eggs and vanilla.
5. Alternately add the dry and wet ingredients into the butter mixture, beating well after each addition. Pour the batter evenly into the 2 prepared cake pans.
6. Bake in preheated oven for about 35 minutes, or until cake springs back when lightly touched in the center. Or you may test with a toothpick. Cool cake in pans on wire racks for 10 minutes, then invert cakes onto cooling racks and let cool completely. At this point, you can frost the cake, or wrap each layer well in plastic wrap and store in the refrigerator overnight. Then assemble and frost the next day.

Cream Cheese Frosting:

8 ounces cream cheese, room temperature
1 stick (1/2 cup) softened butter
31/2-4 cups powdered sugar
1 teaspoon vanilla

In a large bowl, cream the butter and cream cheese together with a mixer.
mix in the vanilla. Add the powdered sugar in about 3 additions, mixing well after each addition. If the frosting seems too stiff, you may add a tablespoon of cream or milk and mix until creamy.

To frost the cake: 
Place one cake layer on cake platter. Add about 3/4 to 1 cup of frosting on the cake and spread evenly to the edge. Top with the remaining cake layer and press cake gently down. Add remaining frosting to top and smooth down and around the sides. I usually swirl the top of the frosting with a knife. I like to refrigerate the cake for 30-60 minutes to set the frosting well.
Slice, serve and enjoy!

Friday, January 11, 2013

Homemade Tomato Soup with Herbs

 
Homemade Tomato Soup with Herbs was a nice break from the super filling stews I've been making lately. Plus it was so much better than the canned version I used to throw together.
When my 3 kids were young, Wednesday evenings became tomato soup night for dinner. We were always in a hurry to make it to church on time, so I made grilled cheese sandwiches or tuna salad sandwiches along with the canned tomato soup.   Of course after awhile we got tired of this, so I moved on to some other meal ideas. My kids are all married now, but they remember this very well and hopefully have forgiven me by now! 
I wanted to make a tomato soup that was homemade last week, so I tried this one from Fine Cooking. I really thought it had too much onion and tasted more like onion tomato soup, so next time I prepare this, I will use only half of the onion. I also added extra herbs and finally came up with a soup that was really good. It is best the second day, and can be frozen for later use. Hope you enjoy this Homemade Tomato Soup with Herbs.
I had hoped to have this posted before now, but we've had computer issues, and blogger is not wanting to load pictures very well either. So I have not abandoned my blog at all and have more recipes to share soon. I so appreciate you all hanging in there with me - love my readers! Hope you enjoy this soup!
 
Homemade Tomato Soup with Herbs
Adapted from Fine Cooking
This soup can be frozen for later use, (up to 3 months). It can also be kept in the refrigerator for several days as long as it is brought to a boil every 2 days.
 
1 tablespoons olive oil
1 tablespoon unsalted butter
1/2 of a sweet onion, finely diced- about 3/4 - 1 cup
1 large clove garlic, smashed and peeled
2 tablespoons flour
3 cups low-sodium chicken broth or chicken stock
28 ounce can of whole peeled plum tomatoes, pureed with the juice
1/2 teaspoons sugar - I only needed 1/2 teaspoon, but you could need more if the tomatoes taste acidic.
1 sprig fresh thyme
1 teaspoon dried herbs, ( or 1 tablespoon or more, fresh herbs)- I used basil, and a bit more thyme- you can use Basil, dill, thyme, chives or a mixture.
salt and pepper to taste.
 
In a non-reactive dutch oven, heat the oil and butter over medium low heat. Add the onion and garlic and cook until soft, but not browned, about 8 minutes.
Add the flour and stir to coat the onion and garlic.
Add the broth, tomatoes, sugar and spring of thyme. Bring to a simmer over medium heat, while stirring to make sure the flour does not stick to the bottom of the pan. Reduce heat to low, cover pan, and simmer for 40 minutes.
Discard thyme spring. Stir in other herbs, if using.
Let soup cool somewhat so you can puree it in a blender or food processor. Season with salt and pepper. Reheat if needed, before serving. Enjoy!
 
To puree soup in blender: Process only 1/2 to 1/3 of soup at a time. Remove the center cap from the blender otherwise steam may  build up it may spray soup everywhere. It also helps to cover the top of blender with a towel while blending.