We have battled the flu and computer problems for the past month and now it's already time for the Super Bowl. How time flies when life gets busy! But I thought I'd share my go to chili. I have to admit that I've never followed a recipe when I make chili, so for all the years of my life I have just winged it. Considering that I turned 62 in December, that's a lot of years. So the past few times I finally began writing it down.We like a thick, meaty chili with beans, that is fragrantly spicy, but not fiery. Some hot cayenne pepper can always be added for more heat, or Ro-tel tomatoes can be used instead of plain tomatoes. I made the last batch of chili this week after my husband finally kicked the flu. He said it really hit the spot! Chili is a perfect Super Bowl food around these parts and is perfect for this cold weather that much of the country is enduring. Here's my recipe.
My Homemade Chili
From Lynda's Recipe Box
I add a little brown sugar to the chili because I think it really compliments the spices nicely.
2 pounds ground beef chuck
1 large onion, diced
1/2 of a poblano pepper or bell pepper, diced
1-2 tablespoon oil
4 cloves of garlic, minced
2 tablespoons of chili powder
2 teaspoons ground cumin
1 - 15 ounce can crushed tomatoes
1 can black beans, drained and rinsed
1 can chili beans in sauce
1 tablespoon light brown sugar, packed
2/12 - 3 cups water
salt and pepper to taste
In a dutch oven over medium-high heat, brown the ground chuck in 1-2 tablespoons of oil. Before the meat is completely browned add the onion, pepper and garlic. When meat is browned and the onion is softened, remove excess grease from the pot if needed. Stir in the chili powder, cumin, about 1 teaspoon salt and pepper to taste. Stir the spices into the meat mixture and let cook just for a minute. Lower the temperature if needed so the spices don't burn.
Add the tomatoes, tomato sauce, brown sugar, drained black beans and chili beans with sauce. Add the water and stir, scraping up any brown bits on the bottom of the pan.
Place lid on the pot and simmer over low heat for about 45 minutes, stirring occasionally, and adding water if needed.
Remove lid. If chili is too thick add extra water to get the consistency that you want. If too runny, cook the chili uncovered, until it thickens to the desired constancy. Stir often to keep the chili from sticking or burning. Taste chili and adjust the seasonings. May need more salt and pepper, and if you want it hotter add 1/4-1/2 teaspoon cayenne pepper. Serve with several choices of toppings, such as onion, sour cream, shredded cheese, cilantro, chips, etc. Enjoy!
Click here for more Super Bowl food ideas.
Friday, January 30, 2015
Tuesday, December 30, 2014
Ham, Cheese, and Veggie Tortilla Pinwheels
I hope all of you had a wonderful Christmas! We are still in the holiday season so I thought I'd share yummy Ham and Cheese Tortilla Pinwheels, (or roll-ups), with you . I made these several times before Christmas for various parties and gatherings. Even though these type of recipes date back to the 80's or so, they are still delicious, and festive little appetizers when sliced and plated, or they can be cut in half and served for lunches or carried in lunch boxes. You can use any type of deli meats and cheeses. For these I also added leaf lettuce and red bell pepper that had been cut in thin strips. Stack each ingredient evenly across the tortillas, and then roll each one up as tightly as possible to keep stuff from falling out. Then enjoy these pretty, festive roll-ups whatever the occasion. Here's my method.
Ham, Cheese and Veggie Tortilla Pinwheels (or roll-ups!)
From Lynda's Recipe Box
Note: you can mix herbs into 8 ounces of plain cream cheese to use, or you may purchased the herbed cream cheese from your local store. Deli meats should be thinly sliced or even shaved. Count your meat and cheese slices so you can evenly divide it among the 8 tortillas. Makes 8 rolls.
Ingredients:
1 package of burrito sized tortillas- I used the spinach flavor tortillas. They add a nice touch of color.
8 ounces softened cream cheese, mixed with about 1 tablespoons fresh, chopped green onion or chives, and 1 tbls. parsley. Or to save time, buy the herbed cream cheese from your market.
1/2 pound thinly sliced deli ham, or other meat of choice,
1/2 pound sliced Provolone cheese, or cheddar or other cheese of choice
1 red bell pepper, sliced thin
leaf lettuce, washed and large ribs cut out
To assemble Tortilla Rolls:
Lay tortillas out on a flat surface. With a knife, spread the softened cream cheese mixture thinly over the tortillas. The cream cheese is going to act like a glue to hold everything together.
Now at the end closest to you, start the layering. Lay out a couple of slices of ham that are folded in half, next cover with cheese, then the lettuce and ending with some sliced bell pepper. These ingredients will be stacked on top of each other, hopefully evenly all the way across.
Now, start rolling the tortilla and holding firmly to the ingredients as you roll, until each tortilla is rolled all the way. When rolled all the way, the cream cheese should hold it together. Wrap each rolled tortilla in plastic wrap and place in the refrigerator for at least 2 hours, or overnight. To serve, remove the plastic wrap and cut the ends off of each tortilla rolls. Cut the roll into 8 equal slices and place on a serving tray. Enjoy!
Ham, Cheese and Veggie Tortilla Pinwheels (or roll-ups!)
From Lynda's Recipe Box
Note: you can mix herbs into 8 ounces of plain cream cheese to use, or you may purchased the herbed cream cheese from your local store. Deli meats should be thinly sliced or even shaved. Count your meat and cheese slices so you can evenly divide it among the 8 tortillas. Makes 8 rolls.
Ingredients:
1 package of burrito sized tortillas- I used the spinach flavor tortillas. They add a nice touch of color.
8 ounces softened cream cheese, mixed with about 1 tablespoons fresh, chopped green onion or chives, and 1 tbls. parsley. Or to save time, buy the herbed cream cheese from your market.
1/2 pound thinly sliced deli ham, or other meat of choice,
1/2 pound sliced Provolone cheese, or cheddar or other cheese of choice
1 red bell pepper, sliced thin
leaf lettuce, washed and large ribs cut out
To assemble Tortilla Rolls:
Lay tortillas out on a flat surface. With a knife, spread the softened cream cheese mixture thinly over the tortillas. The cream cheese is going to act like a glue to hold everything together.
Now at the end closest to you, start the layering. Lay out a couple of slices of ham that are folded in half, next cover with cheese, then the lettuce and ending with some sliced bell pepper. These ingredients will be stacked on top of each other, hopefully evenly all the way across.
Now, start rolling the tortilla and holding firmly to the ingredients as you roll, until each tortilla is rolled all the way. When rolled all the way, the cream cheese should hold it together. Wrap each rolled tortilla in plastic wrap and place in the refrigerator for at least 2 hours, or overnight. To serve, remove the plastic wrap and cut the ends off of each tortilla rolls. Cut the roll into 8 equal slices and place on a serving tray. Enjoy!
Saturday, December 6, 2014
Potato-Fennel Gratin(from Ina Garten)
Mmmm, I have to tell you that Ina's Potato-Fennel Gratin is amazing! My husband and I would order this from a restaurant if it was on the menu, that's how much we love it! This side dish has so much flavor from the addition of fennel, onion and cheese to the potatoes, that it is positively addictive. I don't know about you but I just can't resist creamy, cheesy potato dishes! This is a wonderful dish anytime and perfect for any holiday dinner or buffet.
Only the bulb of the fennel is used. I saved the stalks and added to some soup later on. The fennel bulb is cut in half and the core then removed.
Then it is sliced very thin, and the potatoes also. Ina's recipe calls for Gruyere cheese, but I subbed sharp white cheddar cheese and it is delicious. I hope you'll give Potato-Fennel Gratin a try. Here's the recipe.
Potato-Fennel Gratin
Adapted from Ina Garten
(I made half a recipe when I took these pictures, but I'm providing the whole recipe. Leftovers reheat very well.)
Ingredients:
2 small fennel bulbs ( I use 1 large bulb for the whole recipe)
1 medium yellow onion, thinly sliced
2 tablespoons olive oil
1 tablespoon butter
2 pounds (about 4 large potatoes) I used Yukon gold
2 cups plus 2 tablespoons heavy cream
2 1/2 cups sharp white cheddar cheese (Ina uses Gruyere)
1 teaspoon sea salt
1/2 teaspoon black pepper
Directions:
Preheat oven to 350 degrees F.
Grease the inside of a 10 cup baking dish. I used a 9x13 inch.
Remove the stalks from the fennel and cut the bulbs in half lengthwise. Remove the cores and then slice them thinly, making about 4 cups. Sauté the fennel and sliced onions in the olive oil and butter over medium-low heat for about 15 minutes until tender. Remove from heat.
Peel the potatoes, then slice thinly with a mandolin or by hand. In a large bowl, mix the potatoes with 2 cups of cream, 2 cups of cheese, and the salt and pepper. Add the cooked fennel and onion and mix well.
Pour the potato mixture into the prepared baking dish. Press the mixture down and smooth the potato mixture evenly in the pan. Combine remaining 2 tablespoons of cream and 1/2 cup cheese and sprinkle on top. Bake for 1 1/2 hours, until the potatoes are very tender and the top is browned and bubbly. Remove from oven and let set 10 minutes before serving. Enjoy!
Only the bulb of the fennel is used. I saved the stalks and added to some soup later on. The fennel bulb is cut in half and the core then removed.
Then it is sliced very thin, and the potatoes also. Ina's recipe calls for Gruyere cheese, but I subbed sharp white cheddar cheese and it is delicious. I hope you'll give Potato-Fennel Gratin a try. Here's the recipe.
Potato-Fennel Gratin
Adapted from Ina Garten
(I made half a recipe when I took these pictures, but I'm providing the whole recipe. Leftovers reheat very well.)
Ingredients:
2 small fennel bulbs ( I use 1 large bulb for the whole recipe)
1 medium yellow onion, thinly sliced
2 tablespoons olive oil
1 tablespoon butter
2 pounds (about 4 large potatoes) I used Yukon gold
2 cups plus 2 tablespoons heavy cream
2 1/2 cups sharp white cheddar cheese (Ina uses Gruyere)
1 teaspoon sea salt
1/2 teaspoon black pepper
Directions:
Preheat oven to 350 degrees F.
Grease the inside of a 10 cup baking dish. I used a 9x13 inch.
Remove the stalks from the fennel and cut the bulbs in half lengthwise. Remove the cores and then slice them thinly, making about 4 cups. Sauté the fennel and sliced onions in the olive oil and butter over medium-low heat for about 15 minutes until tender. Remove from heat.
Peel the potatoes, then slice thinly with a mandolin or by hand. In a large bowl, mix the potatoes with 2 cups of cream, 2 cups of cheese, and the salt and pepper. Add the cooked fennel and onion and mix well.
Pour the potato mixture into the prepared baking dish. Press the mixture down and smooth the potato mixture evenly in the pan. Combine remaining 2 tablespoons of cream and 1/2 cup cheese and sprinkle on top. Bake for 1 1/2 hours, until the potatoes are very tender and the top is browned and bubbly. Remove from oven and let set 10 minutes before serving. Enjoy!
Wednesday, December 3, 2014
Pineapple Sheet Cake with Cream Cheese Frosting (AKA Mexican Fruit Cake)
I decided it was time to pull this Pineapple Sheet Cake from the archives and give it better picture. This is a very moist, delicious cake that was passed to me by my mother. My mom was not a pie person, so therefore during the holidays she would make cakes and cookies, but rarely a pie. This cake is a favorite of my husband , and it's always a hit wherever I take it. It's a perfect cake for a pot-luck, or a family dinner, or even to take to work. Even though the cake itself contains no fat, this is a very moist cake as long as you make it several hours before it is to be served. The crushed pineapple in the cake makes it very moist, and it just gets better every day that you have it. I hope you will enjoy it!
Pineapple Sheet Cake with Cream Cheese Frosting
From Lynda's Recipe Box, and my mother
(Note: the only pineapple I've found that DOES NOT work is from Aldi. It just didn't contain enough juice.)
Ingredients for cake:
2 cups all-purpose flour
2 cups granulated sugar
2 teaspoons baking soda
2 large eggs, beaten
1 (20 ounce) can of crushed pineapple with juice
1 teaspoon vanilla
1/2 cups chopped nuts, I usually use pecans or walnuts -optional
Preheat oven to 350 degrees F. Grease either a 9x13 inch pan or a 10x15 inch jelly roll pan. In a large bowl add the flour, sugar and soda and mix. Add all of the remaining ingredients and mix well. Bake for about 35-40 minutes for a 9x13 inch pan. (A 10x15 pan will take about 20-30 minutes). Remove from oven and cool. Can frost while cake is just warm.
Cream Cheese Frosting:
1 - 8 ounce cream cheese, softened
8 tablespoons unsalted butter, (1 stick), softened
3 1/2 cups confectioners sugar
1 teaspoon vanilla
about 3/4 cup chopped nuts, optional, but I always use them. Makes the cake extremely good.
Spread frosting evenly over cake and top with pecans or walnuts. Let it set for several hours before cutting so the pineapple will moisten the cake. Bet you can't eat just one bite- enjoy!
Pineapple Sheet Cake with Cream Cheese Frosting
From Lynda's Recipe Box, and my mother
(Note: the only pineapple I've found that DOES NOT work is from Aldi. It just didn't contain enough juice.)
Ingredients for cake:
2 cups all-purpose flour
2 cups granulated sugar
2 teaspoons baking soda
2 large eggs, beaten
1 (20 ounce) can of crushed pineapple with juice
1 teaspoon vanilla
1/2 cups chopped nuts, I usually use pecans or walnuts -optional
Preheat oven to 350 degrees F. Grease either a 9x13 inch pan or a 10x15 inch jelly roll pan. In a large bowl add the flour, sugar and soda and mix. Add all of the remaining ingredients and mix well. Bake for about 35-40 minutes for a 9x13 inch pan. (A 10x15 pan will take about 20-30 minutes). Remove from oven and cool. Can frost while cake is just warm.
Cream Cheese Frosting:
1 - 8 ounce cream cheese, softened
8 tablespoons unsalted butter, (1 stick), softened
3 1/2 cups confectioners sugar
1 teaspoon vanilla
about 3/4 cup chopped nuts, optional, but I always use them. Makes the cake extremely good.
Spread frosting evenly over cake and top with pecans or walnuts. Let it set for several hours before cutting so the pineapple will moisten the cake. Bet you can't eat just one bite- enjoy!
Saturday, November 22, 2014
Ten Thanksgiving Menu Ideas
Here's some food ideas for your Thanksgiving table. The only turkey recipe I have on the blog so far is Ina's Herb-Roasted Turkey Breast. It's the best turkey breast I've ever eaten. Or there's yummy Cranberry-Apple Relish.
Cheesy Broccoli and Rice Casserole is amazing and a real crowd pleaser.
This Corn Casserole is an easy, old recipe if you need a last minute dish.
Sage Stuffing is delicious! So is Sausage and Cornbread Dressing. In fact dressing/stuffing is my favorite part of the meal, I think.
Roasted Brussels Sprouts with Balsamic Vinegar and Homemade Cranberry Sauce with a touch of orange. So good!
Delicious and easy Honey Glazed Baby Carrots and
Sautéed Kale with Roasted Butternut Squash and Mushrooms give you a couple of tasty, healthy options.
For some more ideas for side dishes for your Thanksgiving table, click here.
Hope that gives you all some ideas. Happy eating!
Cheesy Broccoli and Rice Casserole is amazing and a real crowd pleaser.
This Corn Casserole is an easy, old recipe if you need a last minute dish.
Sage Stuffing is delicious! So is Sausage and Cornbread Dressing. In fact dressing/stuffing is my favorite part of the meal, I think.
Roasted Brussels Sprouts with Balsamic Vinegar and Homemade Cranberry Sauce with a touch of orange. So good!
Delicious and easy Honey Glazed Baby Carrots and
Sautéed Kale with Roasted Butternut Squash and Mushrooms give you a couple of tasty, healthy options.
For some more ideas for side dishes for your Thanksgiving table, click here.
Hope that gives you all some ideas. Happy eating!
Thursday, November 20, 2014
Quick Potato Rolls
Thanksgiving is almost here, and in my opinion you have to have homemade rolls for the feast. At least in our family you do that is. I've got several delicious roll recipes, but I thought I'd share this Easy Potato Roll recipe today. I love Potato Rolls because of their tender, soft interiors, which come from the addition of mashed potatoes to the dough. This recipe is so easy because it uses the convenience of instant mashed potatoes! Plus, this recipe is a quick rise roll, in which you set the pan of rolls over hot water and they are then ready to bake in just 15 minutes! And they smell heavenly, and fill your home with the aroma of fresh baked bread. Mmmm, Thanksgiving isn't the same without this fragrance.
This quick roll is stirred together, lightly kneaded, then formed into 12 rolls and placed in a greased pan. After they are covered, the pan is placed over a pan of very hot water. The rolls rise for about 15 minutes.
When the rise is over, just pop them into the oven and bake Voila! You have tender, melt in your mouth homemade Potato Rolls. I like to brush them with melted butter right out of the oven, then I just can't wait to eat one. Hope you'll give them a try.
Quick Potato Rolls
Adapted from Taste of Home
Ingredients:
3 1/2 - 4 cups of all-purpose unbleached flour, divided
1 tablespoon sugar
1 package (1/4 ounce), quick-rise yeast
1 teaspoon fine sea salt
3/4 cup warm water (about 120 degrees F.)
1/2 cup warm whole milk (about 120 degrees)
1/4 cup melted butter
1/4 cup dry instant mashed potatoes
1 egg
melted butter to brush over the rolls,(about 1 tablespoon)
Directions:
In a large bowl, combine 1 cup of flour, sugar, yeast, sugar and salt. In another bowl, mix the water milk, and the 1/4 cup melted butter. Stir in the potato flakes and let stand 1 minute. Add the egg and beat until smooth. Add the wet mixture to the dry mixture and mix well. Add enough of the remaining flour to make a soft dough. Turn dough onto a floured surface and knead for 4-6 minutes until smooth and elastic. Cover dough and let rise 10 minutes. Uncover dough and cut into 12 equal pieces. Shape each piece into a ball and place in a greased 9x13 inch baking pan. Place a large baking pan on the counter and fill half full with boiling water. Place the baking pan of rolls over the hot water. Cover the rolls and let rise for 15 minutes. ( I place a baking rack or cookie sheet over the boiling water if needed to hold the pan. Then I cover the rolls with plastic wrap to rise). Preheat the oven to 375 degrees F. while the rolls are rising. After 15 minutes of rising, place the rolls in the oven and bake for20-25 minutes until golden. Remove to a wire rack to cool. Brush with melted butter and enjoy!!
This quick roll is stirred together, lightly kneaded, then formed into 12 rolls and placed in a greased pan. After they are covered, the pan is placed over a pan of very hot water. The rolls rise for about 15 minutes.
When the rise is over, just pop them into the oven and bake Voila! You have tender, melt in your mouth homemade Potato Rolls. I like to brush them with melted butter right out of the oven, then I just can't wait to eat one. Hope you'll give them a try.
Quick Potato Rolls
Adapted from Taste of Home
Ingredients:
3 1/2 - 4 cups of all-purpose unbleached flour, divided
1 tablespoon sugar
1 package (1/4 ounce), quick-rise yeast
1 teaspoon fine sea salt
3/4 cup warm water (about 120 degrees F.)
1/2 cup warm whole milk (about 120 degrees)
1/4 cup melted butter
1/4 cup dry instant mashed potatoes
1 egg
melted butter to brush over the rolls,(about 1 tablespoon)
Directions:
In a large bowl, combine 1 cup of flour, sugar, yeast, sugar and salt. In another bowl, mix the water milk, and the 1/4 cup melted butter. Stir in the potato flakes and let stand 1 minute. Add the egg and beat until smooth. Add the wet mixture to the dry mixture and mix well. Add enough of the remaining flour to make a soft dough. Turn dough onto a floured surface and knead for 4-6 minutes until smooth and elastic. Cover dough and let rise 10 minutes. Uncover dough and cut into 12 equal pieces. Shape each piece into a ball and place in a greased 9x13 inch baking pan. Place a large baking pan on the counter and fill half full with boiling water. Place the baking pan of rolls over the hot water. Cover the rolls and let rise for 15 minutes. ( I place a baking rack or cookie sheet over the boiling water if needed to hold the pan. Then I cover the rolls with plastic wrap to rise). Preheat the oven to 375 degrees F. while the rolls are rising. After 15 minutes of rising, place the rolls in the oven and bake for20-25 minutes until golden. Remove to a wire rack to cool. Brush with melted butter and enjoy!!
Wednesday, November 5, 2014
Pumkin Bundt Cake with Cream Cheese Frosting
I just had to start off my fall baking with something pumpkin since it is one of my favorite fall and winter flavors! Apple is right up there too, so there will be an apple recipe coming real soon also. I have tried a couple of different Pumpkin Bundt Cake recipes and this is the best one so far so I'm sharing it with you.
This Pumpkin Bundt Cake with Cream Cheese Frosting is dense and moist, much like pumpkin bread or pound cake. I topped this luscious cake with cream cheese frosting that contains some brown sugar, which gives the frosting a hint of caramel flavor! This is a perfect fall dessert which would be a delicious addition even your Thanksgiving table. And I confess that it was so good with my morning coffee also! Try taking it to any family gathering or even to work and I think people will be singing your praises. Here's the recipe.
Pumpkin Bundt Cake with Cream Cheese Frosting
Adapted from My Baking Addition
Ingredients:
Bundt Cake
If you don't have all the spices, you can sub pumpkin pie spice if desired.
2 1/4 cups granulated sugar
1 cup canola oil, or vegetable oil
3 large eggs
3 cups un-bleached flour
2 teaspoons baking soda
2 teaspoons ground cinnamon
1/2 teaspoon ground cloves
1/4 ground ginger
1/4 teaspoon ground nutmeg
1/2 teaspoon salt
1 can (15 ounces) pure pumpkin puree
Cream Cheese Frosting
4 ounces cream cheese, softened
4 tablespoons softened, unsalted butter
2 tablespoons light brown sugar
1 14 cup confectioners sugar (powdered sugar)
1/2 teaspoon vanilla extract
1-3 tablespoons milk, half and half or cream, if needed to thin the frosting
3/4 cup toasted, chopped pecans, if desired
Directions:
1. Preheat the oven to 350 F. Spray a 10 inch Bundt cake pan with nonstick cooking spray.
2. In a large bowl combine the oil and sugar and mix thoroughly with an electric mixer. Beat in eggs 1 at a time, then beat in the pumpkin. In a medium bowl mix together the flour, baking soda, spices and salt. Add flour mixture to the pumpkin mixture a little at a time, and mix until batter is just blended well.
3. Pour batter into the prepared Bundt pan and smooth the batter evenly around the pan. Bake in the preheated oven for 60-65 minutes until a toothpick inserted in the center if cake comes out clean. Cool the cake for 10-15 minutes. Then invert cake onto a wire rack to finish cooling. Place cake onto a cake plate to frost.
4. To make the frosting: In a large bowl add the softened cream cheese, butter and the brown sugar and beat until creamy and smooth, about 2 minutes. Then gradually add in the powdered sugar and beat well. Stir in the vanilla and milk if needed. If frosting is too thick add a bit more milk if needed to get the desired consistency. Spoon frosting over the cooled cake. Using a spoon or rubber spatula, push the frosting where you want it. (This is not a glaze that will pour). Top with the toasted pecans , if desired. Now enjoy!
This Pumpkin Bundt Cake with Cream Cheese Frosting is dense and moist, much like pumpkin bread or pound cake. I topped this luscious cake with cream cheese frosting that contains some brown sugar, which gives the frosting a hint of caramel flavor! This is a perfect fall dessert which would be a delicious addition even your Thanksgiving table. And I confess that it was so good with my morning coffee also! Try taking it to any family gathering or even to work and I think people will be singing your praises. Here's the recipe.
Pumpkin Bundt Cake with Cream Cheese Frosting
Adapted from My Baking Addition
Ingredients:
Bundt Cake
If you don't have all the spices, you can sub pumpkin pie spice if desired.
2 1/4 cups granulated sugar
1 cup canola oil, or vegetable oil
3 large eggs
3 cups un-bleached flour
2 teaspoons baking soda
2 teaspoons ground cinnamon
1/2 teaspoon ground cloves
1/4 ground ginger
1/4 teaspoon ground nutmeg
1/2 teaspoon salt
1 can (15 ounces) pure pumpkin puree
Cream Cheese Frosting
4 ounces cream cheese, softened
4 tablespoons softened, unsalted butter
2 tablespoons light brown sugar
1 14 cup confectioners sugar (powdered sugar)
1/2 teaspoon vanilla extract
1-3 tablespoons milk, half and half or cream, if needed to thin the frosting
3/4 cup toasted, chopped pecans, if desired
Directions:
1. Preheat the oven to 350 F. Spray a 10 inch Bundt cake pan with nonstick cooking spray.
2. In a large bowl combine the oil and sugar and mix thoroughly with an electric mixer. Beat in eggs 1 at a time, then beat in the pumpkin. In a medium bowl mix together the flour, baking soda, spices and salt. Add flour mixture to the pumpkin mixture a little at a time, and mix until batter is just blended well.
3. Pour batter into the prepared Bundt pan and smooth the batter evenly around the pan. Bake in the preheated oven for 60-65 minutes until a toothpick inserted in the center if cake comes out clean. Cool the cake for 10-15 minutes. Then invert cake onto a wire rack to finish cooling. Place cake onto a cake plate to frost.
4. To make the frosting: In a large bowl add the softened cream cheese, butter and the brown sugar and beat until creamy and smooth, about 2 minutes. Then gradually add in the powdered sugar and beat well. Stir in the vanilla and milk if needed. If frosting is too thick add a bit more milk if needed to get the desired consistency. Spoon frosting over the cooled cake. Using a spoon or rubber spatula, push the frosting where you want it. (This is not a glaze that will pour). Top with the toasted pecans , if desired. Now enjoy!
Saturday, September 27, 2014
Farmer's Breakfast Casserole
It's the time of year when I usually begin craving comfort food, as the temperature has cooled down some, and the mornings and evenings are crisp. I adore fall and always look forward to cooking up some meals that are heartier than summer's fare. This dish is perfect for any meal, as we've eaten it not only for breakfast, but it makes a tasty lunch or dinner as well.
This delicious Farmer's Breakfast Casserole is the perfect 8x8 inch size for my husband and I. There's just enough yummy leftovers for us for a couple of days, plus this dish reheats really well. The casserole starts with a layer of frozen hash browns, then ham, green onion and cheese is layered over the potatoes. Beaten eggs are pour over all. It bakes for about an hour. Don't expect the hash browns to be crispy though. The hash browns are soft and very moist after baking. If not baked long enough I think it could be watery, so be sure to allow time for it to fully cook.
Farmer's Breakfast Casserole
Slightly adapted from here-
This dish can be put together the night before, covered and placed in the fridge, and baked in the morning. Baking time may be longer. Also, according to BHG, you can double the ingredients and place in a 9x13 baking pan. Again I imagine baking time would be longer, and I have not tried it.
Ingredients:
3 cups of frozen hash browns- I use the shredded ones
1/4 cup diced green onions
1 cup of diced ham, or can use cooked sausage
1 cup shredded cheese- I used Colby-Jack
4 eggs, beaten
1 1/2 cups whole milk
1/8 teaspoon salt- I used less because the ham was so salty
1/8 teaspoon black pepper
Method:
Preheat oven to 350 degrees F. Grease an 8x8x2 inch (2 quarts), baking pan. Pour the 3 cups of frozen hash browns into pan and distribute evenly in the pan. Sprinkle potatoes with the green onions, ham and then the cheese. Mix eggs, milk, salt, and pepper together and pour over all. Bake in oven for about 50 minutes, until eggs are set and top is golden. Pierce middle with a knife to test for it to be done. The casserole will puff up during baking. Hope you enjoy!
This delicious Farmer's Breakfast Casserole is the perfect 8x8 inch size for my husband and I. There's just enough yummy leftovers for us for a couple of days, plus this dish reheats really well. The casserole starts with a layer of frozen hash browns, then ham, green onion and cheese is layered over the potatoes. Beaten eggs are pour over all. It bakes for about an hour. Don't expect the hash browns to be crispy though. The hash browns are soft and very moist after baking. If not baked long enough I think it could be watery, so be sure to allow time for it to fully cook.
Farmer's Breakfast Casserole
Slightly adapted from here-
This dish can be put together the night before, covered and placed in the fridge, and baked in the morning. Baking time may be longer. Also, according to BHG, you can double the ingredients and place in a 9x13 baking pan. Again I imagine baking time would be longer, and I have not tried it.
Ingredients:
3 cups of frozen hash browns- I use the shredded ones
1/4 cup diced green onions
1 cup of diced ham, or can use cooked sausage
1 cup shredded cheese- I used Colby-Jack
4 eggs, beaten
1 1/2 cups whole milk
1/8 teaspoon salt- I used less because the ham was so salty
1/8 teaspoon black pepper
Method:
Preheat oven to 350 degrees F. Grease an 8x8x2 inch (2 quarts), baking pan. Pour the 3 cups of frozen hash browns into pan and distribute evenly in the pan. Sprinkle potatoes with the green onions, ham and then the cheese. Mix eggs, milk, salt, and pepper together and pour over all. Bake in oven for about 50 minutes, until eggs are set and top is golden. Pierce middle with a knife to test for it to be done. The casserole will puff up during baking. Hope you enjoy!
Wednesday, September 17, 2014
Blueberry and Blackberry Crisp
My goodness this year has sailed by! Here it is the end of summer and I'm just now posting a berry dessert. But this berry crisp is also wonderful made with frozen berries, so I had to go ahead and post it. I have made this Blueberry and Blackberry Crisp several times this summer, plus I've made it with blueberries only which is just as yummy. I've added a bit extra sugar to this recipe with the blackberry addition as the frozen berries I bought were more tart than the blueberries.
This Blueberry and Blackberry Crisp is so easy to put together and the topping is a whiz to prepare. Plus, this topping actually is very crisp which has made it a favorite of ours. Of course topping this crisp with a good quality vanilla ice cream makes irresistible! Hope you'll give it a try!
Blueberry and Blackberry Crisp
Adapted from Martha Stewart
Fresh or frozen berries may be used, but baking time may increase if using all frozen berries. The filling is juicy. If a thicker filling is desired add another teaspoon or 2 of cornstarch.
Ingredients:
For the filling:
4 cups blueberries - I used fresh
2 cups blackberries - I used frozen this time
2/3 cup sugar ( when I make all blueberry crisp, I reduce to 1/2 c.)
1 tablespoon cornstarch
1 teaspoon fresh lemon juice
1/4 teaspoon sea salt
For the Topping:
3/4 cup unbleached all-purpose flour
1/2 cup quick oats ( may use rolled oats)
1/2 teaspoon baking powder
1/2 teaspoon sea salt
6 tablespoons melted, unsalted butter
1/3 cup sugar
1/2 teaspoon cinnamon
Directions:
1. Preheat oven to 375 degrees. Make filling by mixing berries, sugar, cornstarch, lemon juice and salt in a bowl. Poor berry mixture into an 8x8 inch baking dish with 2 inch sides.
2. Make topping- Stir together the flour oats baking powder, sugar, cinnamon, and salt.
Pour butter over topping and stir until it is absorbed and the topping is crumbly.
3. Sprinkle topping evenly over the filling. Place dish on a foil lined baking sheet just in case it bubbles over. (I haven't had that problem, but some commenters on Martha's site did.)
Bake until crisp is bubbling around the sides and in the center and brown on top, about 1 hour. Remove from oven and cool on a wire rack at least 30 minutes before serving. Top with ice cream and enjoy!
This Blueberry and Blackberry Crisp is so easy to put together and the topping is a whiz to prepare. Plus, this topping actually is very crisp which has made it a favorite of ours. Of course topping this crisp with a good quality vanilla ice cream makes irresistible! Hope you'll give it a try!
Blueberry and Blackberry Crisp
Adapted from Martha Stewart
Fresh or frozen berries may be used, but baking time may increase if using all frozen berries. The filling is juicy. If a thicker filling is desired add another teaspoon or 2 of cornstarch.
Ingredients:
For the filling:
4 cups blueberries - I used fresh
2 cups blackberries - I used frozen this time
2/3 cup sugar ( when I make all blueberry crisp, I reduce to 1/2 c.)
1 tablespoon cornstarch
1 teaspoon fresh lemon juice
1/4 teaspoon sea salt
For the Topping:
3/4 cup unbleached all-purpose flour
1/2 cup quick oats ( may use rolled oats)
1/2 teaspoon baking powder
1/2 teaspoon sea salt
6 tablespoons melted, unsalted butter
1/3 cup sugar
1/2 teaspoon cinnamon
Directions:
1. Preheat oven to 375 degrees. Make filling by mixing berries, sugar, cornstarch, lemon juice and salt in a bowl. Poor berry mixture into an 8x8 inch baking dish with 2 inch sides.
2. Make topping- Stir together the flour oats baking powder, sugar, cinnamon, and salt.
Pour butter over topping and stir until it is absorbed and the topping is crumbly.
3. Sprinkle topping evenly over the filling. Place dish on a foil lined baking sheet just in case it bubbles over. (I haven't had that problem, but some commenters on Martha's site did.)
Bake until crisp is bubbling around the sides and in the center and brown on top, about 1 hour. Remove from oven and cool on a wire rack at least 30 minutes before serving. Top with ice cream and enjoy!
Sunday, May 25, 2014
Easy Vinegar Coleslaw
I have taken an unplanned hiatus from blog this spring, but I'm back in time for Memorial Day with another recipe to share! We went through such a long winter and some other stuff that was going on in my life, but my love of food and sharing is back with this lovely weather. I found this amazingly simple and delicious recipe for coleslaw. It is also probably the healthiest recipe for coleslaw that I've made. I used about 1 pound of cabbage that I already had in the fridge, but often I buy the pre-shredded slaw mix in the grocers produce section. Toss the slaw mix with this vinegar and oil dressing and it's done in about 5 minutes and tasted delish too! Can't get much easier for a side dish and perfect for a topping for your sandwiches too! Here's the recipe.
Easy Vinegar Coleslaw
adapted from here
1 pound bag of slaw mix from your grocer
1 carrot, shredded
1/2 cup diced onion, I used Vidalia
1/4 cup red wine vinegar
2 tablespoons sugar
2 tablespoons oil - I used canola
1 teaspoon sea salt
1/2 teaspoon celery seed
fresh ground pepper to taste
In a large bowl mix the vinegar, sugar, oil salt pepper and celery seed. Stir in the shredded cabbage, onion and carrot and mix well. Refrigerate until ready to serve. Enjoy!
Have a wonderful holiday and remember all the veterans who have served our great nation.
Easy Vinegar Coleslaw
adapted from here
1 pound bag of slaw mix from your grocer
1 carrot, shredded
1/2 cup diced onion, I used Vidalia
1/4 cup red wine vinegar
2 tablespoons sugar
2 tablespoons oil - I used canola
1 teaspoon sea salt
1/2 teaspoon celery seed
fresh ground pepper to taste
In a large bowl mix the vinegar, sugar, oil salt pepper and celery seed. Stir in the shredded cabbage, onion and carrot and mix well. Refrigerate until ready to serve. Enjoy!
Have a wonderful holiday and remember all the veterans who have served our great nation.
Saturday, February 1, 2014
Meatball Sliders for Super Bowl!
Here it is, almost Super Bowl Sunday! If you are one of the many people planning a party for the big day, I have a fantastic Meatball Slider recipe for you to serve during the Super Bowl or any time for that matter. This is a really easy recipe where the meatballs are baked and then cooked for a short time in the quick tomato sauce, topped with cheese and then the buns. I have adapted my mother's meatball recipe for these yummy sliders and made an easy Italian flavored sauce for them. My husband loves these Meatball Sliders, so I hope you will too! Here's my recipe.
Meatball Sliders
From Lynda's Recipe Box
(If you want to add some spicy heat to the sauce just add 1/4 teaspoon of red pepper flakes to the oil at the same time as the minced garlic when making the sauce.)
Meatball Ingredients:
1 pound beef ground chuck
1/2 cup freshly grated Parmesan cheese
2 cloves minced garlic
1/2 cup dry bread crumbs
1/3 cup milk 1 egg, slightly beaten
2 tablespoons fresh parsley, chopped
1 teaspoon salt
black pepper
either shredded or sliced Provolone or Mozzarella cheese. If using slices you will need 6 slices to have cheese on top and bottom. Cut the sliced cheese in 4 square pieces.
1 dozen slider rolls, or dinner rolls if you can't find sliders
Directions for Meatballs:
Preheat oven to 350 degrees F. In a large bowl, combine the ground chuck, Parmesan and minced garlic; toss it lightly with a fork to incorporate. Add the remaining ingredients and mix fairly well, either with a fork or your hands. I use my hands, I confess. It's just easier.
Line a large baking sheet with foil and spray liberally with cooking spray. Divide the meat mixture into 12 even pieces and roll each into a ball and place on baking sheet. Place pan in oven and bake meatballs for 25 minutes. When done remove meatballs from pan and add to the sauce.
Quick Italian Style Sauce Ingredients:
1 - 28 ounce can of good quality crushed tomatoes
2 cloves minced garlic
1 tablespoon olive oil
1 teaspoon dried basil
1/4 teaspoon dried pepper flakes, optional, only if you want some heat
salt and pepper to taste
In a large sauce pan or Dutch oven, over medium heat, add the olive oil, then the minced garlic and pepper flakes, if using. Saute for 30 seconds; then add the tomatoes and dried basil. Cover and cook on low heat for 15 minutes or so. If sauce gets too thick you can add a little water to thin it. Taste and adjust seasonings if needed. I sometimes add about 1 teaspoon of sugar if sauce needs it. Some canned tomatoes can have a sharp taste and the sugar helps.
Add meatballs when they are done, cover and cook another 10-20 minutes.
I like the sauce to be thick so it will stick to the meatballs some.
To assemble sliders:
If you want to toast the rolls, just open the rolls and lay on a baking sheet, put under the broiler for a short time. Stay by your stove as they toast really quick! Remove from oven.
Add cheese to the bottom of the buns; place 1 meatball on each bottom bun. Top with more cheese and the tops of the buns. Place on serving tray and enjoy!
Meatball Sliders
From Lynda's Recipe Box
(If you want to add some spicy heat to the sauce just add 1/4 teaspoon of red pepper flakes to the oil at the same time as the minced garlic when making the sauce.)
Meatball Ingredients:
1 pound beef ground chuck
1/2 cup freshly grated Parmesan cheese
2 cloves minced garlic
1/2 cup dry bread crumbs
1/3 cup milk 1 egg, slightly beaten
2 tablespoons fresh parsley, chopped
1 teaspoon salt
black pepper
either shredded or sliced Provolone or Mozzarella cheese. If using slices you will need 6 slices to have cheese on top and bottom. Cut the sliced cheese in 4 square pieces.
1 dozen slider rolls, or dinner rolls if you can't find sliders
Directions for Meatballs:
Preheat oven to 350 degrees F. In a large bowl, combine the ground chuck, Parmesan and minced garlic; toss it lightly with a fork to incorporate. Add the remaining ingredients and mix fairly well, either with a fork or your hands. I use my hands, I confess. It's just easier.
Line a large baking sheet with foil and spray liberally with cooking spray. Divide the meat mixture into 12 even pieces and roll each into a ball and place on baking sheet. Place pan in oven and bake meatballs for 25 minutes. When done remove meatballs from pan and add to the sauce.
Quick Italian Style Sauce Ingredients:
1 - 28 ounce can of good quality crushed tomatoes
2 cloves minced garlic
1 tablespoon olive oil
1 teaspoon dried basil
1/4 teaspoon dried pepper flakes, optional, only if you want some heat
salt and pepper to taste
In a large sauce pan or Dutch oven, over medium heat, add the olive oil, then the minced garlic and pepper flakes, if using. Saute for 30 seconds; then add the tomatoes and dried basil. Cover and cook on low heat for 15 minutes or so. If sauce gets too thick you can add a little water to thin it. Taste and adjust seasonings if needed. I sometimes add about 1 teaspoon of sugar if sauce needs it. Some canned tomatoes can have a sharp taste and the sugar helps.
Add meatballs when they are done, cover and cook another 10-20 minutes.
I like the sauce to be thick so it will stick to the meatballs some.
To assemble sliders:
If you want to toast the rolls, just open the rolls and lay on a baking sheet, put under the broiler for a short time. Stay by your stove as they toast really quick! Remove from oven.
Add cheese to the bottom of the buns; place 1 meatball on each bottom bun. Top with more cheese and the tops of the buns. Place on serving tray and enjoy!
Sunday, December 29, 2013
Rolo Pretzel Turtle Candies
I hope everyone has had a Merry Christmas and that you are looking forward to the New Year! Food is such a big part of our holidays aren't they. You've all probably eaten these delicious Rolo Pretzel Turtle Candies at some time. These candies are such easy little Turtle candies to make and so addictive once you pop one in your mouth. I made some of them into sandwiches for anyone that can't have nuts. I wanted to drizzle them with more chocolate, but I had depleted my stash of chocolate. Oh well, I'll do it next time. I will be making these yummy treats again.
Easy and delicious too, they don't require many steps. Here's the directions to make the Rolo Pretzel Turtles.
Rolo Pretzel Turtle Candies
From Hershey's Kitchens
Make as many candies as you wish. I used all of the Rolos. Baking too long will cause the Rolos to break open when pressed with a pecan, so don't over bake.
1 bag individual Rolo Candies, unwrapped
1 bad waffle shaped pretzels, I used Snyder's
pecan halves- enough for all the candies you are making
Preheat oven to 350 degrees F. Line a baking sheet with parchment paper or foil. Place the pretzels on the baking sheet, not too closely. Place 1 Rolo on each pretzel. Put pan in oven and bake 2-3 minutes. Remove pan from oven and press a pecan half on each candy. Let cool completely before serving. Enjoy!
Sunday, December 8, 2013
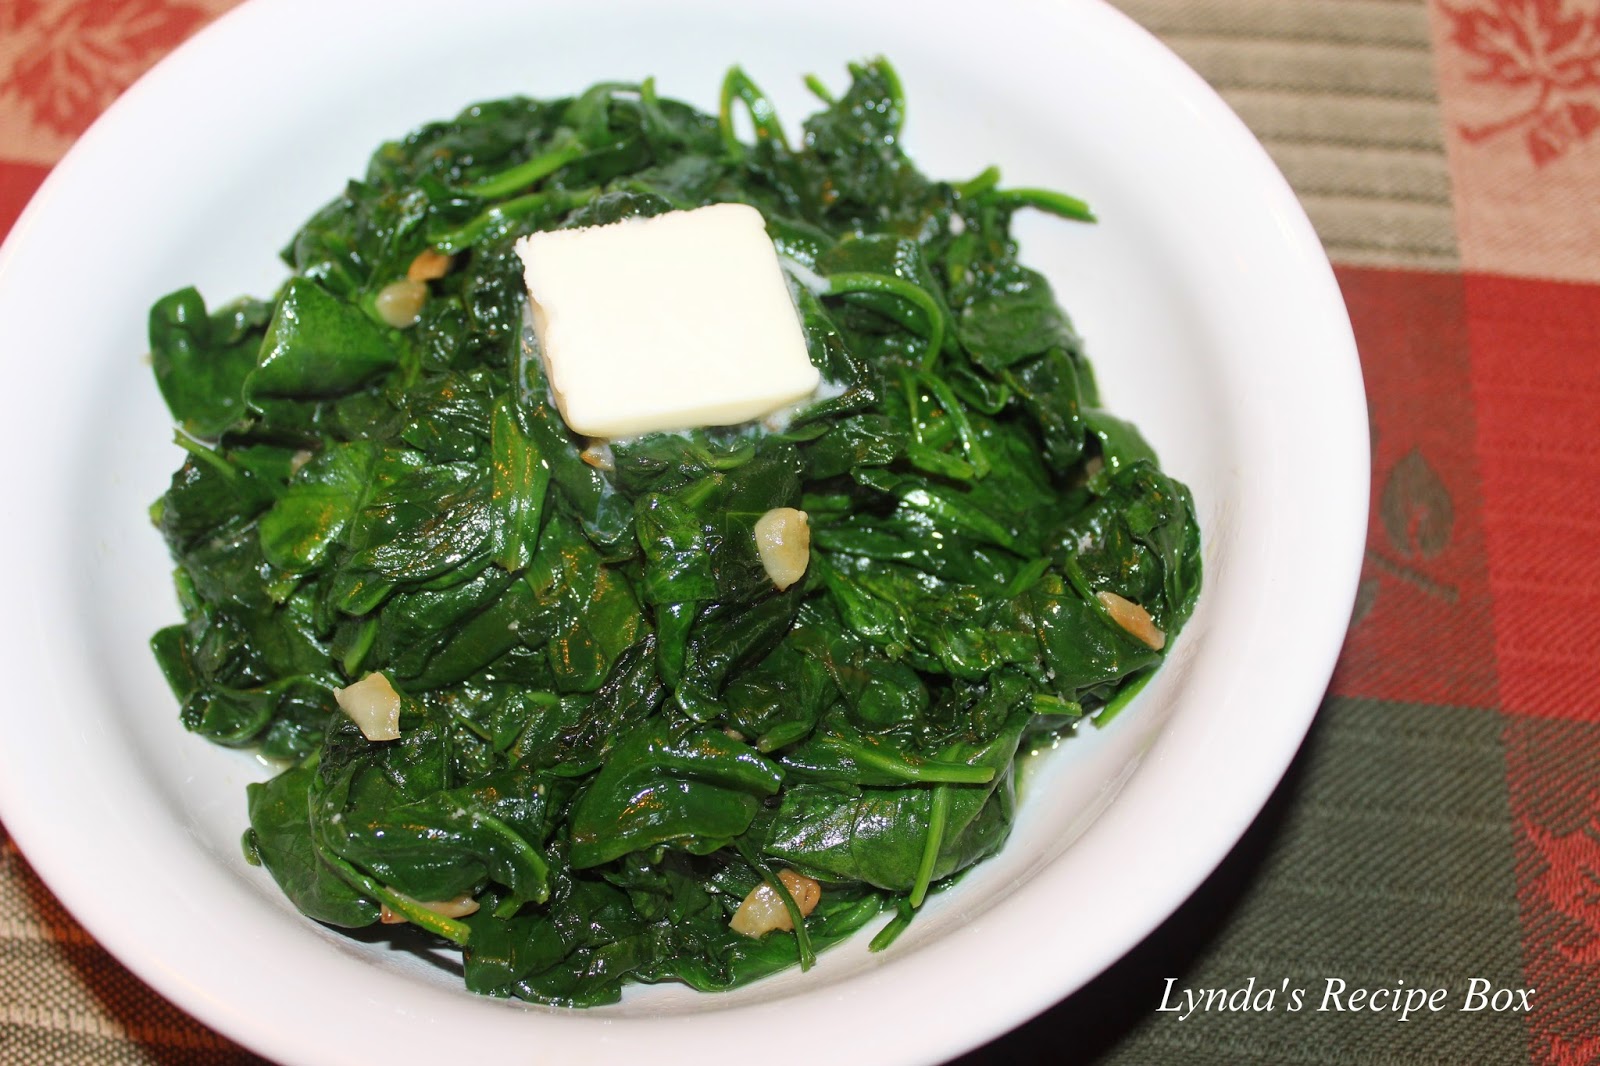
Garlic Sauteed Spinach
When I was a kid, the cartoon Popeye the Sailor Man was one of my favorite cartoons. I can remember wanting to be strong like him so I begged my mother to buy me the canned spinach that Popeye reportedly ate. When she prepared it for dinner one evening I can remember taking a few bites and then flexing my arm to see if I had muscles as large as Popeye's! Of course I didn't, but as we know spinach is considered a very healthy super-food adding lots of nutrients that our bodies need. Sauteing spinach in olive oil and garlic makes it a most delicious side dish. Really, if you love wilted spinach, I think you will enjoy this version adapted from Ina Garten, very much.
Garlic Sauteed Spinach
approximately 3-4 servings
1 pound of baby spinach, washed
4 cloves garlic, thinly sliced
1/2 teaspoon salt
1/4 teaspoon fresh black pepper
2 tablespoons olive oil
1 tablespoon butter
fresh lemon for squeezing
In a large pot or dutch oven, heat the oil over medium heat. Add the garlic and cook only about 1 minute. Don't let it get brown. Add all off the spinach, the salt and pepper to the pot. Give it a stir and cover the pot with a lid to let the spinach steam about 2 minutes. Remove the lid and give it a good stir and cook if needed, until all the spinach is wilted. Using a slotted spoon, remove the spinach to a serving dish. Top with the pat of butter and a good squeeze of lemon. Serve hot. Enjoy!
Garlic Sauteed Spinach
approximately 3-4 servings
1 pound of baby spinach, washed
4 cloves garlic, thinly sliced
1/2 teaspoon salt
1/4 teaspoon fresh black pepper
2 tablespoons olive oil
1 tablespoon butter
fresh lemon for squeezing
In a large pot or dutch oven, heat the oil over medium heat. Add the garlic and cook only about 1 minute. Don't let it get brown. Add all off the spinach, the salt and pepper to the pot. Give it a stir and cover the pot with a lid to let the spinach steam about 2 minutes. Remove the lid and give it a good stir and cook if needed, until all the spinach is wilted. Using a slotted spoon, remove the spinach to a serving dish. Top with the pat of butter and a good squeeze of lemon. Serve hot. Enjoy!
Wednesday, November 27, 2013
Homemade Cranberry Sauce
Well, it's just a few hours until Thanksgiving officially is here. Are you ready? I thought I'd share a very quick recipe for Homemade Cranberry Sauce that is delicious. I grew up eating the cranberry sauce from the can. That's all my mother ever bought. I didn't have the homemade stuff until I was married and had my first holiday at my mother-in-laws house. I fell in love with the tart, fresh flavor of the cranberries. I've made several different recipes through the years, like Cranberry Apple Relish which I have also posted. This is the quickest recipe and will only take you about 15 minutes! There's definitely time for you to make this before dinner!
Homemade Cranberry Sauce
From Lynda's Recipe Box
I used the juice from an orange plus enough water to make 1 cup of liquid. There is just a hint of orange in the taste. You could use all water, or another juice like apple or pomegranate if desired. You can also stir in chopped nuts after cooking.
Ingredients:
12 ounce bag of fresh cranberries
zest from 1 orange
juice from 1 orange, plus enough added water to make 1 cup of liquid
1 cup of granulated sugar
Directions:
In a 3 quart sauce pan bring the water mixture and the sugar to a simmer; add the cranberries and bring to a rolling boil. Turn heat down to medium low, still boiling, and cook for 10 minutes. Stir frequently. Stir in the orange zest and remove pan from heat. The cranberry sauce will be foaming, but as it begins to cool, it will disappear when you give it a stir. Or you may skim the foam off if preferred. Pour sauce into a serving dish and chill until time to serve. I hope you enjoy your deliciously sweet, but tart Cranberry Sauce
Happy Thanksgiving!
Homemade Cranberry Sauce
From Lynda's Recipe Box
I used the juice from an orange plus enough water to make 1 cup of liquid. There is just a hint of orange in the taste. You could use all water, or another juice like apple or pomegranate if desired. You can also stir in chopped nuts after cooking.
Ingredients:
12 ounce bag of fresh cranberries
zest from 1 orange
juice from 1 orange, plus enough added water to make 1 cup of liquid
1 cup of granulated sugar
Directions:
In a 3 quart sauce pan bring the water mixture and the sugar to a simmer; add the cranberries and bring to a rolling boil. Turn heat down to medium low, still boiling, and cook for 10 minutes. Stir frequently. Stir in the orange zest and remove pan from heat. The cranberry sauce will be foaming, but as it begins to cool, it will disappear when you give it a stir. Or you may skim the foam off if preferred. Pour sauce into a serving dish and chill until time to serve. I hope you enjoy your deliciously sweet, but tart Cranberry Sauce
Happy Thanksgiving!
Tuesday, November 26, 2013
Sage Stuffing (or Dressing-whatever you want to call it!)
Here it is, 2 days before Thanksgiving. Time really flies by fast this time of year doesn't it? If you are hosting the meal on the big day I hope that you already have some of the preparations out of the way so that you can enjoy your time with family and friends. Our family had our big dinner this past Sunday. Now that our kids are all married, it seemed like a good idea to celebrate on a different day than Thanksgiving. That frees up the kids to go to the other side of the family on the big day. I mean, it's not really fun if you have to make it to 3 dinners in one day. So this worked well for us.
I thought I'd share my stuffing recipe with you today. Dressing or stuffing, I've called it both names. For years I've tried to make my stuffing like my mother-in-law used to. But she didn't follow a recipe, she had a method that she followed every year that produced a moist and spicy bread dressing that we loved. I'm getting closer. I think I would have nailed it this year, but I needed more sage. But this was still a yummy dressing full of fresh herbs that made tasty leftovers too. My photo was taken quickly, before we sat down to devour our food. Here is my method.
Sage Stuffing
From Lynda's Recipe Box
(Hint) You may use all bread if desired, instead of adding cornbread. To save time on the big day, prepare the corn bread 2 days ahead of your dinner. Also cube the bread at this time. Use a hearty white bread. It will then be dried out enough to stir up the day before your dinner. Just mix up the stuffing and place in a greased baking dish; cover and refrigerate. Take out of fridge about 30 minutes before placing in the oven, Bake and serve.
Ingredients:
about 8 cups of white bread cubes- trim crusts from bread and cut into small cubes
about 4 cups of cornbread, cubed or crumbled- from this recipe, or your own recipe
1/4 cup chopped fresh parsley
3 tablespoons fresh sage, finely chopped- or about 1 tablespoons dried sage
1 teaspoon fresh thyme or rosemary, finely chopped
1 teaspoon salt
about 1/2 teaspoon pepper
1 stick (1/2 cup), unsalted butter, melted
1 large sweet onion, finely diced
2 stalks celery, finely diced
2 large eggs, beaten
1 cup of unsalted chicken stock or broth, or more
1/3 cup half and half or heavy cream
Preparation:
If you need to dry the bread and cornbread more, place the cubes on 2 baking sheets and place in a 300 degree oven for 15-20 minutes until dry. Cool in pans, then transfer to a large bowl. When ready to stir up the dressing, stir in the herbs and the salt and pepper.
Melt butter in a heavy skillet over medium low heat. Add the onions and celery and cook until tender, about 5minutes. Pour into the bowl with the bead. Mix the eggs and half and half together. Pour over the bread. Add the chicken broth and toss all the ingredients together. if you need more broth stir it in. I used about 1 1/3 cup.
Transfer stuffing to a greased 2 1/2 quart to 3 quart baking dish. Cover with foil. (At this point you can refrigerate the stuffing for 1 day.) If ready to bake, place it covered, in the middle of the oven at 350 degrees for 25minnutes. Uncover and bake another 25 - 30minutes until golden. Remove from oven and enjoy.
Also check out my recipe for Sausage and Cornbread Dressing.
My daughter Hailey has started a food blog also. She'd be so happy if you stopped by to "hi" at Tasteful Cuisine.
I thought I'd share my stuffing recipe with you today. Dressing or stuffing, I've called it both names. For years I've tried to make my stuffing like my mother-in-law used to. But she didn't follow a recipe, she had a method that she followed every year that produced a moist and spicy bread dressing that we loved. I'm getting closer. I think I would have nailed it this year, but I needed more sage. But this was still a yummy dressing full of fresh herbs that made tasty leftovers too. My photo was taken quickly, before we sat down to devour our food. Here is my method.
Sage Stuffing
From Lynda's Recipe Box
(Hint) You may use all bread if desired, instead of adding cornbread. To save time on the big day, prepare the corn bread 2 days ahead of your dinner. Also cube the bread at this time. Use a hearty white bread. It will then be dried out enough to stir up the day before your dinner. Just mix up the stuffing and place in a greased baking dish; cover and refrigerate. Take out of fridge about 30 minutes before placing in the oven, Bake and serve.
Ingredients:
about 8 cups of white bread cubes- trim crusts from bread and cut into small cubes
about 4 cups of cornbread, cubed or crumbled- from this recipe, or your own recipe
1/4 cup chopped fresh parsley
3 tablespoons fresh sage, finely chopped- or about 1 tablespoons dried sage
1 teaspoon fresh thyme or rosemary, finely chopped
1 teaspoon salt
about 1/2 teaspoon pepper
1 stick (1/2 cup), unsalted butter, melted
1 large sweet onion, finely diced
2 stalks celery, finely diced
2 large eggs, beaten
1 cup of unsalted chicken stock or broth, or more
1/3 cup half and half or heavy cream
Preparation:
If you need to dry the bread and cornbread more, place the cubes on 2 baking sheets and place in a 300 degree oven for 15-20 minutes until dry. Cool in pans, then transfer to a large bowl. When ready to stir up the dressing, stir in the herbs and the salt and pepper.
Melt butter in a heavy skillet over medium low heat. Add the onions and celery and cook until tender, about 5minutes. Pour into the bowl with the bead. Mix the eggs and half and half together. Pour over the bread. Add the chicken broth and toss all the ingredients together. if you need more broth stir it in. I used about 1 1/3 cup.
Transfer stuffing to a greased 2 1/2 quart to 3 quart baking dish. Cover with foil. (At this point you can refrigerate the stuffing for 1 day.) If ready to bake, place it covered, in the middle of the oven at 350 degrees for 25minnutes. Uncover and bake another 25 - 30minutes until golden. Remove from oven and enjoy.
Also check out my recipe for Sausage and Cornbread Dressing.
My daughter Hailey has started a food blog also. She'd be so happy if you stopped by to "hi" at Tasteful Cuisine.
Wednesday, November 20, 2013
Oatmeal Peanut Butter Chocolate Chip Cookies
I love cookies. My favorites are peanut butter, oatmeal cookies and chocolate chip cookies. So when I found this recipe that contained all three ingredients in one cookie I was thrilled. I must say they taste amazing! Soft and chewy in the middle and crisp around the edges these are the perfect cookie in my opinion. The aroma while baking made it really difficult to resist when they were done. So I just gave in. They are just so delicious! The dough freezes well too, making it easy to make ahead and thaw for later use. These Oatmeal Peanut Butter Chocolate Chip Cookies are going to be on my cookie trays this holiday season. Here's the recipe.
Oatmeal Peanut Butter Chocolate Chip Cookies
adapted from Epicurious
This dough can keep in the refrigerator up to 1 week before baking. It also freezes very well. I baked about half the dough and froze the rest. I thawed it out about 2 weeks later and baked the rest. Perfect cookies!
Ingredients:
1 1/2 cups old-fashioned rolled oats
2 cups all-purpose flour
1 teaspoon baking powder
1 teaspoon baking soda
1/2 teaspoon salt
2 sticks (1 cup) unsalted butter, softened
1 cup granulated sugar
1 cup light brown sugar, firmly packed
1 tablespoon vanilla extract, (yes, that right!)
3/4 cup regular peanut butter- either plain or chunky works
2 large eggs
1 1/2 bags (about 18 ounces, or more if you wish), of semi-sweet chocolate chips
Directions:
In a food processor pulse 1 cup of the oats until fine. In a large bowl mix together the ground oats, the other 1/2 cup of rolled oats, flour, baking powder, soda, and salt.
In another bowl with a mixer beat together the butter and sugars until fluffy. Beat in vanilla and peanut butter and beat well. Add eggs one at a time. Gradually beat in the flour mixture, or mix it by hand if desired. Add the chocolate chips and mix until combined.. Chill cookie dough covered, at least 2 hours, or up to 1 week.
To bake:
Preheat the oven to 325 degrees F.
Form rounded tablespoons of dough and place on baking sheet about 2 inches apart. Flatten balls just slightly. Bake in the middle rack of the oven 15 minutes just until pale golden. Cool on baking sheet 5 minutes an then remove cookies to cooling rack. Enjoy!
Oatmeal Peanut Butter Chocolate Chip Cookies
adapted from Epicurious
This dough can keep in the refrigerator up to 1 week before baking. It also freezes very well. I baked about half the dough and froze the rest. I thawed it out about 2 weeks later and baked the rest. Perfect cookies!
Ingredients:
1 1/2 cups old-fashioned rolled oats
2 cups all-purpose flour
1 teaspoon baking powder
1 teaspoon baking soda
1/2 teaspoon salt
2 sticks (1 cup) unsalted butter, softened
1 cup granulated sugar
1 cup light brown sugar, firmly packed
1 tablespoon vanilla extract, (yes, that right!)
3/4 cup regular peanut butter- either plain or chunky works
2 large eggs
1 1/2 bags (about 18 ounces, or more if you wish), of semi-sweet chocolate chips
Directions:
In a food processor pulse 1 cup of the oats until fine. In a large bowl mix together the ground oats, the other 1/2 cup of rolled oats, flour, baking powder, soda, and salt.
In another bowl with a mixer beat together the butter and sugars until fluffy. Beat in vanilla and peanut butter and beat well. Add eggs one at a time. Gradually beat in the flour mixture, or mix it by hand if desired. Add the chocolate chips and mix until combined.. Chill cookie dough covered, at least 2 hours, or up to 1 week.
To bake:
Preheat the oven to 325 degrees F.
Form rounded tablespoons of dough and place on baking sheet about 2 inches apart. Flatten balls just slightly. Bake in the middle rack of the oven 15 minutes just until pale golden. Cool on baking sheet 5 minutes an then remove cookies to cooling rack. Enjoy!
Wednesday, October 16, 2013
Pumpkin Coffee Cake with Brown Sugar-Pecan Streusel
I am so happy that fall is here! I want to spend more time in the kitchen when the cooler weather arrives, and I always love trying new pumpkin and apple recipes to add to my recipe collection . I must admit that I've struggled with cooking and blogging the last few months since I had surgery, but fall is my favorite time to experiment in the kitchen. This Pumpkin Coffee Cake with Brown Sugar-Pecan Streusel is delicious and was a real treat for my husband and I. We both love pumpkin so there's nothing bad to say about this recipe. This cake is not as heavy and moist as my pumpkin bread, because it uses butter instead of oil. The streusel is so yummy with the toasted pecans and made this cake such a treat with a steaming mug of coffee! I also love the size of the cake; it's made in a 9 inch springform pan so it's not too huge for a small group. It was perfect for us. Here's the recipe.
Pumpkin Coffee Cake with Brown Sugar-Pecan Streusel
Adapted from Williams-Sonoma
(The only thing I changed in the recipe was the spice amounts.)
Ingredients:
For the streusel;
1/3 cup all-purpose flour
1/2 cup firmly packed light brown sugar
1 teaspoon cinnamon
pinch of salt
6 tablespoons cold unsalted butter
1 cup chopped pecans, lightly toasted (Spread pecans on baking sheet; toast at 325 for 5 minutes. Cool before adding to streusel.)
For the batter:
1 1/2 cups all purpose flour
2 teaspoons baking powder
1/2 teaspoon baking soda
1 1/2 teaspoons cinnamon
1/2 teaspoon ground ginger
1/4 teaspoon ground nutmeg
1/2 teaspoon salt
8 tablespoons unsalted butter, softened
1 cup firmly packed light brown sugar
2 large eggs
1/2 cup canned pumpkin puree
1/2 cup sour cream
For the glaze:
1/2 cup confectioners sugar
about 2-3 teaspoons of milk
1 teaspoon vanilla extract
Directions:
Preheat oven to 350 degrees F. Grease and flour a 9 inch springform pan.
To make the streusel, combine the flour, brown sugar, salt and cinnamon in a bowl. Add the butter; use a pastry cutter to cut in the butter until mixture looks like coarse crumbs. Or you may use a food processor. Stir in the pecans. Set aside.
For batter; in a large bowl, sift together the flour, baking powder, baking soda, cinnamon, ginger, nutmeg and salt. In another bowl, beat together the butter and sugar, until combined. beat in the eggs, one at a time. Add the pumpkin and sour cream and mix. Stir in the dry ingredients. Batter is very thick.
Spread half the batter in the prepared springform pan. Sprinkle half of the streusel over the batter. Dollop the remaining batter over the streusel and spread over the streusel as best you can. (This was the hardest part of the recipe for me as the batter does not want to spread well. but it turns out delicious anyway.) Top with the remaining streusel. Bake until a toothpick inserted into the center of the cake come out clean, about 50-55 minutes. Place pan on a wire cooling rack for 15 minutes. Remove the sides of the pan from the cake and slide cake onto rack to finish cooling.
To glaze, whisk together the confectioners sugar, milk and vanilla until smooth. Place cake on serving platter. Drizzle glaze over cake. Enjoy!
Pumpkin Coffee Cake with Brown Sugar-Pecan Streusel
Adapted from Williams-Sonoma
(The only thing I changed in the recipe was the spice amounts.)
Ingredients:
For the streusel;
1/3 cup all-purpose flour
1/2 cup firmly packed light brown sugar
1 teaspoon cinnamon
pinch of salt
6 tablespoons cold unsalted butter
1 cup chopped pecans, lightly toasted (Spread pecans on baking sheet; toast at 325 for 5 minutes. Cool before adding to streusel.)
For the batter:
1 1/2 cups all purpose flour
2 teaspoons baking powder
1/2 teaspoon baking soda
1 1/2 teaspoons cinnamon
1/2 teaspoon ground ginger
1/4 teaspoon ground nutmeg
1/2 teaspoon salt
8 tablespoons unsalted butter, softened
1 cup firmly packed light brown sugar
2 large eggs
1/2 cup canned pumpkin puree
1/2 cup sour cream
For the glaze:
1/2 cup confectioners sugar
about 2-3 teaspoons of milk
1 teaspoon vanilla extract
Directions:
Preheat oven to 350 degrees F. Grease and flour a 9 inch springform pan.
To make the streusel, combine the flour, brown sugar, salt and cinnamon in a bowl. Add the butter; use a pastry cutter to cut in the butter until mixture looks like coarse crumbs. Or you may use a food processor. Stir in the pecans. Set aside.
For batter; in a large bowl, sift together the flour, baking powder, baking soda, cinnamon, ginger, nutmeg and salt. In another bowl, beat together the butter and sugar, until combined. beat in the eggs, one at a time. Add the pumpkin and sour cream and mix. Stir in the dry ingredients. Batter is very thick.
Spread half the batter in the prepared springform pan. Sprinkle half of the streusel over the batter. Dollop the remaining batter over the streusel and spread over the streusel as best you can. (This was the hardest part of the recipe for me as the batter does not want to spread well. but it turns out delicious anyway.) Top with the remaining streusel. Bake until a toothpick inserted into the center of the cake come out clean, about 50-55 minutes. Place pan on a wire cooling rack for 15 minutes. Remove the sides of the pan from the cake and slide cake onto rack to finish cooling.
To glaze, whisk together the confectioners sugar, milk and vanilla until smooth. Place cake on serving platter. Drizzle glaze over cake. Enjoy!
Tuesday, August 6, 2013
I'm Back with an Oil and Vinegar Potato Salad Recipe
I thought I'd drop in and share a quick, delicious potato salad recipe that I made recently. It is so easy to put together and is healthy, delicious and perfect for hot weather. Made with a dressing of red wine vinegar and olive oil, it stays light and tangy and complements just about any main dish from grilled and smoked meats, fried chicken, sandwiches and anything else you can think of. It is yummy served room temperature or cold. So if you like a light and tangy potato salad, this recipe is for you. I will caution you to not over-cook the potatos though as this salad is best when the potatoes hold their shape and are not mushy. So watch them carefully while they boil.
As a quick update, I am doing well with my new knee. It has been almost 3 months since my surgery and I am walking so much better. I have awhile before I'll be back to normal, but I'm getting there. I'm more interested in cooking again, so more recipes are on the way! Thanks for all the well wishes and prayers that you have sent my way!
Now, here's the recipe.
Oil and Vinegar Potato Salad
Adapted from here
1 1/2 pounds new, small red potatoes, scrubbed and diced
1/4 cup red wine vinegar
1/3 cup olive oil
1/2 cup sliced green onions, or 1/2 of a small red onion diced
1 teaspoon sugar
2 tablespoons chopped fresh Italian parsley
2-3 teaspoons of mustard, if desired- I used 2 teas.
Add diced new potatoes to a pot; cover with cold water and bring to a boil. Reduce heat and simmer until potatoes are just tender, (mine took about 5-10 minutes depending on how small you dice them).
Boil potatoes only until they are just tender. Drain them well, and spread the potatoes out on a baking sheet to cool. (I usually place them in the fridge to hurry up the cooling.)
Put cooled potatoes into a bowl with the diced onions. Mix the dressing ingredients together and pour over the potatoes and onions. Stir gently; serve immediately, or refrigerate for later. So easy and yummy - enjoy!
As a quick update, I am doing well with my new knee. It has been almost 3 months since my surgery and I am walking so much better. I have awhile before I'll be back to normal, but I'm getting there. I'm more interested in cooking again, so more recipes are on the way! Thanks for all the well wishes and prayers that you have sent my way!
Now, here's the recipe.
Oil and Vinegar Potato Salad
Adapted from here
1 1/2 pounds new, small red potatoes, scrubbed and diced
1/4 cup red wine vinegar
1/3 cup olive oil
1/2 cup sliced green onions, or 1/2 of a small red onion diced
1 teaspoon sugar
2 tablespoons chopped fresh Italian parsley
2-3 teaspoons of mustard, if desired- I used 2 teas.
Add diced new potatoes to a pot; cover with cold water and bring to a boil. Reduce heat and simmer until potatoes are just tender, (mine took about 5-10 minutes depending on how small you dice them).
Boil potatoes only until they are just tender. Drain them well, and spread the potatoes out on a baking sheet to cool. (I usually place them in the fridge to hurry up the cooling.)
Put cooled potatoes into a bowl with the diced onions. Mix the dressing ingredients together and pour over the potatoes and onions. Stir gently; serve immediately, or refrigerate for later. So easy and yummy - enjoy!
Monday, May 27, 2013
Memorial Day Recipes
Hi! Remember me? Please don't give up on me. I'll share more of my current situation after the recipes. I've got a couple of delicious food ideas for your summertime dinner celebrations, starting with today's Memorial Day Cookouts. First up is my Springtime Macaroni Salad with Peas, which is one of out family favorite recipes. It also is one of the most popular recipes on my blog. Made with elbow macaroni and lots of spring veggies, it is cool, creamy and delicious, and one of my all time favorite salads. I could eat just a plate of this and be very happy! Here are some more salads ideas for your table!
And this Four Layer Pudding Dessert is a favorite from way back. My family will devour this dessert way before they even touch anything else. No kidding, I could spend hours over the most wonderful layer cake or fancy pie, but this dessert will win hands down with my family, every time. It is delicious and easy to make as well. You will be the star of the potluck!
I have many other winning recipes for this summers cookouts that I wish I could list here. But this is a quick post; here's what I've been up to in the last 2 weeks.
I underwent knee replacement surgery on May 8th of this month and am recuperating nicely, but I am not back to cooking yet. Physical therapy is taking up most of my time right now, and my appetite has not been very good yet either. I am so grateful to my friends and family who have prepared delicious meals for me, so I haven't had to worry about what we will eat on any particular day. And I have plenty of salad fixins to fall back on at lunch time too, so I'm definitely not hurting for food. I'm also suffering from some sciatic nerve pain at this time, so sitting for long periods blogging is not easy right now. I am trying to catch up, but I am slow. Please bear with me while I get my strength back and keep me in your thoughts and prayers. I have some recipes that I will be posting very soon that will get you taste buds revved up for summer! Happy summer!
And this Four Layer Pudding Dessert is a favorite from way back. My family will devour this dessert way before they even touch anything else. No kidding, I could spend hours over the most wonderful layer cake or fancy pie, but this dessert will win hands down with my family, every time. It is delicious and easy to make as well. You will be the star of the potluck!
I have many other winning recipes for this summers cookouts that I wish I could list here. But this is a quick post; here's what I've been up to in the last 2 weeks.
I underwent knee replacement surgery on May 8th of this month and am recuperating nicely, but I am not back to cooking yet. Physical therapy is taking up most of my time right now, and my appetite has not been very good yet either. I am so grateful to my friends and family who have prepared delicious meals for me, so I haven't had to worry about what we will eat on any particular day. And I have plenty of salad fixins to fall back on at lunch time too, so I'm definitely not hurting for food. I'm also suffering from some sciatic nerve pain at this time, so sitting for long periods blogging is not easy right now. I am trying to catch up, but I am slow. Please bear with me while I get my strength back and keep me in your thoughts and prayers. I have some recipes that I will be posting very soon that will get you taste buds revved up for summer! Happy summer!
Subscribe to:
Posts (Atom)